ℹ️ Skipped - page is already crawled
| Filter | Status | Condition | Details |
|---|---|---|---|
| HTTP status | PASS | download_http_code = 200 | HTTP 200 |
| Age cutoff | PASS | download_stamp > now() - 6 MONTH | 0.2 months ago |
| History drop | PASS | isNull(history_drop_reason) | No drop reason |
| Spam/ban | PASS | fh_dont_index != 1 AND ml_spam_score = 0 | ml_spam_score=0 |
| Canonical | PASS | meta_canonical IS NULL OR = '' OR = src_unparsed | Not set |
| Property | Value |
|---|---|
| URL | https://www.burton.com/discover/s/article/how-to-set-up-a-snowboard |
| Last Crawled | 2026-04-10 10:00:12 (4 days ago) |
| First Indexed | 2021-09-30 06:11:25 (4 years ago) |
| HTTP Status Code | 200 |
| Meta Title | A Beginner’s Guide on How to Set up a Snowboard | Burton Snowboards |
| Meta Description | This Beginner’s Guide on How to Set up a Snowboard covers the basics of binding adjustments and pre-ride tuning. |
| Meta Canonical | null |
| Boilerpipe Text | We did the math: There are approximately 3,254,612 snowboard/binding/boot configurations. Okay, we didn't really do the math but the point is that it's easy to get overwhelmed when setting up a snowboard. The good news is that the large amount of options means there is a perfect set up for you and your riding style. So, whether you're dialing in your first snowboard or just curious about how to wade through the millions of combinations, this beginner's guide on how to set up a snowboard was built for you.
In this article, we'll cover the fundamentals of mounting and adjusting bindings, the pros and cons of pre-ride tuning, and highlight a few tips and tricks to consider before getting started.
How to Set Up Your Snowboard: Video Tutorial
How to Set up a Snowboard: Quick Navigation
Setting Your Stance
Assembling the Correct Hardware
Adjusting Binding Straps
Adjusting Binding Toe Ramps
Adjusting Forward Lean
Mounting Bindings
Snowboard Tuning
Tips & Tricks
Setting Your Stance
Getting your stance dialed in is one of the most important parts of setting up a snowboard. We recommend reviewing
The Official Guide to Snowboard Stances
to get a better understanding of all the different factors to consider when setting your stance for the first time. Once you have determined your footedness, width, angle, and setback (and understand how all of these aspects work together), we recommend testing out your stance before mounting your bindings.
Using four 6" (15 cm) pieces of masking tape, mark the approximate locations of your bindings and their angles on the snowboard.
Next, lay the board down on some carpeted floor and place your feet on the tape. While standing with your feet in the approximate binding locations, do a squat. As you bend your knees lower and lower, you should feel stable and balanced with your weight centered evenly under each foot (not too much weight on the outsides or insides of the feet) until you've gone as low as you can. If you get halfway into a squat and have to catch yourself to avoid falling over, move your feet around a bit and try again until it feels right.
Once you have set up a few snowboards, this step is less important, but when getting started, there are two important reasons to mark off and test your stance first:
It will give you an idea of how the stance feels on the board and allow you to make some adjustments if necessary.
Most retailers will not accept a snowboard for a return once bindings have been mounted, even if the board was never ridden. So, if you decide (for whatever reason) to return the board before riding it, you can do so without the risk of binding marks on the topsheet.
Assembling the Correct Hardware
Now that you have confirmed your stance, it's important to make sure that you have all the necessary hardware to get everything mounted up. If you are mounting Burton
snowboard bindings
on a Burton
snowboard
that was all purchased from an
authorized seller
, you should have received all of the appropriate hardware. But let's take a quick minute to review what is needed.
Mounting Bindings with EST and The Channel
For a Burton snowboard with The Channel system, you will need:
Burton EST snowboard bindings
(one left foot, one right foot)
4 M6 Channel inserts
4 M6 screws
4 washers
Mounting Bindings with Re:Flex and 4x2
For a non-Burton snowboard with a 4x2 mounting pattern, you will need:
Burton Re:Flex snowboard bindings
(one left foot, one right foot)
8 M6 screws
8 washers
If you're coming up short on anything, please drop us a line (spoiler: we might be able to hook you up with some spare parts at no cost).
Adjusting Binding Straps
Always perform a general fit check of your boots in your bindings before you mount the bindings to your board. Without putting them on, pull the laces semi-tight on each snowboard boot and place them in the appropriate binding. Strap in the boots and note where the center of the strap is. You want the center of the strap to be in line with the center of the boot when it's all the way tightened down. Remove the screw on the buckle strap and lengthen or shorten the strap before replacing the screw.
Repeat the process until the boots can be tightened snugly and the center of the straps sit over the center of the boots.
Note that after mounting your bindings to your board, you will want to perform these same steps with your feet in the boots and fine-tune your strap length accordingly.
Pro tip
: Many binding straps provide tool-less adjustments, but you may need a screwdriver for certain adjustments so make sure to perform this set up before heading to the mountain, just in case.
Adjusting Binding Toe Ramps
Lastly, adjust the binding's toe ramps to fit the boot's footprint. This is a very important step that is often overlooked. The toe ramps lift the toes of the boots off the ground for better overall toeside response and additional clearance on deep toeside turns. You might not be able to make any toe ramp adjustments once the binding is fully mounted, so do this before you put the screws in.
Optimal toe ramp placement is where the sole of the boot fits flat on the binding footbed from heel to toe (the toe ramp of the binding fits against the natural rise of the toe of the boot). Every binding is a little different, but in general you will need to slide the the front half of the binding footbed forward or backward (depending on the size of the boot) to achieve optimal toe ramp placement. Then, place the binding (with the boot still in it) on the snowboard to confirm that the toe and heel of the boot doesn't hang too far over the edges (this is called toe drag and heel drag). Once you're comfortable with the current binding configuration, remove the boots and proceed.
Pro tip
: The toe ramp should not extend past the edge of the board.
Adjusting Forward Lean
Forward lean is the amount of angle on the binding highback (the binding component behind the boot that braces against the rider's calf). More forward lean increases power and precision to the heelside edge. In general, we recommend most beginners apply "zero" forward lean until they have a few days on the mountain.
Mounting Bindings
Once you know your stance and have your straps and toe ramps dialed in, it's time to mount up. To mount your bindings to your snowboard, insert the baseplate into the binding and use it to set each binding's angle. Next, loosely arrange each binding on the snowboard where it should go and line up the baseplate to the appropriate mounting holes.
Using a screwdriver, screw in each screw a few turns (do not tighten all the way). Once all the screws have been started, check the binding position, angles, and toe/heel drag again. If everything still lines up as expected, tighten the screws.
Note: Never use power tools to mount bindings. Always hand-tighten snowboard binding screws and avoid thread-lock products.
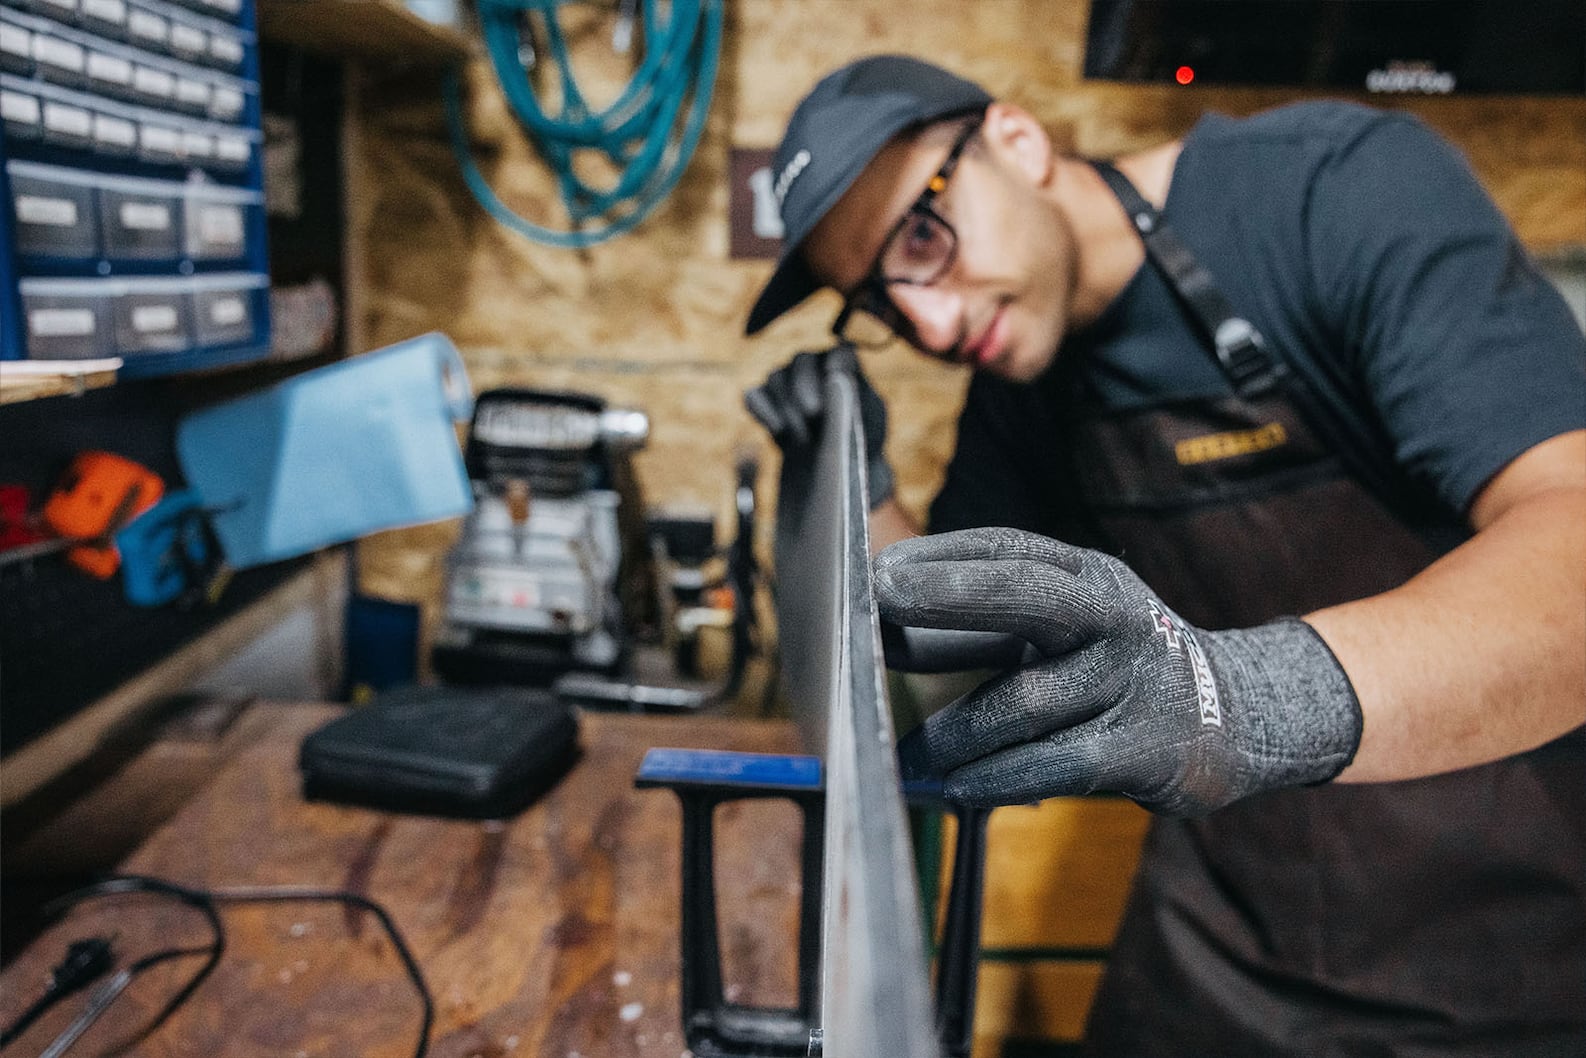
Snowboard Tuning
The factory tune on new snowboards is good enough for most riders, but there are a few tweaks that you can make when setting up a new ride. The most common tuning adjustments on new snowboards are waxing and detuning the edges.
Pros of Tuning a Factory Tune
Factory tuning typically uses all-temperature wax, and if you ride in an extremely cold region or a warmer, wetter region, then applying a temperature-specific wax could potentially improve your performance. And when it comes to detuning, factory edges are super sharp, and detuning the contact points will keep them from catching unexpectedly (which is especially helpful for new riders who are still learning edge control).
Note: Once you detune your edges they will never get fully sharp again. Remember that there is no going back so detune conservatively.
Cons of Tuning a Factory Tune
As we already mentioned, a factory tune will be sufficient for most riders, so the additional work may not yield a noticeable difference for new riders. Plus, waxing a snowboard in and of itself is a project that requires an investment in specialty tools and practice to perfect.
How to Set Up a Snowboard FAQs
Getting your snowboard set up for the first time is a big accomplishment, so give yourself a pat on the back. But on the chance that you've got some additional questions, review these common FAQs.
Q:
How do you set up bindings on a snowboard?
A:
Setting up bindings on a snowboard is relatively easy. Begin by making sure you have the correct
hardware
and
mounting discs
. Next, place your snowboard bindings on your snowboard deck in your preferred stance. Finally, tighten down the snowboard binding mounting hardware using a hand-held Phillips screwdriver (do not use power tools).
Q:
How do you set up a new snowboard?
A:
Setting up a new snowboard requires installing bindings and may also include a
hot wax
and detuning the contact points on your edges. While you generally don't need to wax a brand-new snowboard, some riders prefer a fresh wax and tune before hitting the slopes.
Q:
How do you set up bindings on a directional snowboard?
A:
Directional snowboards have a distinct nose and tail, with the nose being longer than the tail. To set up bindings on a directional snowboard, install your front binding at the nose end of the snowboard and your rear binding at the tail end. Check out
Burton's overview of stances
for more information.
Tips & Tricks on How to Set up a Snowboard
When setting up a snowboard, here are a few tips and tricks that can be helpful (and fun):
Setting up a snowboard the first time can be intimidating, but it is actually super quick and easy once you've done it a few times so don't be afraid to take a few runs and then make some adjustments (most resorts offer tools on the mountain for this exact reason). Keep tweaking until everything feels just right.
Regularly check your screws to make sure everything is tight, this ensure a consistent and safe ride every time.
Practice binding micro adjustments in mittens. It's normal to see other riders fiddling with their bindings out on the mountain as they try to optimize fit and performance. You should know how to change all of the settings on your bindings before heading out and it's always a good idea to practice these adjustments while wearing gloves/mittens.
We mentioned this already but it comes up a lot: Never use threadlock products on your binding screws. These products are typically not compatible with plastics and can cause damage to critical components.
Invest in a stomp pad. In a few years you may not need one, but if you're just getting started with snowboarding a stomp pad can be extremely helpful in maintaining balance while getting on and off the chair lift. Plus, it's another easy way to personalize your board.
Have a snowboard tuning party. Get your crew together and make an afternoon of it. Even the folks who have been riding for years probably have board/binding combos they want to update. |
| Markdown | Loading
[×](https://www.burton.com/discover/s/article/how-to-set-up-a-snowboard "Cancel and close")Sorry to interrupt
CSS Error
[Refresh](https://www.burton.com/discover/s/article/how-to-set-up-a-snowboard?nocache=https%3A%2F%2Fwww.burton.com%2Fdiscover%2Fs%2Farticle%2Fhow-to-set-up-a-snowboard)
[Skip to Navigation]()[Skip to Main Content]()
Search
[Cart](https://www.burton.com/us/en/cart)
[Burton](https://www.burton.com/us/en)[Anon](https://www.burton.com/us/en/anon)
[Blog](http://www.burton.com/blogs)[Sustainability](https://www.burton.com/us/en/sustainability-people)
[Stores](https://www.burton.com/us/en/stores)
[Account](https://www.burton.com/on/demandware.store/Sites-Burton_NA-Site/en_US/Account-Show)
[Cart](https://www.burton.com/us/en/cart)
[Snowboarding](https://www.burton.com/us/en/c/snowboarding)[Women](https://www.burton.com/us/en/c/womens)[Men](https://www.burton.com/us/en/c/mens)[Kids](https://www.burton.com/us/en/c/youth)[Accessories & Bags](https://www.burton.com/us/en/c/bags-luggage)[Sale](https://www.burton.com/us/en/c/sale-gear)[Mine77](https://www.burton.com/us/en/c/mine-77)
[Cart](https://www.burton.com/us/en/cart)
[Blog](http://www.burton.com/blogs)[Sustainability](https://www.burton.com/us/en/sustainability-people)[Team](https://www.burton.com/us/en/team)[Find A Store](https://www.burton.com/us/en/stores)
Close
Toggle Menu
[discover]("discover")
- [Home](https://www.burton.com/discover/s/)
- [Help](https://www.burton.com/discover/s/help)
- [Advice](https://www.burton.com/discover/s/advice)
- More
[Search]()
Search...
Loading...
[Cancel]()
[Login]("Login")
# A Beginner's Guide on How to Set up a Snowboard
We did the math: There are approximately 3,254,612 snowboard/binding/boot configurations. Okay, we didn't really do the math but the point is that it's easy to get overwhelmed when setting up a snowboard. The good news is that the large amount of options means there is a perfect set up for you and your riding style. So, whether you're dialing in your first snowboard or just curious about how to wade through the millions of combinations, this beginner's guide on how to set up a snowboard was built for you.
In this article, we'll cover the fundamentals of mounting and adjusting bindings, the pros and cons of pre-ride tuning, and highlight a few tips and tricks to consider before getting started.
## How to Set Up Your Snowboard: Video Tutorial
## How to Set up a Snowboard: Quick Navigation
- [Setting Your Stance](https://www.burton.com/discover/s/article/how-to-set-up-a-snowboard#setting-your-stance)
- [Assembling the Correct Hardware](https://www.burton.com/discover/s/article/how-to-set-up-a-snowboard#assembling-the-correct-hardware)
- [Adjusting Binding Straps](https://www.burton.com/discover/s/article/how-to-set-up-a-snowboard#adjusting-binding-straps)
- [Adjusting Binding Toe Ramps](https://www.burton.com/discover/s/article/how-to-set-up-a-snowboard#adjusting-binding-toe-ramps)
- [Adjusting Forward Lean](https://www.burton.com/discover/s/article/how-to-set-up-a-snowboard#adjusting-forward-lean)
- [Mounting Bindings](https://www.burton.com/discover/s/article/how-to-set-up-a-snowboard#mounting-bindings)
- [Snowboard Tuning](https://www.burton.com/discover/s/article/how-to-set-up-a-snowboard#snowboard-tuning)
- [Tips & Tricks](https://www.burton.com/discover/s/article/how-to-set-up-a-snowboard#tips-and-tricks)
## Setting Your Stance
Getting your stance dialed in is one of the most important parts of setting up a snowboard. We recommend reviewing [The Official Guide to Snowboard Stances](https://www.burton.com/discover/s/article/goofy-vs-regular) to get a better understanding of all the different factors to consider when setting your stance for the first time. Once you have determined your footedness, width, angle, and setback (and understand how all of these aspects work together), we recommend testing out your stance before mounting your bindings.
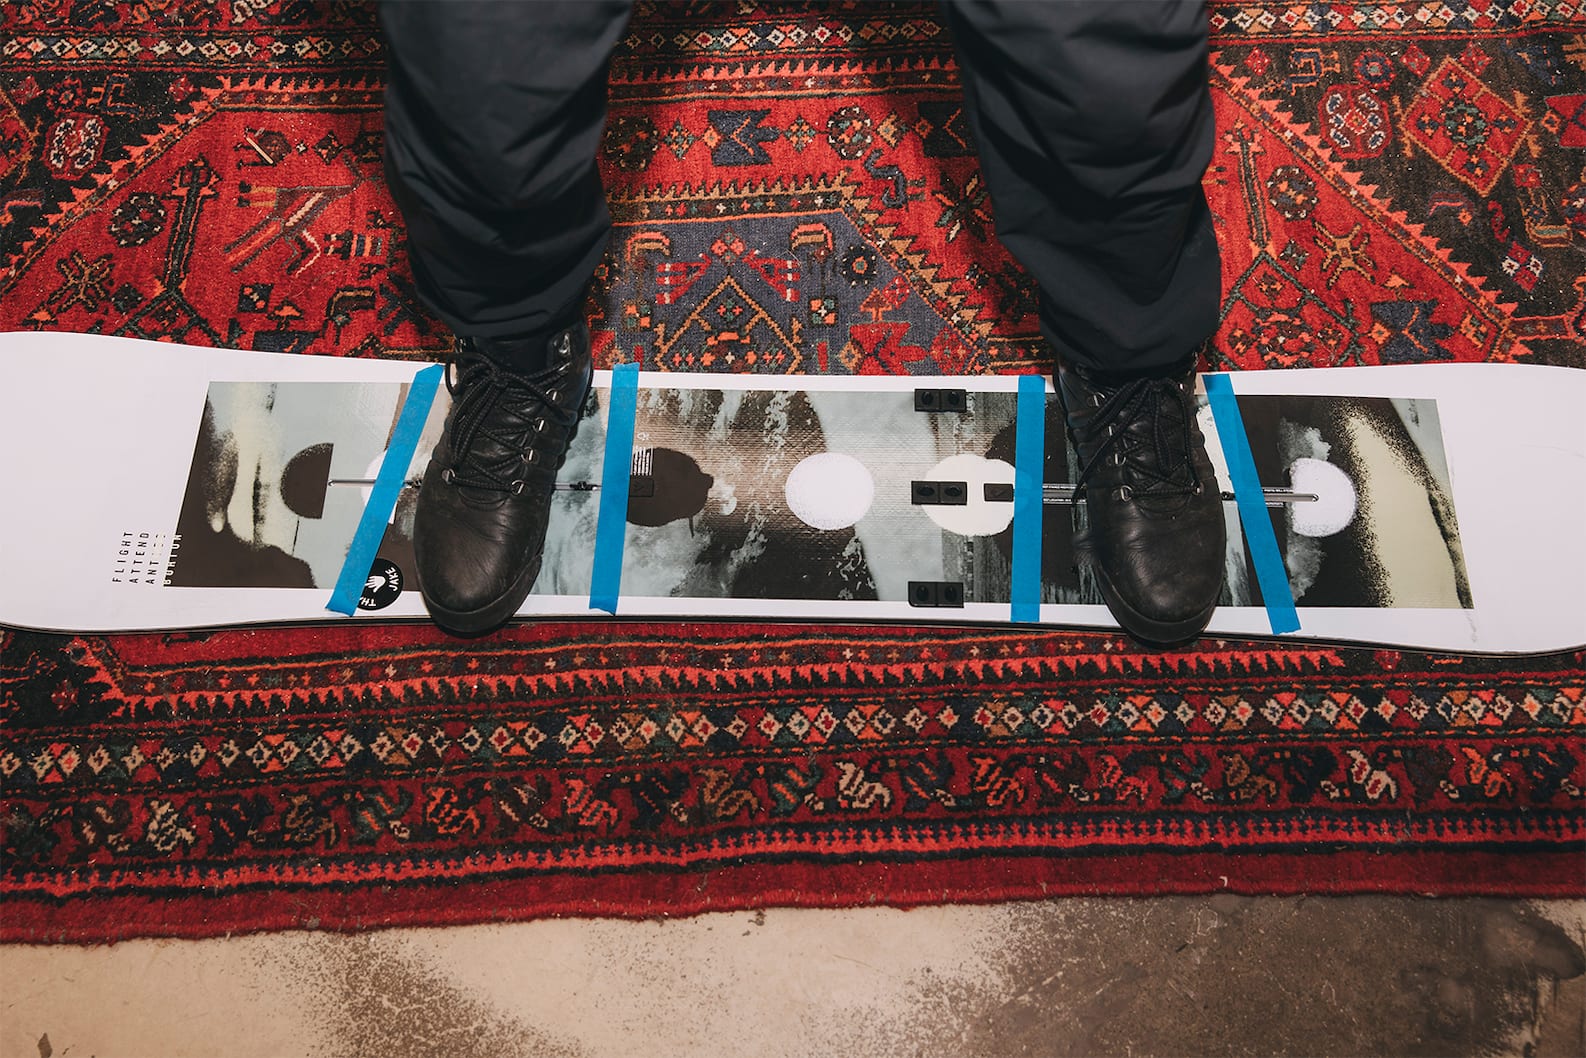
Using four 6" (15 cm) pieces of masking tape, mark the approximate locations of your bindings and their angles on the snowboard.
Next, lay the board down on some carpeted floor and place your feet on the tape. While standing with your feet in the approximate binding locations, do a squat. As you bend your knees lower and lower, you should feel stable and balanced with your weight centered evenly under each foot (not too much weight on the outsides or insides of the feet) until you've gone as low as you can. If you get halfway into a squat and have to catch yourself to avoid falling over, move your feet around a bit and try again until it feels right.
Once you have set up a few snowboards, this step is less important, but when getting started, there are two important reasons to mark off and test your stance first:
1. It will give you an idea of how the stance feels on the board and allow you to make some adjustments if necessary.
2. Most retailers will not accept a snowboard for a return once bindings have been mounted, even if the board was never ridden. So, if you decide (for whatever reason) to return the board before riding it, you can do so without the risk of binding marks on the topsheet.
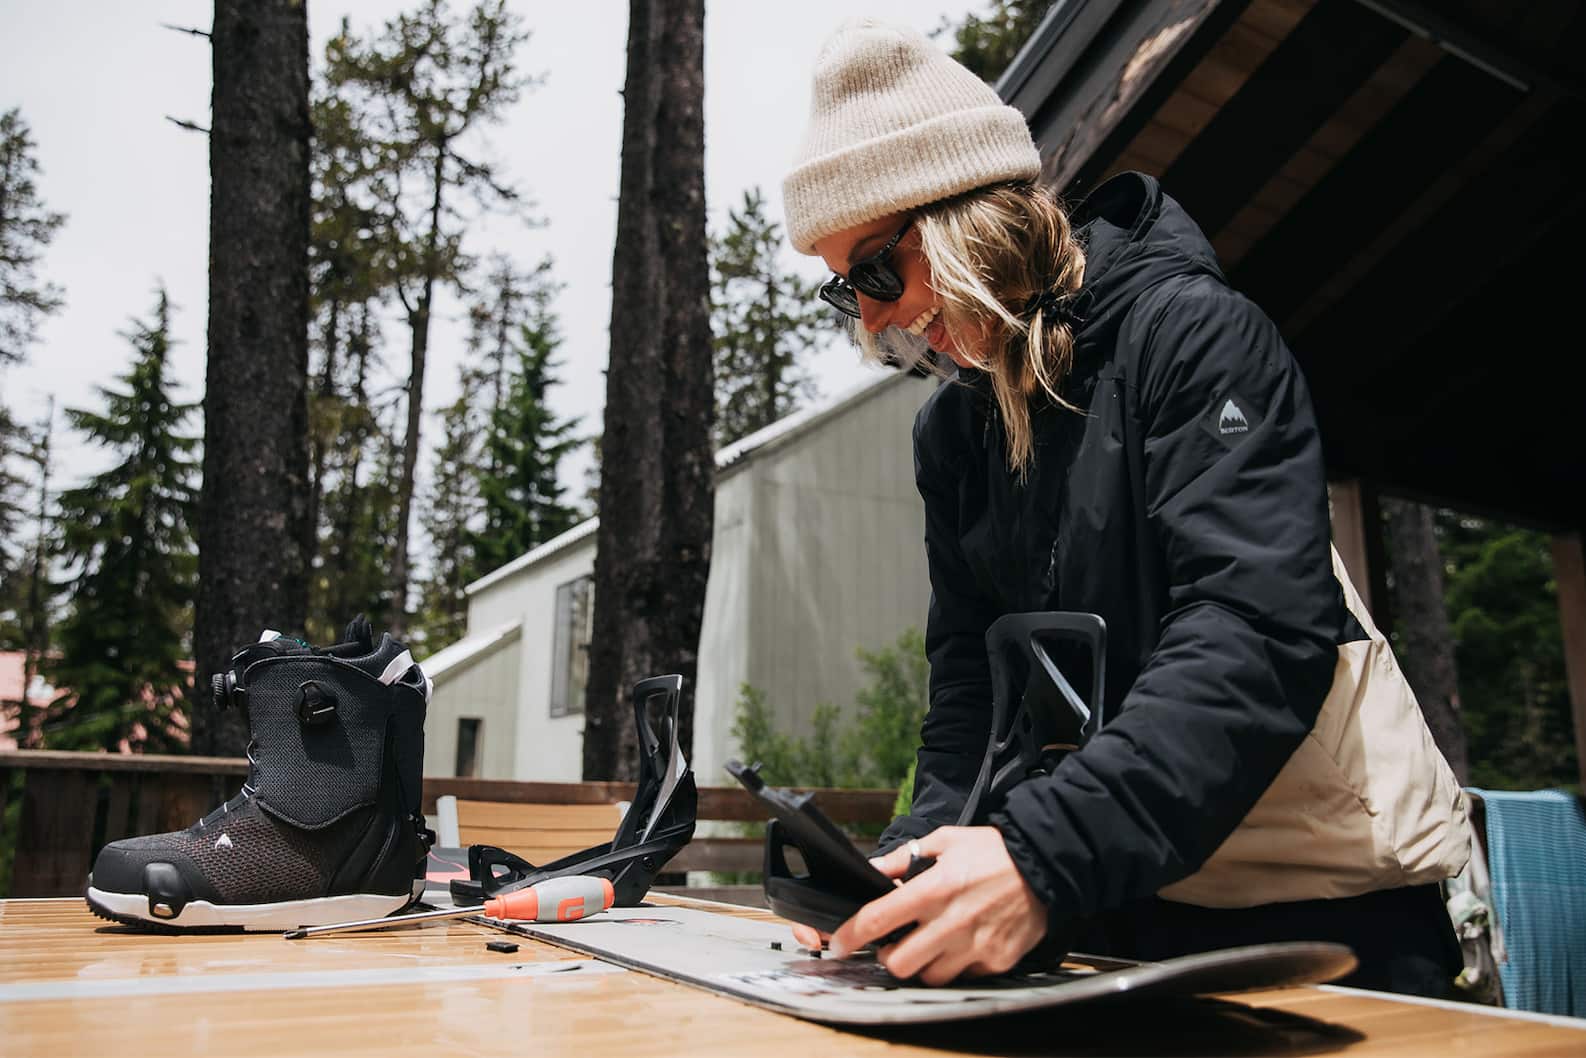
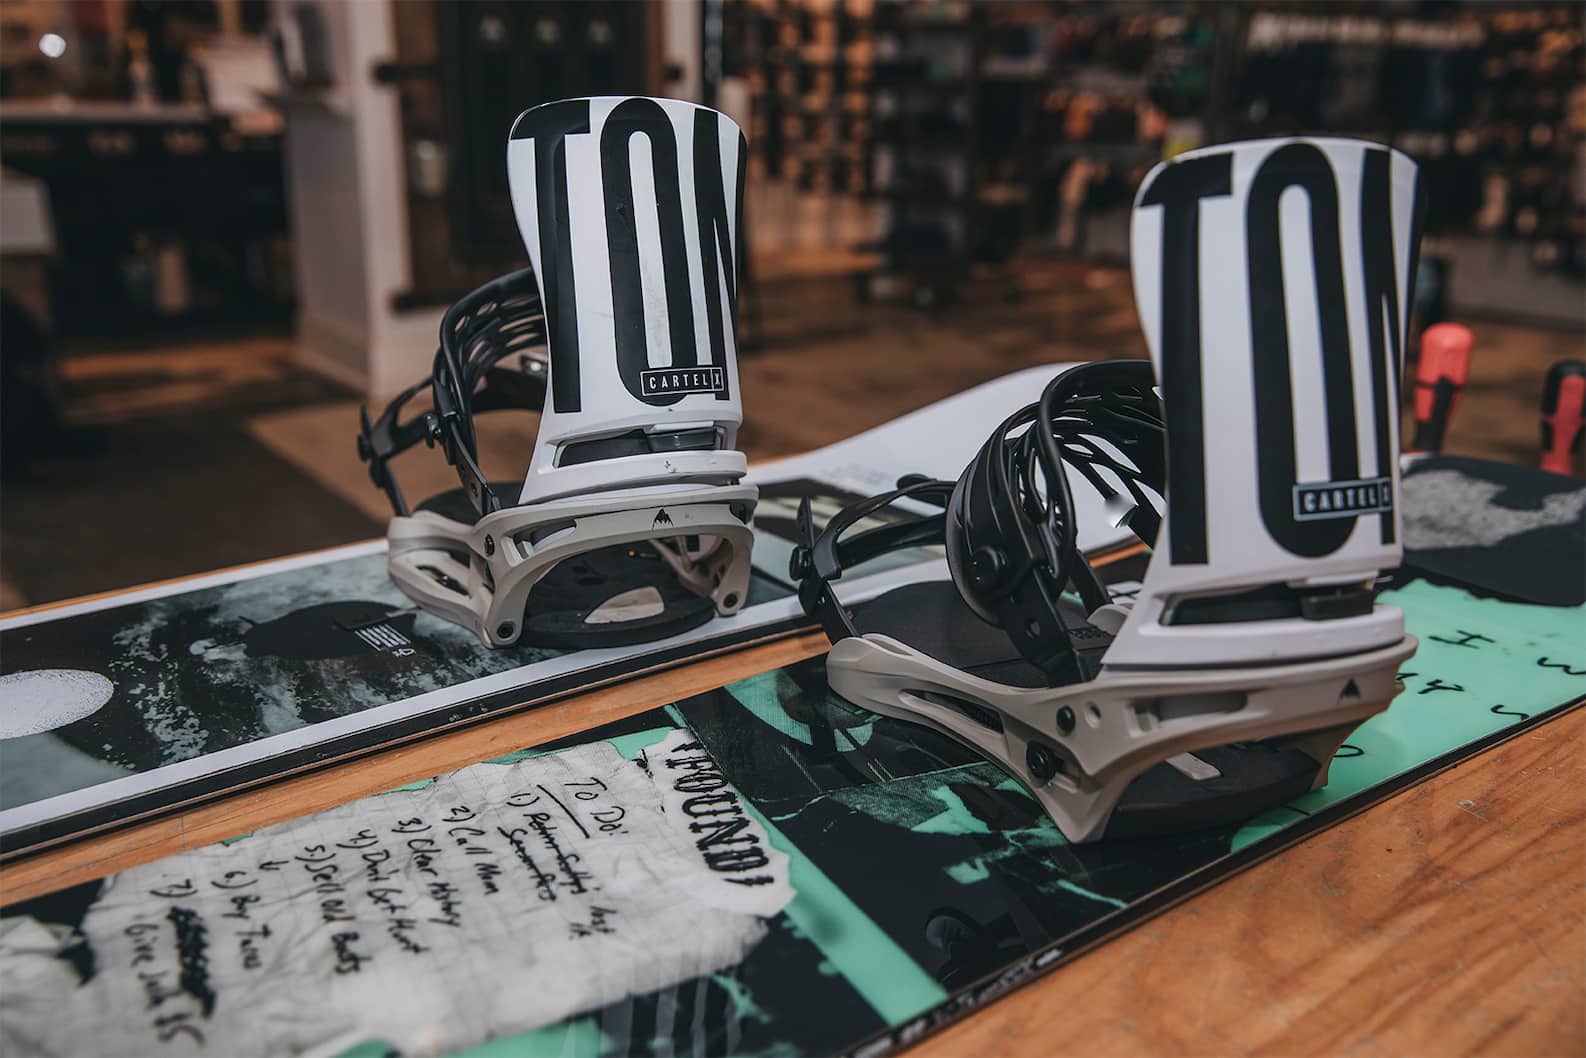
## Assembling the Correct Hardware
Now that you have confirmed your stance, it's important to make sure that you have all the necessary hardware to get everything mounted up. If you are mounting Burton [snowboard bindings](https://www.burton.com/us/en/c/snowboarding-bindings) on a Burton [snowboard](https://www.burton.com/us/en/c/snowboarding-snowboards) that was all purchased from an [authorized seller](https://www.burton.com/stores), you should have received all of the appropriate hardware. But let's take a quick minute to review what is needed.
### Mounting Bindings with EST and The Channel

For a Burton snowboard with The Channel system, you will need:
- [Burton EST snowboard bindings](https://www.burton.com/us/en/c/snowboarding-bindings) (one left foot, one right foot)
- [4 M6 Channel inserts](https://www.burton.com/us/en/c/snowboarding-spare-parts)
- [4 M6 screws](https://www.burton.com/us/en/c/snowboarding-spare-parts)
- [4 washers](https://www.burton.com/us/en/p/disc-channel-mounting-hardware/W20-124411.html)

### Mounting Bindings with Re:Flex and 4x2
For a non-Burton snowboard with a 4x2 mounting pattern, you will need:
- [Burton Re:Flex snowboard bindings](https://www.burton.com/us/en/c/snowboarding-bindings) (one left foot, one right foot)
- [8 M6 screws](https://www.burton.com/us/en/c/snowboarding-spare-parts)
- [8 washers](https://www.burton.com/us/en/c/snowboarding-spare-parts)
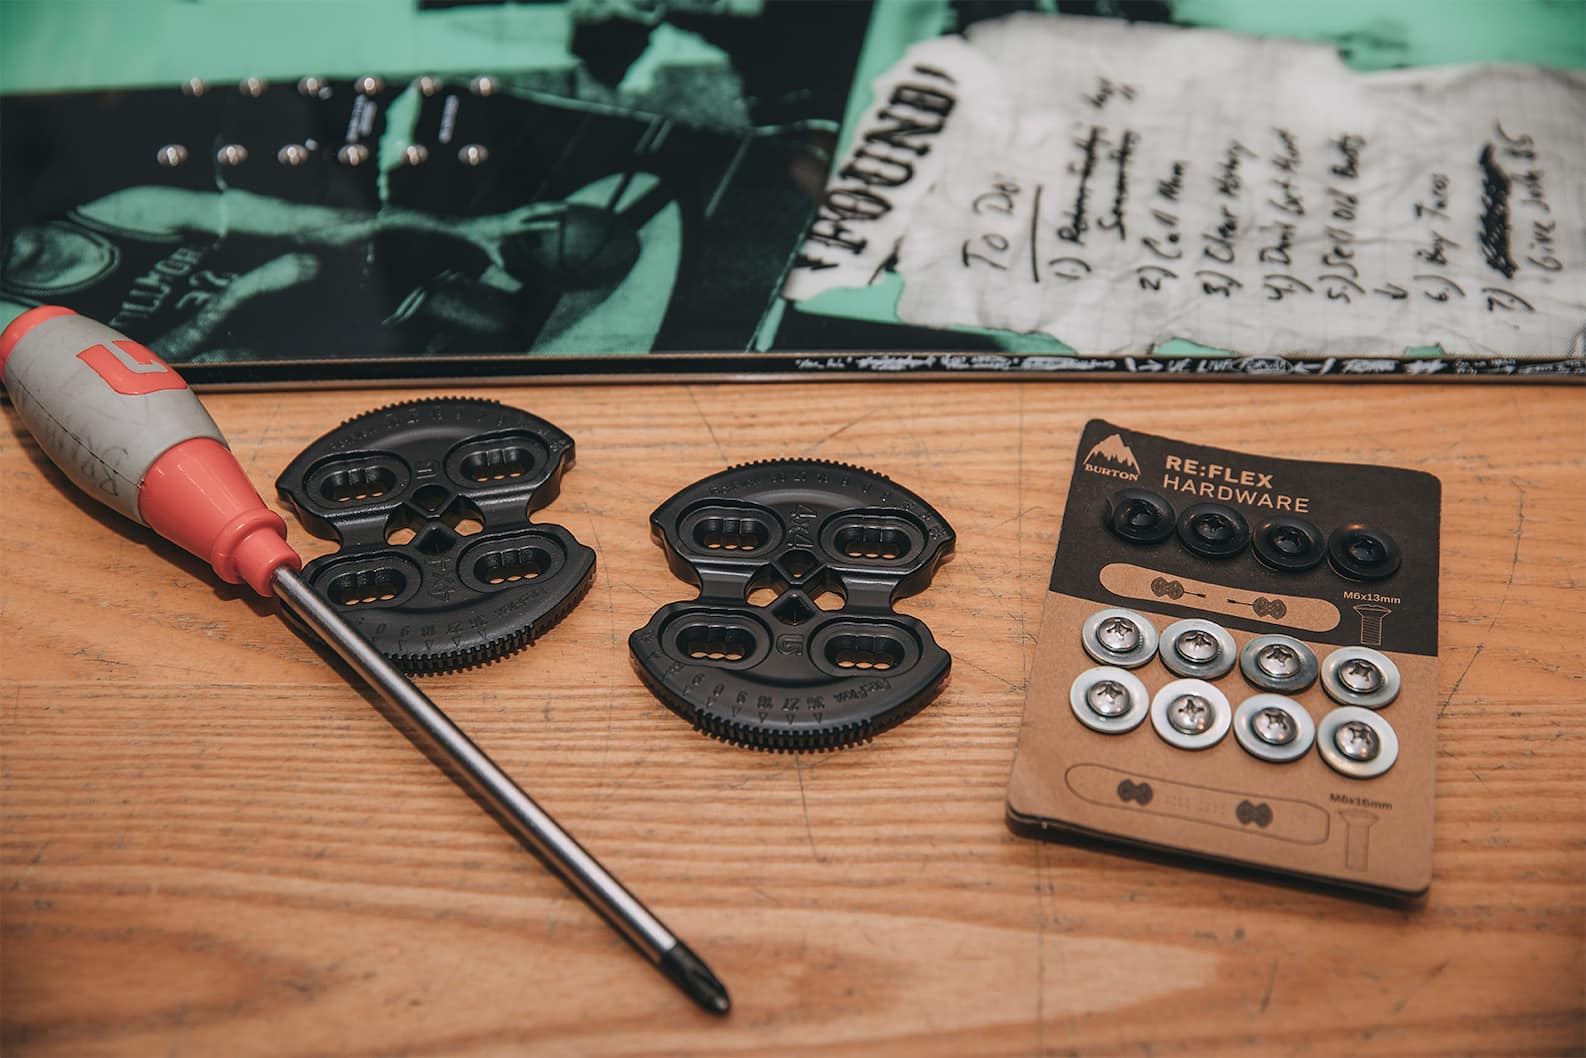
If you're coming up short on anything, please drop us a line (spoiler: we might be able to hook you up with some spare parts at no cost).
## Adjusting Binding Straps
Always perform a general fit check of your boots in your bindings before you mount the bindings to your board. Without putting them on, pull the laces semi-tight on each snowboard boot and place them in the appropriate binding. Strap in the boots and note where the center of the strap is. You want the center of the strap to be in line with the center of the boot when it's all the way tightened down. Remove the screw on the buckle strap and lengthen or shorten the strap before replacing the screw.
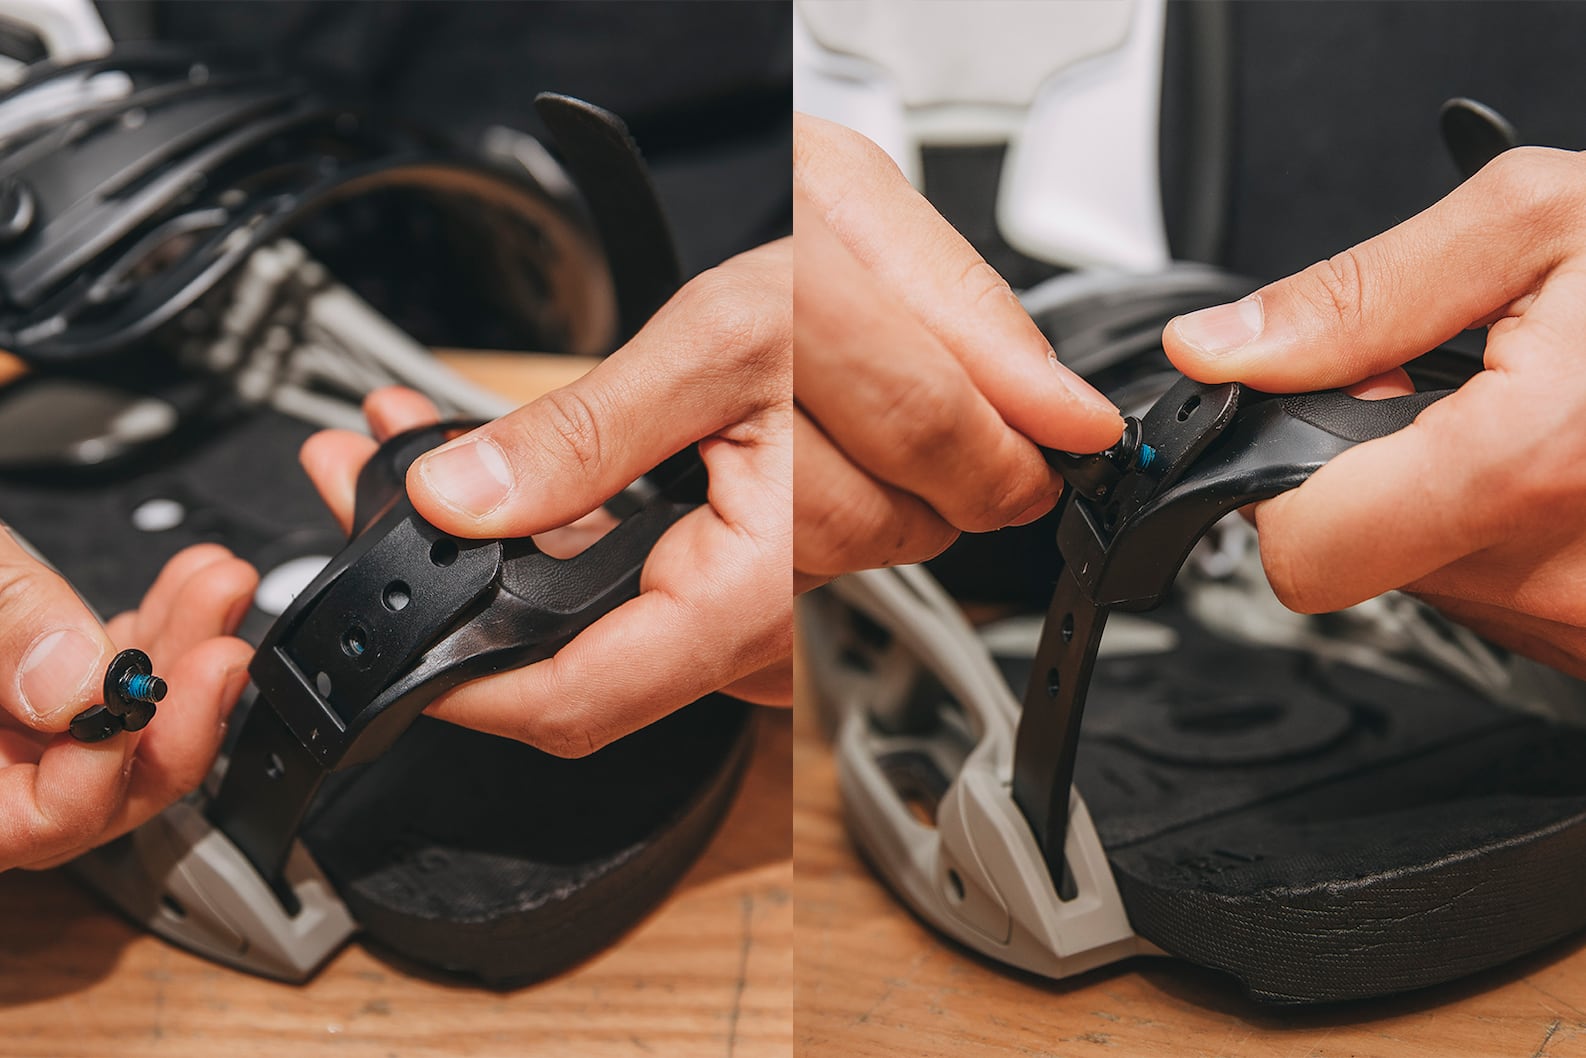
Repeat the process until the boots can be tightened snugly and the center of the straps sit over the center of the boots.
Note that after mounting your bindings to your board, you will want to perform these same steps with your feet in the boots and fine-tune your strap length accordingly.
**Pro tip**: Many binding straps provide tool-less adjustments, but you may need a screwdriver for certain adjustments so make sure to perform this set up before heading to the mountain, just in case.
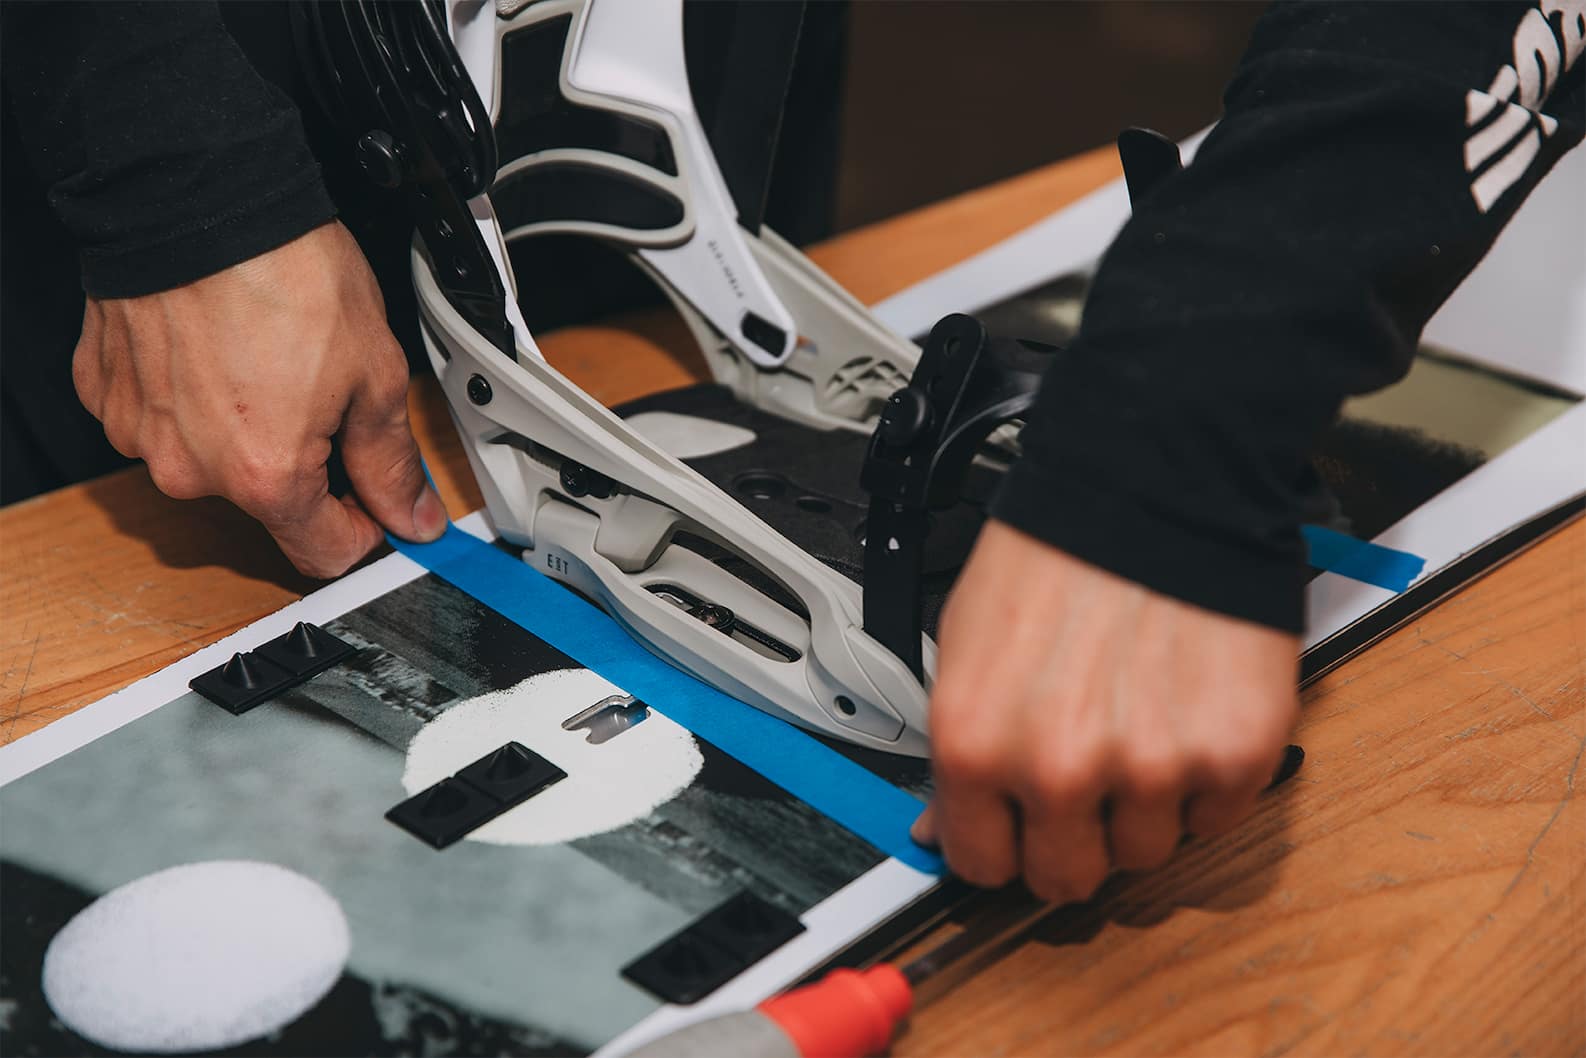
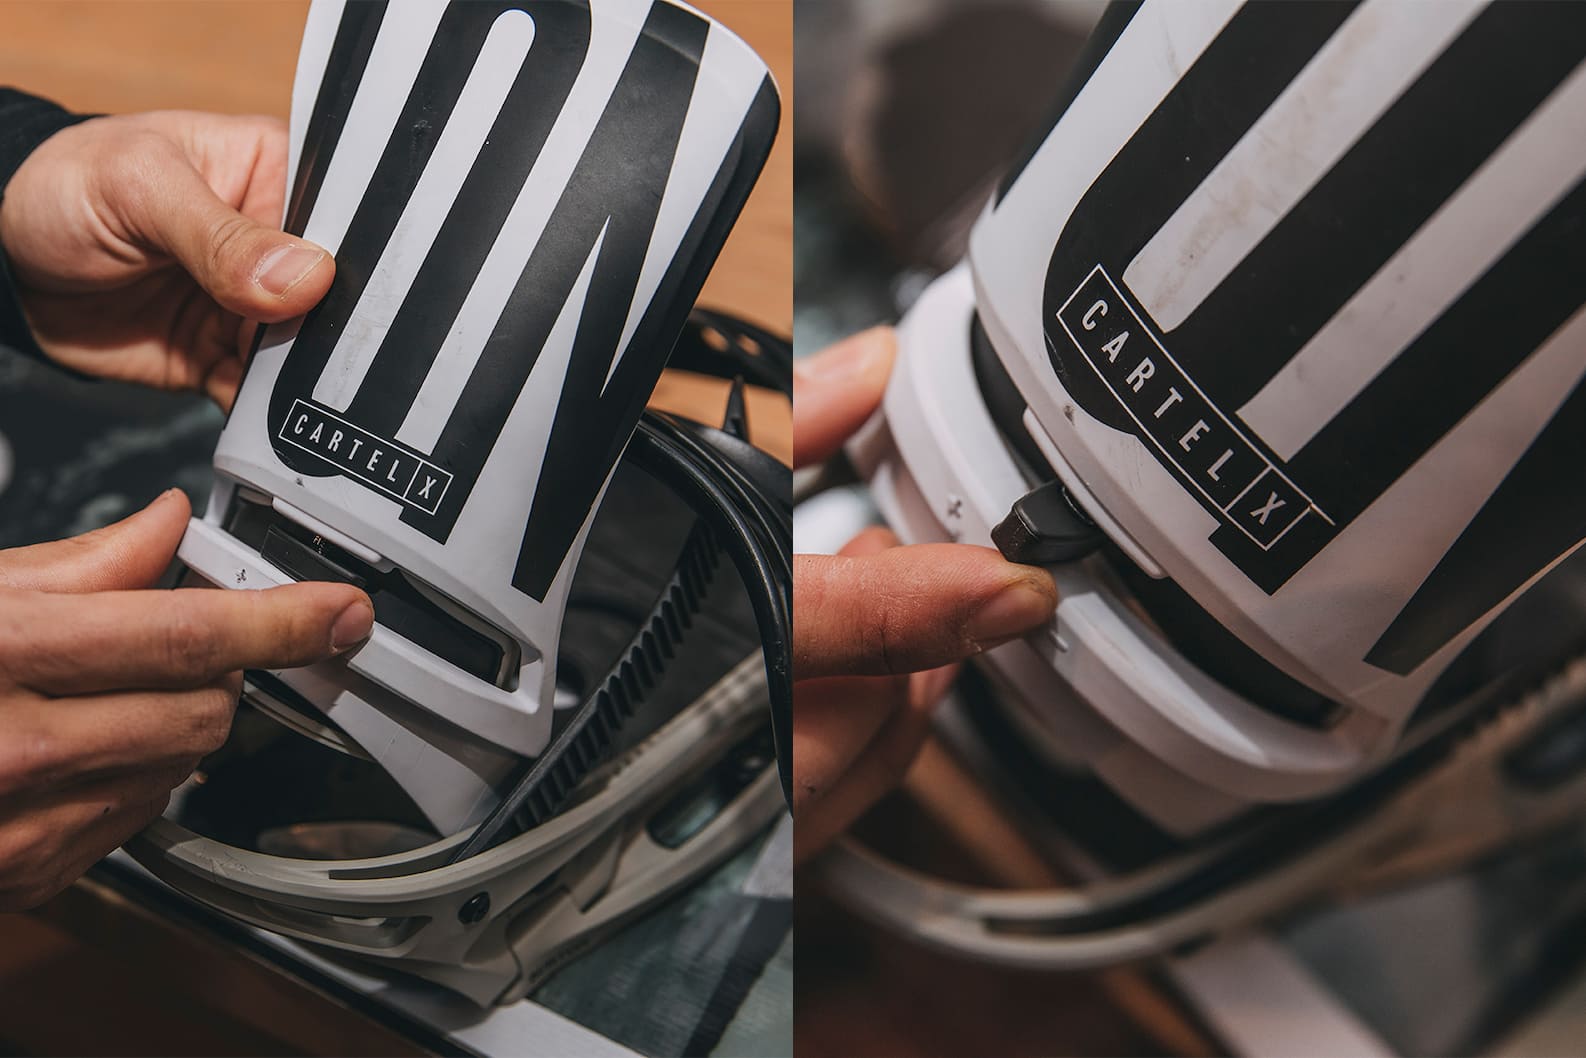
## Adjusting Binding Toe Ramps
Lastly, adjust the binding's toe ramps to fit the boot's footprint. This is a very important step that is often overlooked. The toe ramps lift the toes of the boots off the ground for better overall toeside response and additional clearance on deep toeside turns. You might not be able to make any toe ramp adjustments once the binding is fully mounted, so do this before you put the screws in.

Optimal toe ramp placement is where the sole of the boot fits flat on the binding footbed from heel to toe (the toe ramp of the binding fits against the natural rise of the toe of the boot). Every binding is a little different, but in general you will need to slide the the front half of the binding footbed forward or backward (depending on the size of the boot) to achieve optimal toe ramp placement. Then, place the binding (with the boot still in it) on the snowboard to confirm that the toe and heel of the boot doesn't hang too far over the edges (this is called toe drag and heel drag). Once you're comfortable with the current binding configuration, remove the boots and proceed.
**Pro tip**: The toe ramp should not extend past the edge of the board.
## Adjusting Forward Lean
Forward lean is the amount of angle on the binding highback (the binding component behind the boot that braces against the rider's calf). More forward lean increases power and precision to the heelside edge. In general, we recommend most beginners apply "zero" forward lean until they have a few days on the mountain.
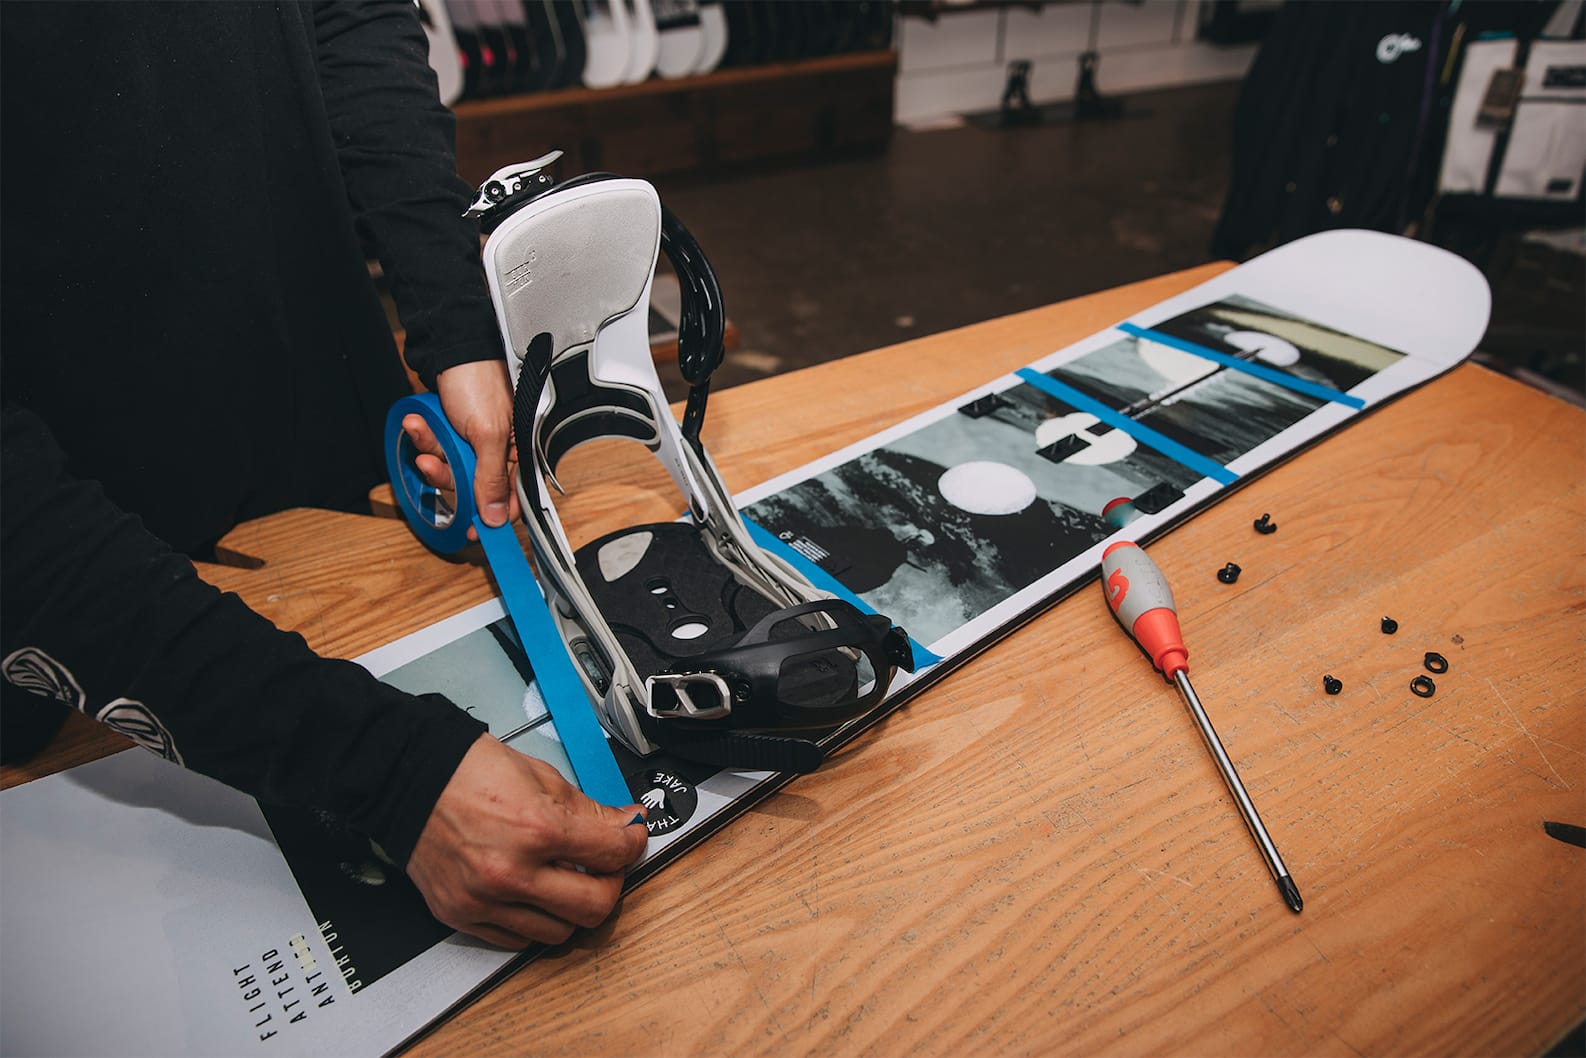
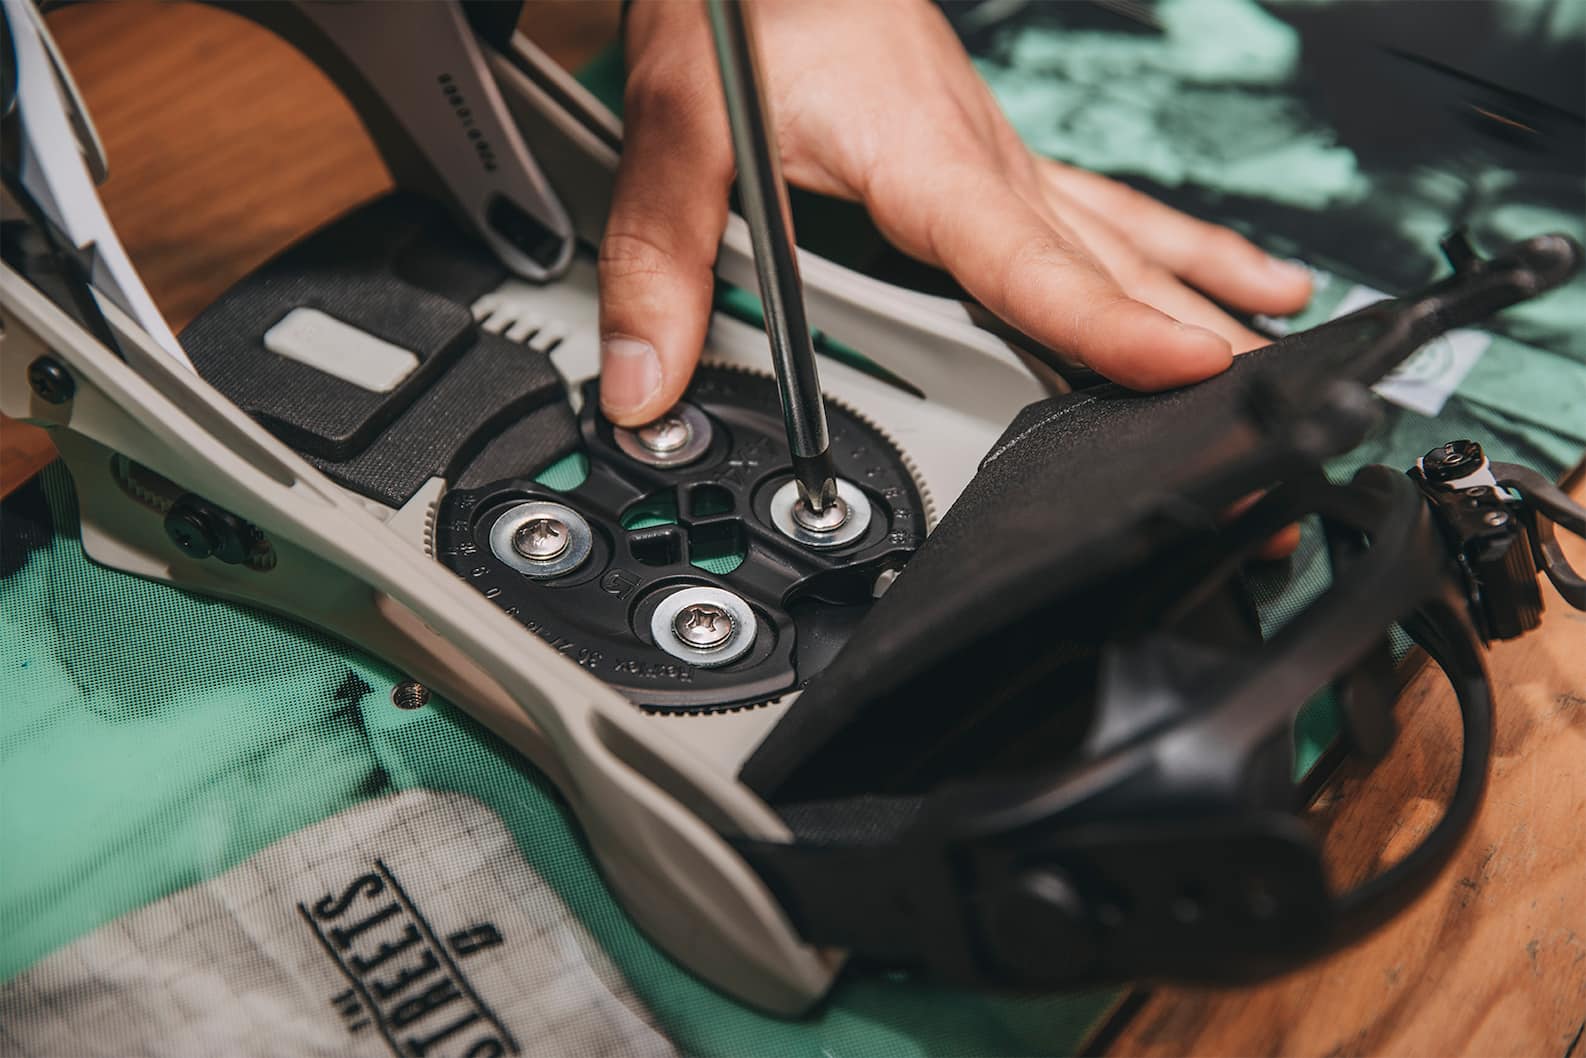
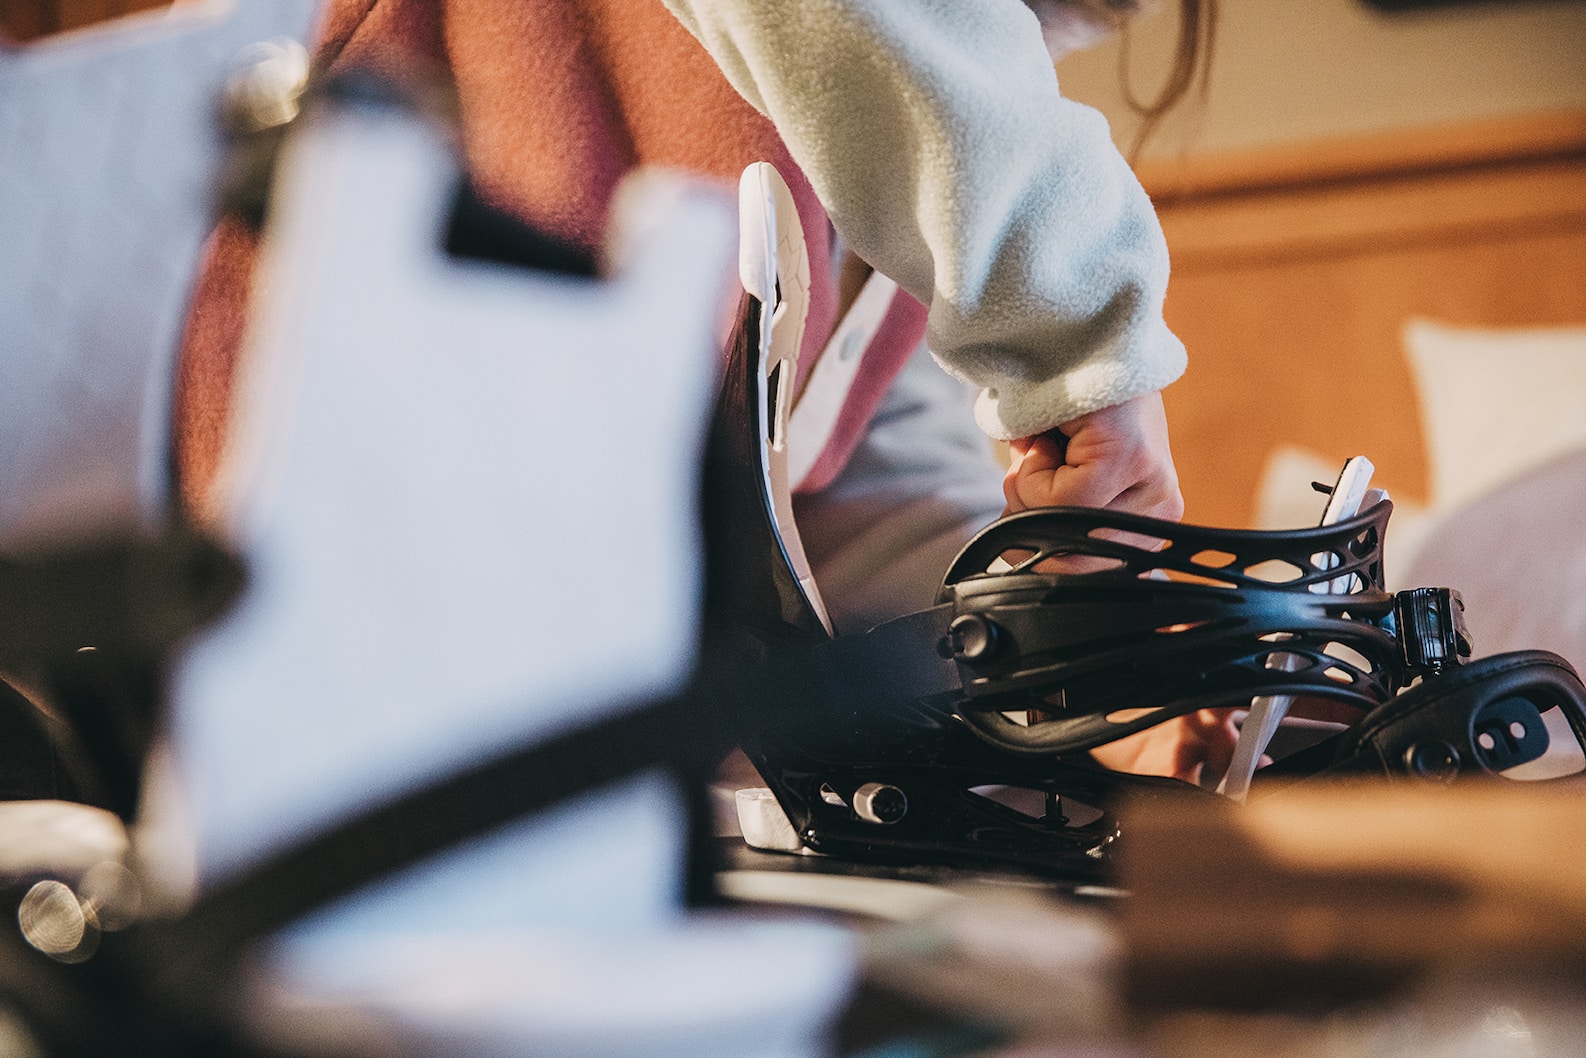
## Mounting Bindings
Once you know your stance and have your straps and toe ramps dialed in, it's time to mount up. To mount your bindings to your snowboard, insert the baseplate into the binding and use it to set each binding's angle. Next, loosely arrange each binding on the snowboard where it should go and line up the baseplate to the appropriate mounting holes.
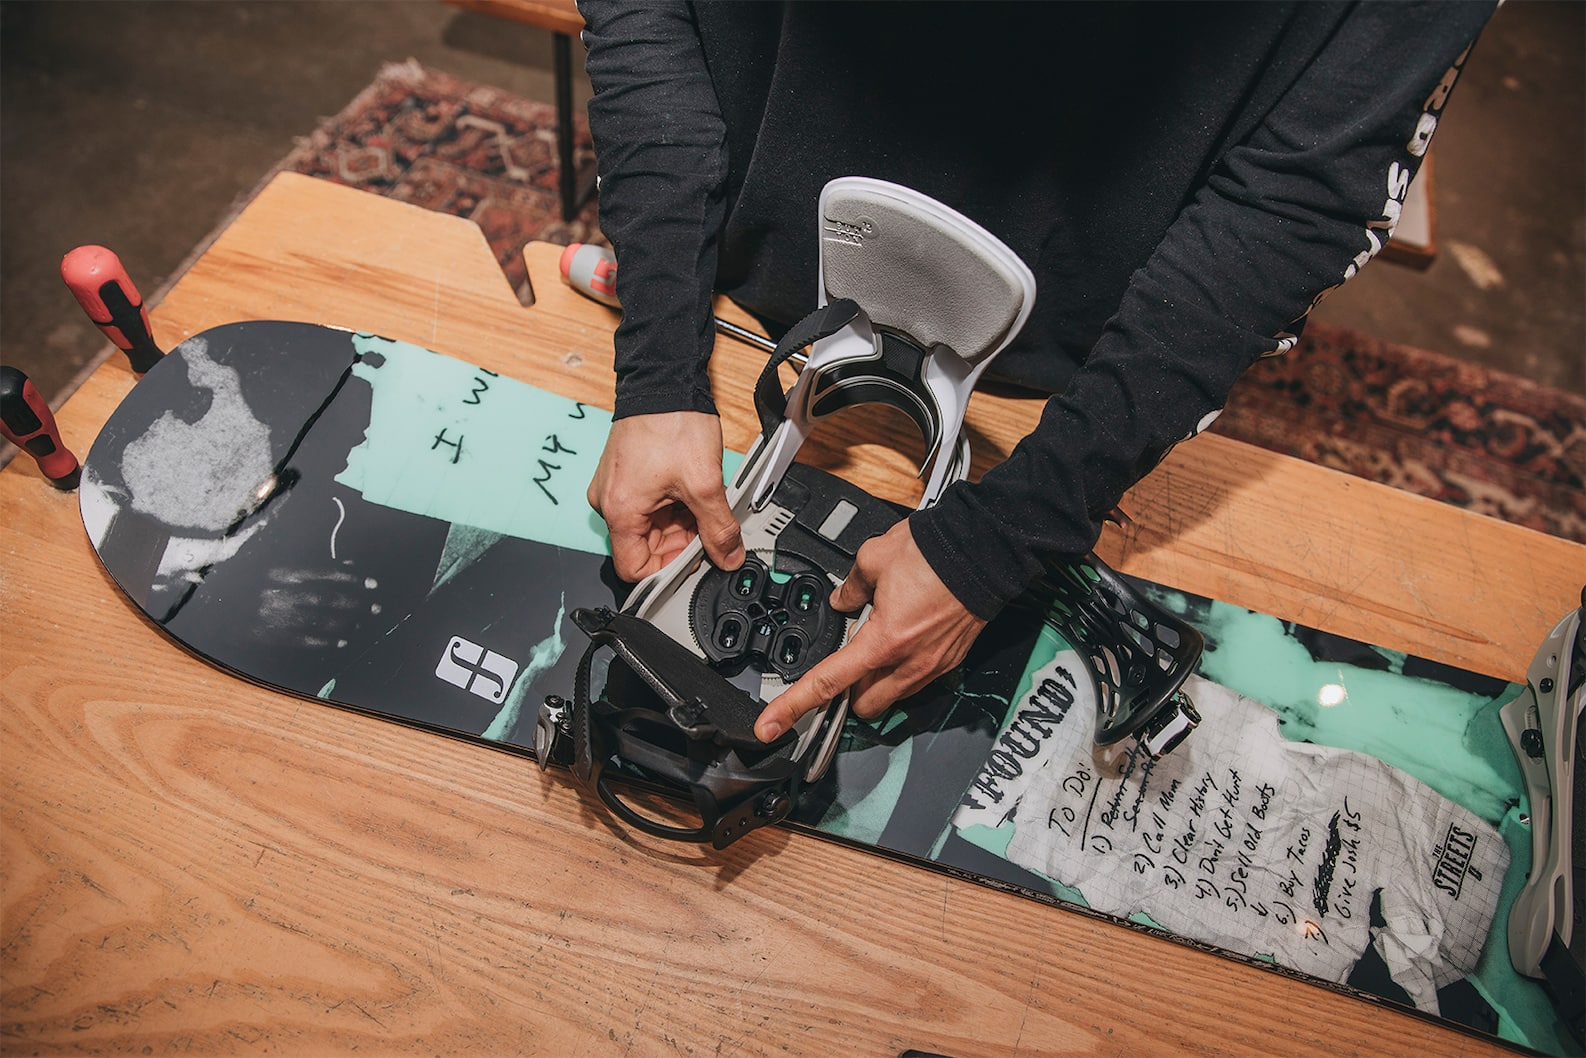
Using a screwdriver, screw in each screw a few turns (do not tighten all the way). Once all the screws have been started, check the binding position, angles, and toe/heel drag again. If everything still lines up as expected, tighten the screws.
Note: Never use power tools to mount bindings. Always hand-tighten snowboard binding screws and avoid thread-lock products.
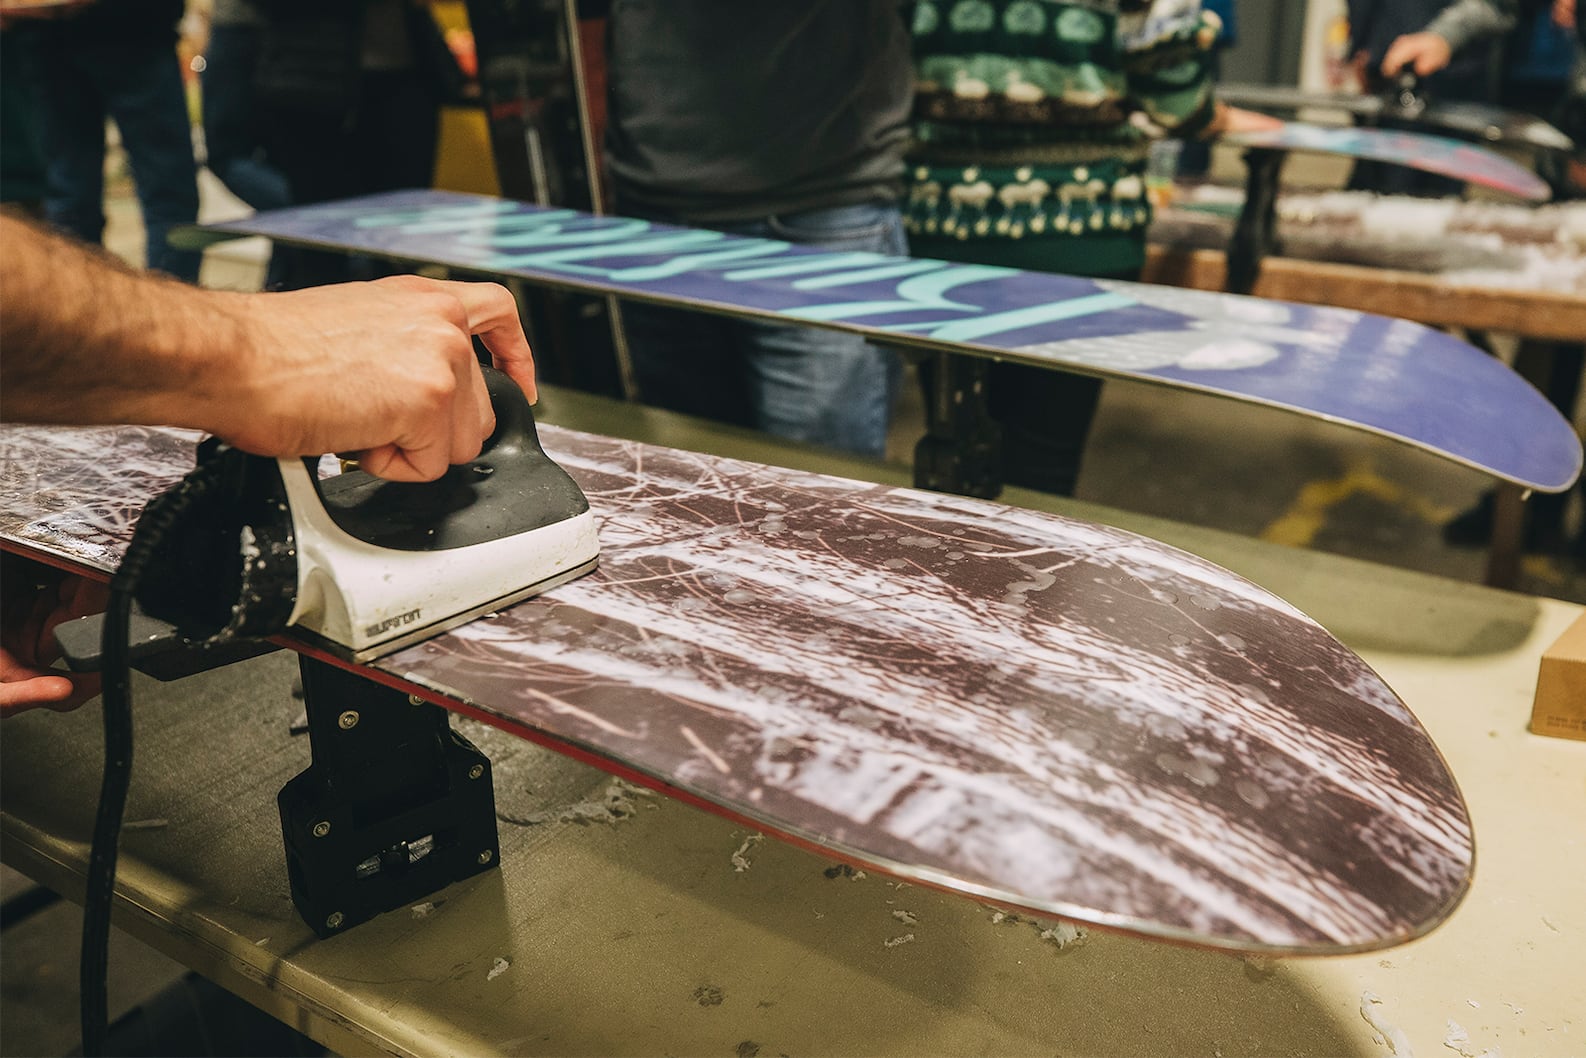
## Snowboard Tuning
The factory tune on new snowboards is good enough for most riders, but there are a few tweaks that you can make when setting up a new ride. The most common tuning adjustments on new snowboards are waxing and detuning the edges.
### Pros of Tuning a Factory Tune
Factory tuning typically uses all-temperature wax, and if you ride in an extremely cold region or a warmer, wetter region, then applying a temperature-specific wax could potentially improve your performance. And when it comes to detuning, factory edges are super sharp, and detuning the contact points will keep them from catching unexpectedly (which is especially helpful for new riders who are still learning edge control).
Note: Once you detune your edges they will never get fully sharp again. Remember that there is no going back so detune conservatively.
### Cons of Tuning a Factory Tune
As we already mentioned, a factory tune will be sufficient for most riders, so the additional work may not yield a noticeable difference for new riders. Plus, waxing a snowboard in and of itself is a project that requires an investment in specialty tools and practice to perfect.
## How to Set Up a Snowboard FAQs
Getting your snowboard set up for the first time is a big accomplishment, so give yourself a pat on the back. But on the chance that you've got some additional questions, review these common FAQs.
**Q:** How do you set up bindings on a snowboard?
**A:** Setting up bindings on a snowboard is relatively easy. Begin by making sure you have the correct [hardware](https://www.burton.com/us/en/c/snowboarding-spare-parts) and [mounting discs](https://www.burton.com/us/en/c/snowboarding-spare-parts). Next, place your snowboard bindings on your snowboard deck in your preferred stance. Finally, tighten down the snowboard binding mounting hardware using a hand-held Phillips screwdriver (do not use power tools).
**Q:** How do you set up a new snowboard?
**A:** Setting up a new snowboard requires installing bindings and may also include a [hot wax](https://www.burton.com/discover/s/article/how-to-wax-snowboard) and detuning the contact points on your edges. While you generally don't need to wax a brand-new snowboard, some riders prefer a fresh wax and tune before hitting the slopes.
**Q:** How do you set up bindings on a directional snowboard?
**A:** Directional snowboards have a distinct nose and tail, with the nose being longer than the tail. To set up bindings on a directional snowboard, install your front binding at the nose end of the snowboard and your rear binding at the tail end. Check out [Burton's overview of stances](https://www.burton.com/discover/s/article/goofy-vs-regular) for more information.
## Tips & Tricks on How to Set up a Snowboard
When setting up a snowboard, here are a few tips and tricks that can be helpful (and fun):
1. Setting up a snowboard the first time can be intimidating, but it is actually super quick and easy once you've done it a few times so don't be afraid to take a few runs and then make some adjustments (most resorts offer tools on the mountain for this exact reason). Keep tweaking until everything feels just right.
2. Regularly check your screws to make sure everything is tight, this ensure a consistent and safe ride every time.
3. Practice binding micro adjustments in mittens. It's normal to see other riders fiddling with their bindings out on the mountain as they try to optimize fit and performance. You should know how to change all of the settings on your bindings before heading out and it's always a good idea to practice these adjustments while wearing gloves/mittens.
4. We mentioned this already but it comes up a lot: Never use threadlock products on your binding screws. These products are typically not compatible with plastics and can cause damage to critical components.
5. Invest in a stomp pad. In a few years you may not need one, but if you're just getting started with snowboarding a stomp pad can be extremely helpful in maintaining balance while getting on and off the chair lift. Plus, it's another easy way to personalize your board.
6. Have a snowboard tuning party. Get your crew together and make an afternoon of it. Even the folks who have been riding for years probably have board/binding combos they want to update.
#### Related
[ Splitboarding 101: The Complete Beginner’s Guide Burton’s Splitboarding 101 class is in session. Drop in for a comprehensive review of vocabulary, gear, and technique.](https://www.burton.com/discover/s/article/splitboarding-101)
[ Do you need to wax a new snowboard? Do you need to wax a new snowboard? Is my new snowboard ready to ride? The Burton Guides answer these common questions.](https://www.burton.com/discover/s/article/do-you-need-to-wax-a-new-snowboard)
[ How to Sharpen Snowboard Edges: A Step-by-Step Guide Learn how to sharpen your snowboard edges and improve your performance on the slopes with this easy-to-follow guide.](https://www.burton.com/discover/s/article/how-to-sharpen-snowboard-edges)
[Find a Store](https://www.burton.com/us/en/stores) [Take A Test Ride](https://www.burton.com/us/en/test-ride-region-nav)
#### About Us
[About Burton](https://www.burton.com/us/en/content/about-us.html) [Purpose](https://www.burton.com/us/en/content/purpose.html) [Remembering Jake](https://www.burton.com/us/en/content/jake-burton-carpenter.html) [We Ride Together](https://www.burton.com/us/en/content/we-ride-together-snowboard-gear.html) [Chill Foundation](https://www.chill.org/) [Careers](https://www.burton.com/us/en/content/working-at-burton.html)
#### Programs
[Services](https://www.burton.com/us/en/content/rider-services.html) [First Chair Loyalty Program](https://www.burton.com/us/en/content/first-chair.html) [Performer Program](https://www.burton.com/us/en/performerprogram) [Discount Programs](https://www.burton.com/us/en/content/burton-discount-programs.html) [Affiliate](https://www.burton.com/us/en/affiliate/affiliate-na.html)
#### Help
[Track Your Order](https://www.burton.com/us/en/trackyourorder) [Returns](https://www.burton.com/us/en/help/returns-na.html) [Shipping Policy](https://www.burton.com/us/en/help/orders-shipping-na.html) [Warranty](https://www.burton.com/us/en/warranty) [Spare Parts](https://www.burton.com/us/en/c/snowboarding-spare-parts) [Get Advice](https://www.burton.com/discover/s/advice)
#### Contact Us
[Help Center](https://www.burton.com/us/en/help/help-home-na.html) [(800) 881-3138](tel:800-881-3138)
Cookie Settings
[Accessibility](https://www.burton.com/us/en/content/help/accessibility.html) [California Transparency Act](https://www.burton.com/static/content/2026/PDF/Burton_California_Transparency_Disclosure_March_2026.pdf)
[](https://bcorporation.eu/)
[Instagram](https://www.instagram.com/burton/) [YouTube](https://www.youtube.com/burtonsnowboards) [Facebook](https://www.facebook.com/Burton/) [LinkedIn](https://www.linkedin.com/company/burton-snowboards/posts) [Twitter](https://www.twitter.com/burtonsnowboard) [TikTok](https://www.tiktok.com/@burtonsnowboard?lang=en)
[Current Region: US/EN](https://www.burton.com/on/demandware.store/Sites-Burton_NA-Site/en_US/RegionSelector-Show)
© 2026 Burton Snowboards
[Terms & Conditions](https://www.burton.com/us/en/help/legal-na.html) [Privacy](https://www.burton.com/us/en/help/privacy-na.html) [User Content Terms](https://www.burton.com/us/en/user-generated-content-policy/ugc-policy.html) [Site Map](https://www.burton.com/us/en/sitemap)
Loading
A Beginner’s Guide on How to Set up a Snowboard \| Burton Snowboards |
| Readable Markdown | 
We did the math: There are approximately 3,254,612 snowboard/binding/boot configurations. Okay, we didn't really do the math but the point is that it's easy to get overwhelmed when setting up a snowboard. The good news is that the large amount of options means there is a perfect set up for you and your riding style. So, whether you're dialing in your first snowboard or just curious about how to wade through the millions of combinations, this beginner's guide on how to set up a snowboard was built for you.
In this article, we'll cover the fundamentals of mounting and adjusting bindings, the pros and cons of pre-ride tuning, and highlight a few tips and tricks to consider before getting started.
## How to Set Up Your Snowboard: Video Tutorial
## How to Set up a Snowboard: Quick Navigation
- [Setting Your Stance](https://www.burton.com/discover/s/article/how-to-set-up-a-snowboard#setting-your-stance)
- [Assembling the Correct Hardware](https://www.burton.com/discover/s/article/how-to-set-up-a-snowboard#assembling-the-correct-hardware)
- [Adjusting Binding Straps](https://www.burton.com/discover/s/article/how-to-set-up-a-snowboard#adjusting-binding-straps)
- [Adjusting Binding Toe Ramps](https://www.burton.com/discover/s/article/how-to-set-up-a-snowboard#adjusting-binding-toe-ramps)
- [Adjusting Forward Lean](https://www.burton.com/discover/s/article/how-to-set-up-a-snowboard#adjusting-forward-lean)
- [Mounting Bindings](https://www.burton.com/discover/s/article/how-to-set-up-a-snowboard#mounting-bindings)
- [Snowboard Tuning](https://www.burton.com/discover/s/article/how-to-set-up-a-snowboard#snowboard-tuning)
- [Tips & Tricks](https://www.burton.com/discover/s/article/how-to-set-up-a-snowboard#tips-and-tricks)
## Setting Your Stance
Getting your stance dialed in is one of the most important parts of setting up a snowboard. We recommend reviewing [The Official Guide to Snowboard Stances](https://www.burton.com/discover/s/article/goofy-vs-regular) to get a better understanding of all the different factors to consider when setting your stance for the first time. Once you have determined your footedness, width, angle, and setback (and understand how all of these aspects work together), we recommend testing out your stance before mounting your bindings.

Using four 6" (15 cm) pieces of masking tape, mark the approximate locations of your bindings and their angles on the snowboard.

Next, lay the board down on some carpeted floor and place your feet on the tape. While standing with your feet in the approximate binding locations, do a squat. As you bend your knees lower and lower, you should feel stable and balanced with your weight centered evenly under each foot (not too much weight on the outsides or insides of the feet) until you've gone as low as you can. If you get halfway into a squat and have to catch yourself to avoid falling over, move your feet around a bit and try again until it feels right.
Once you have set up a few snowboards, this step is less important, but when getting started, there are two important reasons to mark off and test your stance first:
1. It will give you an idea of how the stance feels on the board and allow you to make some adjustments if necessary.
2. Most retailers will not accept a snowboard for a return once bindings have been mounted, even if the board was never ridden. So, if you decide (for whatever reason) to return the board before riding it, you can do so without the risk of binding marks on the topsheet.

## Assembling the Correct Hardware
Now that you have confirmed your stance, it's important to make sure that you have all the necessary hardware to get everything mounted up. If you are mounting Burton [snowboard bindings](https://www.burton.com/us/en/c/snowboarding-bindings) on a Burton [snowboard](https://www.burton.com/us/en/c/snowboarding-snowboards) that was all purchased from an [authorized seller](https://www.burton.com/stores), you should have received all of the appropriate hardware. But let's take a quick minute to review what is needed.
### Mounting Bindings with EST and The Channel

For a Burton snowboard with The Channel system, you will need:
- [Burton EST snowboard bindings](https://www.burton.com/us/en/c/snowboarding-bindings) (one left foot, one right foot)
- [4 M6 Channel inserts](https://www.burton.com/us/en/c/snowboarding-spare-parts)
- [4 M6 screws](https://www.burton.com/us/en/c/snowboarding-spare-parts)
- [4 washers](https://www.burton.com/us/en/p/disc-channel-mounting-hardware/W20-124411.html)

### Mounting Bindings with Re:Flex and 4x2

For a non-Burton snowboard with a 4x2 mounting pattern, you will need:
- [Burton Re:Flex snowboard bindings](https://www.burton.com/us/en/c/snowboarding-bindings) (one left foot, one right foot)
- [8 M6 screws](https://www.burton.com/us/en/c/snowboarding-spare-parts)
- [8 washers](https://www.burton.com/us/en/c/snowboarding-spare-parts)

If you're coming up short on anything, please drop us a line (spoiler: we might be able to hook you up with some spare parts at no cost).
## Adjusting Binding Straps
Always perform a general fit check of your boots in your bindings before you mount the bindings to your board. Without putting them on, pull the laces semi-tight on each snowboard boot and place them in the appropriate binding. Strap in the boots and note where the center of the strap is. You want the center of the strap to be in line with the center of the boot when it's all the way tightened down. Remove the screw on the buckle strap and lengthen or shorten the strap before replacing the screw.

Repeat the process until the boots can be tightened snugly and the center of the straps sit over the center of the boots.
Note that after mounting your bindings to your board, you will want to perform these same steps with your feet in the boots and fine-tune your strap length accordingly.
**Pro tip**: Many binding straps provide tool-less adjustments, but you may need a screwdriver for certain adjustments so make sure to perform this set up before heading to the mountain, just in case.
## Adjusting Binding Toe Ramps
Lastly, adjust the binding's toe ramps to fit the boot's footprint. This is a very important step that is often overlooked. The toe ramps lift the toes of the boots off the ground for better overall toeside response and additional clearance on deep toeside turns. You might not be able to make any toe ramp adjustments once the binding is fully mounted, so do this before you put the screws in.

Optimal toe ramp placement is where the sole of the boot fits flat on the binding footbed from heel to toe (the toe ramp of the binding fits against the natural rise of the toe of the boot). Every binding is a little different, but in general you will need to slide the the front half of the binding footbed forward or backward (depending on the size of the boot) to achieve optimal toe ramp placement. Then, place the binding (with the boot still in it) on the snowboard to confirm that the toe and heel of the boot doesn't hang too far over the edges (this is called toe drag and heel drag). Once you're comfortable with the current binding configuration, remove the boots and proceed.
**Pro tip**: The toe ramp should not extend past the edge of the board.
## Adjusting Forward Lean
Forward lean is the amount of angle on the binding highback (the binding component behind the boot that braces against the rider's calf). More forward lean increases power and precision to the heelside edge. In general, we recommend most beginners apply "zero" forward lean until they have a few days on the mountain.

## Mounting Bindings
Once you know your stance and have your straps and toe ramps dialed in, it's time to mount up. To mount your bindings to your snowboard, insert the baseplate into the binding and use it to set each binding's angle. Next, loosely arrange each binding on the snowboard where it should go and line up the baseplate to the appropriate mounting holes.

Using a screwdriver, screw in each screw a few turns (do not tighten all the way). Once all the screws have been started, check the binding position, angles, and toe/heel drag again. If everything still lines up as expected, tighten the screws.

Note: Never use power tools to mount bindings. Always hand-tighten snowboard binding screws and avoid thread-lock products.
## Snowboard Tuning
The factory tune on new snowboards is good enough for most riders, but there are a few tweaks that you can make when setting up a new ride. The most common tuning adjustments on new snowboards are waxing and detuning the edges.
### Pros of Tuning a Factory Tune
Factory tuning typically uses all-temperature wax, and if you ride in an extremely cold region or a warmer, wetter region, then applying a temperature-specific wax could potentially improve your performance. And when it comes to detuning, factory edges are super sharp, and detuning the contact points will keep them from catching unexpectedly (which is especially helpful for new riders who are still learning edge control).
Note: Once you detune your edges they will never get fully sharp again. Remember that there is no going back so detune conservatively.
### Cons of Tuning a Factory Tune
As we already mentioned, a factory tune will be sufficient for most riders, so the additional work may not yield a noticeable difference for new riders. Plus, waxing a snowboard in and of itself is a project that requires an investment in specialty tools and practice to perfect.
## How to Set Up a Snowboard FAQs
Getting your snowboard set up for the first time is a big accomplishment, so give yourself a pat on the back. But on the chance that you've got some additional questions, review these common FAQs.
**Q:** How do you set up bindings on a snowboard?
**A:** Setting up bindings on a snowboard is relatively easy. Begin by making sure you have the correct [hardware](https://www.burton.com/us/en/c/snowboarding-spare-parts) and [mounting discs](https://www.burton.com/us/en/c/snowboarding-spare-parts). Next, place your snowboard bindings on your snowboard deck in your preferred stance. Finally, tighten down the snowboard binding mounting hardware using a hand-held Phillips screwdriver (do not use power tools).
**Q:** How do you set up a new snowboard?
**A:** Setting up a new snowboard requires installing bindings and may also include a [hot wax](https://www.burton.com/discover/s/article/how-to-wax-snowboard) and detuning the contact points on your edges. While you generally don't need to wax a brand-new snowboard, some riders prefer a fresh wax and tune before hitting the slopes.
**Q:** How do you set up bindings on a directional snowboard?
**A:** Directional snowboards have a distinct nose and tail, with the nose being longer than the tail. To set up bindings on a directional snowboard, install your front binding at the nose end of the snowboard and your rear binding at the tail end. Check out [Burton's overview of stances](https://www.burton.com/discover/s/article/goofy-vs-regular) for more information.
## Tips & Tricks on How to Set up a Snowboard
When setting up a snowboard, here are a few tips and tricks that can be helpful (and fun):
1. Setting up a snowboard the first time can be intimidating, but it is actually super quick and easy once you've done it a few times so don't be afraid to take a few runs and then make some adjustments (most resorts offer tools on the mountain for this exact reason). Keep tweaking until everything feels just right.
2. Regularly check your screws to make sure everything is tight, this ensure a consistent and safe ride every time.
3. Practice binding micro adjustments in mittens. It's normal to see other riders fiddling with their bindings out on the mountain as they try to optimize fit and performance. You should know how to change all of the settings on your bindings before heading out and it's always a good idea to practice these adjustments while wearing gloves/mittens.
4. We mentioned this already but it comes up a lot: Never use threadlock products on your binding screws. These products are typically not compatible with plastics and can cause damage to critical components.
5. Invest in a stomp pad. In a few years you may not need one, but if you're just getting started with snowboarding a stomp pad can be extremely helpful in maintaining balance while getting on and off the chair lift. Plus, it's another easy way to personalize your board.
6. Have a snowboard tuning party. Get your crew together and make an afternoon of it. Even the folks who have been riding for years probably have board/binding combos they want to update.
 |
| Shard | 17 (laksa) |
| Root Hash | 10337490822760621817 |
| Unparsed URL | com,burton!www,/discover/s/article/how-to-set-up-a-snowboard s443 |