ℹ️ Skipped - page is already crawled
| Filter | Status | Condition | Details |
|---|---|---|---|
| HTTP status | PASS | download_http_code = 200 | HTTP 200 |
| Age cutoff | PASS | download_stamp > now() - 6 MONTH | 0.1 months ago |
| History drop | PASS | isNull(history_drop_reason) | No drop reason |
| Spam/ban | PASS | fh_dont_index != 1 AND ml_spam_score = 0 | ml_spam_score=0 |
| Canonical | PASS | meta_canonical IS NULL OR = '' OR = src_unparsed | Not set |
| Property | Value |
|---|---|
| URL | https://sarahscoopeats.com/easy-mooncakes-how-to-make-traditional-moon-cake-recipe/ |
| Last Crawled | 2026-04-23 21:05:34 (3 days ago) |
| First Indexed | 2023-11-21 03:12:32 (2 years ago) |
| HTTP Status Code | 200 |
| Content | |
| Meta Title | Easy Mooncakes | How to Make Traditional Moon Cake Recipe |
| Meta Description | We're thrilled to share our favorite moon cake recipe! These are more than just a treat; they're a symbol of reunion and togetherness. |
| Meta Canonical | null |
| Boilerpipe Text | We’re thrilled to share our favorite traditional moon cake recipe with you! Mooncakes are more than just a treat; they’re a symbol of reunion and togetherness.
We’ve simplified the process without compromising the taste and significance.
Whether you’re a seasoned baker or a newbie, we’ll guide you through the journey of making your very own mooncakes.
Let’s dive into the rich culture of mooncakes, find the perfect ingredients, and start baking!
This is where tradition meets innovation.
Understanding Mooncake Origins
Before we dive into the recipe, let’s explore the rich cultural tapestry that’s the origin of mooncakes.
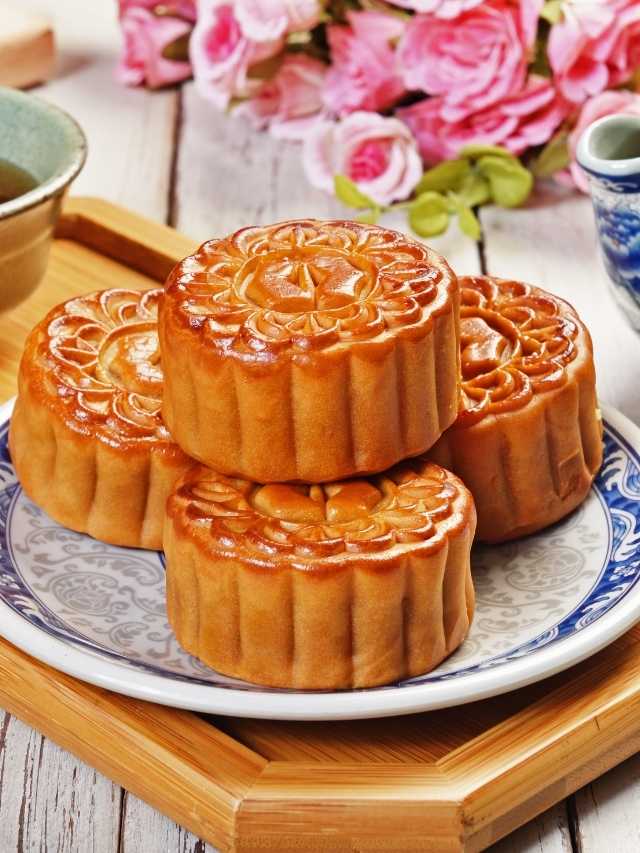
Mooncakes, or traditional Chinese mooncakes, are an integral part of the Mid-Autumn Festival, an event that celebrates the full moon’s beauty and family togetherness.
Mooncakes have been shared for centuries during this mooncake festival, their round shape symbolizing unity and completeness.
But, why buy when we can create our own mooncakes? Our homemade mooncakes recipe will enable you to craft these traditional treats with a modern twist.
As we delve deeper, we’ll introduce you to the art of making the perfect mooncake dough, filling and the intricate designs on moon cakes.
Importance of Mooncakes
Stepping away from the historical background, let’s delve into why we place such importance on
mooncakes
in our festivities.
For Chinese people, particularly in Hong Kong, the traditional Cantonese mooncake holds a significant place in our hearts and our celebration.
This isn’t just about a mooncake recipe. It’s about preserving our heritage, our traditions.
It’s about the variety of fillings that bring us back to our childhood, the making of our own golden syrup that adds a touch of home, a flavor of nostalgia.
Store-bought versions just can’t replicate that. That’s why we encourage making easy mooncakes at home.
Sure, you can get them from a Chinese grocery store, but the importance of mooncakes goes beyond convenience. It’s about culture, it’s about family, it’s about love.
Essential Mooncake Ingredients
After understanding the cultural significance of mooncakes, it’s time we delve into the essential ingredients we’ll need to start baking these traditional treats at home.
For the mooncake skin, we’ll need glutinous rice flour, a key ingredient in creating the unique texture of snow skin mooncakes.
The filling is a concoction of sweet paste, with popular options being lotus seed paste,
red bean paste
, and mung bean paste.
We’ll wrap a lotus paste ball around duck egg yolks, symbolizing the moon, to create the core of the mooncake. Some prefer a custard filling, adding a creamy contrast to the chewy skin.
It’s fascinating how these simple ingredients come together to create such a meaningful and delicious treat. Now, let’s get baking!
Sourcing Mooncake Ingredients
We’ll need to find reliable sources for our mooncake ingredients to ensure the quality and authenticity of our homemade treats.
Check out your local Asian market; they’re usually stocked with everything from adzuki beans to black sesame paste.
If you’re having trouble finding a
mooncake mold
, don’t sweat it. Many online retailers offer a variety of shapes and sizes.
Salted duck egg yolk, lotus seeds, cake flour, coconut oil, and more can be found in these markets or ordered online.
Use a food processor to grind lotus seeds into a fine paste. Mix it with your syrup mixture to create a smooth filling. For the dough, combine cake flour and coconut oil.
Now, let’s get cooking!
Preparations Before Baking
Before we pop these mooncakes into the oven, there’s a few crucial steps we must take to ensure they turn out perfect.
First, sift the purpose flour into a
large bowl
, ensuring no lumps remain.
Next, prepare the sweet filling. Roll it into small balls and store them in an airtight container to maintain freshness.
To get the perfect shape, place the filling balls on a piece of plastic wrap and gently flatten it with a rolling pin.
Then, wrap the flattened filling in the dough, sealing all edges.
Place the filled dough on a parchment-lined baking sheet.
Just before baking, we’ll use a pastry brush to apply a light egg wash, which gives our mooncakes a lovely sheen.
With these preparations before baking, you’re all set to create perfect mooncakes every time.
Making Mooncake Dough
Let’s get started on mixing our mooncake dough, the base of this traditional treat. We’ll provide step-by-step photos to make the process more engaging and easier to follow.
Start by gathering your ingredients: you’ll need a clean work surface and a small bowl.
Using a
wooden spoon
, combine the ingredients in the small bowl until it forms a smooth dough ball.
It’s important to note that the dough should be handled gently to maintain its texture. Once mixed, transfer the dough onto your work surface.
Divide the dough into equal pieces. Then, shape each piece into a smooth, round ball. This mooncake ball is your canvas for creating a delightful, edible piece of art.
Remember, the dough ball is the heart of your mooncake, so treat it with care.
Enjoy the process!
Preparing the Filling
Having nurtured our mooncake dough with care, our attention now shifts to the soul of our mooncakes – the filling.
In preparing the filling, we’re seeking that perfect balance of flavors that defines the perfect mooncake.
For the full recipe, we’ll be using salted egg yolks, providing a rich contrast to the sweet mooncake. To start, we’ll heat a cup sugar in some
vegetable oil
, letting it dissolve.
The next step involves the lye water, also known as alkaline water, which we’ll carefully incorporate.
This key ingredient helps to achieve a golden-brown crust and offsets the sweetness of the filling.
Stay tuned for the next steps as we continue our journey towards creating the perfect mooncake.
Tips for Perfect Filling
While we’re crafting the perfect filling, it’s crucial we remember a few important tips to ensure our mooncakes turn out just right.
First, we’ll need to cook our filling on medium-low heat. This provides the best results, ensuring our filling is cooked evenly without burning.
Next, we’ll want to wrap the cooked filling in cling wrap and store it in an air-tight container. This keeps it fresh and maintains its daily values.
Before we start filling our mooncakes, we’ll need to preheat the oven to the right oven temperature.
We should also prepare a sheet of
parchment paper
on the baking tray. This will help to create a beautiful pattern on top of the mooncake.
Lastly, remember to have plenty of water on hand to adjust the dough’s consistency.
Filling Vs Dough Ratio
Often, we’re asked about the ideal filling to dough ratio for mooncakes, and it’s something we can’t ignore.
For first time mooncake makers, we suggest starting with a 1:1.5 dough to filling ratio.
This balance allows the golden brown hue of the baked mooncakes to shine, without overpowering the intricate patterns that make each cake unique.
To achieve this, prepare duck eggs, ensuring that they’re thoroughly mixed with peanut oil under medium heat.
Apply just enough egg wash to create a sheen, but avoid excess egg wash as it can alter the texture.
Store your mooncakes in tight containers to maintain freshness. Remember, family members might’ve different preferences, so feel free to adjust the ratio to suit their tastes.
Shaping the Mooncakes
After perfecting the dough to filling ratio, we’re now ready to delve into the art of shaping our mooncakes.
The key is to ensure the dough is at room temperature before we start kneading.
A little bit of potassium carbonate will enhance the texture, just as we discovered last year.
The next step is to mold the mooncake using a special press, making sure the filling is completely enclosed in the dough.
This year, we’re introducing an innovative technique that involves chilling the shaped mooncakes for about 15 minutes before baking.
Preheat your oven to 180 degrees C, place the mooncakes on a
wire rack
, and bake until golden.
This will give you the perfect, traditional mooncakes with a creative twist.
Using a Mooncake Mold
In spite of the complexity, we’ve found that using a mooncake mold isn’t as daunting as it seems.
You’ll find an array of molds online or in Asian markets, ranging from intricate traditional designs to modern, minimalist ones. We recommend starting with a 50g mold, perfect for beginners.
Here’s the magic part: lightly flour your mold to prevent sticking, press your filled mooncake ball into it, and then gently but firmly push down on the plunger to shape it.
In a swift motion, we release the mooncake, revealing the gorgeously embossed design. A tip: oil the mold after each use to keep it in top shape.
Pre-Baking Procedures
Now that we’ve mastered using the mooncake mold, let’s move on to the important pre-baking procedures.
We’ll start by preheating our oven to the optimal temperature of 180 degrees Celsius. While it’s heating, we’ll brush a light layer of egg wash over our mooncakes.
This simple step gives them that gorgeous golden-brown finish. But remember, too much can cause the mooncakes to crack, so moderation is key!
Next, we’ll arrange our mooncakes on a
baking tray
lined with parchment paper. Ensure they’re spaced apart to prevent them from sticking together.
Once our oven signals it’s ready, we’ll pop our tray in and bake. The anticipation builds as we watch our mooncakes transform into golden delights.
And there you have it! Our pre-baking procedures, innovatively simple and effective.
Baking Temperature and Time
Let’s dive into the specifics of baking temperature and time for our mooncakes.
To ensure a lovely golden-brown sheen, we’ll be baking these at 180°C (356°F). We’ve found this to be the sweet spot – any higher and the mooncakes might burn, any lower and they may not fully cook.
Now, let’s talk timing. We’ll set our timers for 15 minutes initially, then we’ll whip out our mooncakes for a quick egg wash. You’ll love the shiny finish this gives!
Then, back into the oven they go, for another 10 to 15 minutes. Be vigilant during this time, as ovens can vary.
The result? Perfectly baked mooncakes every time. It’s a bit of an art and a science, but oh-so worth it.
Post-Baking Procedures
After we’ve baked our mooncakes to perfection, there are a few crucial steps we’ve got to follow to ensure they’re absolutely delectable.
Let’s start by allowing them to cool completely on a wire rack. We don’t want to rush this process, patience is key.
Next up, we’ll coat our mooncakes with a glossy egg wash, which will give them a beautiful shiny finish.
This is a simple yet transformative detail that will take our
mooncakes
to the next level.
Mooncake Cooling Process
Once we’ve removed our mooncakes from the oven, it’s crucial to let them rest and cool completely on a wire rack.
This isn’t just a pause in the process, it’s a vital step in ensuring the mooncakes achieve their distinctive texture and flavor.
The cooling allows for the pastry to firm up and the filling to settle. This cooling period also intensifies the flavors within the mooncake, making every bite a delight.
To innovate, place the rack in a well-ventilated area to speed up the cooling. We could even use a fan to hasten the process. But remember, patience is key here.
Only after they’re fully cooled can we package or serve our mooncakes, ensuring they’re at their absolute best. Now, that’s innovation in tradition.
Storing Your Mooncakes
With our mooncakes completely cooled, the next phase in our mooncake journey is understanding the art of proper storage.
Let’s store these delicacies in an
airtight container
to ward off moisture.
Now, here’s a creative twist – we’re not going to dig in right away. Patience, my friends, is key. Leave them at room temperature for about two days.
This ‘resting’ period allows the oil from the filling to seep into the crust, making it softer and enhancing the overall flavor.
After this, if you’re not planning to feast on them immediately, they can be stored in the refrigerator for up to a week.
Remember, mooncakes are like a fine wine; they get better with time.
Enjoy the anticipation!
Serving Suggestions for Mooncakes
Now that we’ve patiently awaited our mooncakes’ peak flavor, let’s delve into the delightful world of serving these traditional treats.
Mooncakes are versatile and can be served in several innovative ways. For a chic and modern twist, consider presenting your mooncakes sliced and layered on a bed of fruit compote.
Alternatively, for a more traditional approach, serve them whole, allowing guests to admire their ornate designs before indulging.
A steaming pot of
herbal tea
or a robust espresso could complement these delicacies perfectly, providing a balance to their rich sweetness.
If you’re aiming for a grand reveal, present them in a beautiful, ornate box as a centerpiece, creating anticipation and excitement.
Understanding Mooncake Varieties
After enjoying the visual and gustatory delight of our mooncakes, let’s delve into understanding the various types that exist.
Traditionally, mooncakes are categorized by their fillings, which can range from sweet red bean to lotus seed paste, and even savory flavors like ham or egg yolk.
However, modern culinary innovation has ushered in new varieties, appealing to the adventurous taste buds.
We now have mooncakes with unique fillings like matcha, truffle, and even durian, pushing the boundaries of traditional flavors.
The crust, too, can vary, from the classic golden-brown pastry, to the snowy white, mochi-like skin of snow skin mooncakes.
The sheer diversity is testament to the mooncake’s adaptability and enduring appeal.
Adapting the Recipe
Often, we’ll find ourselves tweaking traditional mooncake recipes to cater to our personal preferences or dietary needs.
It’s about understanding the balance of flavours and textures that make a mooncake enjoyable.
For instance, if you’re vegan, you can easily substitute lard with vegetable shortening in the dough.
You can also create fillings from a range of plant-based ingredients like
nuts
, seeds, or red bean paste.
Perhaps you’re looking for something low-sugar? Reduce the amount of sweetener in your filling, or opt for natural sweeteners like dates or honey.
For a fun twist, try adding unconventional ingredients like chocolate or
matcha powder
.
The key is to experiment and adapt, making your mooncake truly yours. Remember, there’s no limit to creativity in the kitchen.
Mooncake Troubleshooting Tips
So, what do we do if our mooncake doesn’t turn out as expected? No need to panic, we’ve got some innovative solutions.
If your mooncake is too dry, it might be due to insufficient syrup. We recommend adding more in small increments.
On the flip side, if it’s too wet or sticky, lessen the liquid or increase baking time.
For crumbly mooncakes, it’s likely an issue with too much fat. Try reducing the amount next time.
If the shape isn’t holding, it might be a problem with the dough-to-filling ratio. Next time, use less filling or more dough.
And remember, practice makes perfect. Don’t be disheartened. Keep experimenting with ratios and baking times. Soon, you’ll be a mooncake master!
Nutritional Information
‘Where does the nutritional value lie in our homemade mooncakes, you might wonder? Well, let’s dive into the delicious details.
Mooncakes are a rich source of carbohydrates, providing you with the energy needed to fuel your day.
The filling, typically made from sweetened red bean or lotus seed paste, is high in fiber, aiding digestion. The egg yolk center, symbolic of the full moon, is packed with protein.
While they’re a sweet treat, mooncakes also contain a fair amount of sugar, so moderation is key.
Nuts and seeds often included in the filling add a crunch along with heart-healthy fats and antioxidants.
Allergen Information
In making our mooncakes, it’s important for us to consider potential allergens that may be present in the ingredients.
We’re conscious that food allergies are a significant concern for many, which is why we’re detailing this information.
The key ingredients of our mooncakes are flour, golden syrup, lye water, lotus seed paste, melon seeds, and egg yolks.
They contain gluten, found in flour, and potential allergens like eggs and seeds.
For those with nut allergies, it’s crucial to note that while our traditional recipe doesn’t include
nuts
, some variations might.
We aim for transparency, ensuring you can enjoy our mooncakes while staying safe.
Always check the ingredient list for every recipe, and when in doubt, consult with a healthcare professional.
Your safety is our priority.
Vegan Mooncake Alternatives
While we’ve highlighted traditional mooncake ingredients, we can’t forget about our vegan friends who may want to partake in this delicious tradition.
Innovating with plant-based alternatives is more than possible and can be just as tasty.
Instead of lard, try coconut oil for a rich, moist dough. Swap the much egg wash for a glossy
maple syrup
glaze.
As for the filling, lotus seed paste is already vegan-friendly, but for a creative twist, consider a decadent mix of crushed nuts and dried fruits.
Don’t forget to choose vegan-friendly food colorings for your decorative imprints.
With these substitutions, you’ll craft a mooncake that’s not only vegan, but also a delightful surprise for all your guests. Tradition meets innovation in every bite!
Hosting a Mooncake Party
After whipping up some traditional and vegan-friendly mooncakes, we’re all set to throw an unforgettable mooncake party. Let’s create an atmosphere that’s both festive and intimate.
We’ll start with decorations. Think lanterns, table runners adorned with moon and star motifs, and centerpieces featuring fresh flowers.
Our playlist? A blend of traditional Chinese music and contemporary hits, creating a fusion that’s as unique as our mooncakes.
Now, for the food. We’ll serve our mooncakes as the star attraction, complemented by a mix of savory Asian-inspired finger foods.
Don’t forget the tea! A variety of flavors will cater to everyone’s palate.
Lastly, we’ll have interactive stations where guests can try their hand at mooncake making. It’s not just a party, it’s a mooncake experience!
Exploring More Mooncake Recipes
Now that we’ve mastered the basics, let’s venture into experimenting with more mooncake recipes to add a twist to our traditional creation.
Why not try a chocolate mooncake or perhaps a matcha-flavored one? Both offer a delightful blend of East meets West.
We could also incorporate fruits like coconut or pineapple, giving our mooncakes a tropical twist.
For those who prefer savory, let’s experiment with fillings like ham, cheese, or even
truffle
.
The possibilities are endless, and we’re only limited by our creativity.
We can adapt our mooncake recipes to cater to dietary needs too – gluten-free, sugar-free, or vegan versions are certainly possible.
Final Thoughts
We’ve journeyed through the rich history, importance, and delightful creation of mooncakes. From sourcing ingredients to baking and even hosting a mooncake party, we’ve covered it all.
Crafting mooncakes is a delightful culinary endeavor, and this moon cake recipe provides a satisfying and flavorful result.
The process involves creating a smooth ball of filling, infusing them with the sweetness derived from a carefully measured cup of sugar.
The g mooncake mold becomes the vessel for shaping these delectable treats, ensuring a uniform and visually appealing appearance.
A finishing touch involves brushing the mooncakes with an egg wash, removing excess for a perfect, golden sheen.
This moon cake recipe not only encapsulates the essence of a cherished tradition but also allows for a personalized touch in both flavor and presentation.
Whether shared during festive occasions or savored as a special treat, these mooncakes encapsulate the artistry of homemade delights.
Remember, there’s always room for creativity in the kitchen, even with traditional recipes. So, whether you’re making these for a festival or just a fun treat, enjoy the process.
Don’t forget to check out more mooncake recipes and vegan alternatives. Happy mooncake making!
Prep Time
20 minutes
Cook Time
30 minutes
Total Time
50 minutes
Ingredients
Glutinous rice flour
Lotus seed paste, red bean paste, or mung bean paste
Lotus paste ball
Duck egg yolks
Vegetable oil
Sugar
Instructions
Preparations Before Baking
Before we pop these mooncakes into the oven, there's a few crucial steps we must take to ensure they turn out perfect.
First, sift the purpose flour into a
large bowl
, ensuring no lumps remain.
Next, prepare the sweet filling. Roll it into small balls and store them in an airtight container to maintain freshness.
To get the perfect shape, place a filling ball on a piece of plastic wrap and gently flatten it with a rolling pin.
Then, wrap the flattened filling in the dough, sealing all edges.
Place the filled dough on a parchment-lined baking sheet.
Just before baking, we'll use a pastry brush to apply a light egg wash, which gives our mooncakes a lovely sheen.
With these preparations before baking, you're all set to create perfect mooncakes every time.
Making Mooncake Dough
Let's get started on mixing our mooncake dough, the base of this traditional treat. We'll provide step-by-step photos to make the process more engaging and easier to follow.
Start by gathering your ingredients: you'll need a clean work surface and a small bowl.
Using a
wooden spoon
, combine the ingredients in the small bowl until it forms a smooth dough ball.
It's important to note that the dough should be handled gently to maintain its texture. Once mixed, transfer the dough onto your work surface.
Divide the dough into equal pieces. Then, shape each piece into a smooth, round ball. This mooncake ball is your canvas for creating a delightful, edible piece of art.
Remember, the dough ball is the heart of your mooncake, so treat it with care.
Preparing the Filling
Having nurtured our mooncake dough with care, our attention now shifts to the soul of our mooncakes – the filling.
In preparing the filling, we're seeking that perfect balance of flavors that defines the perfect mooncake.
For the full recipe, we'll be using salted egg yolks, providing a rich contrast to the sweet mooncake. To start, we'll heat a cup of sugar in some
vegetable oil
, letting it dissolve.
The next step involves the lye water, also known as alkaline water, which we'll carefully incorporate.
This key ingredient helps to achieve a golden-brown crust and offsets the sweetness of the filling.
Stay tuned for the next steps as we continue our journey towards creating the perfect mooncake.
Shaping the Mooncakes
After perfecting the dough to filling ratio, we're now ready to delve into the art of shaping our mooncakes.
The key is to ensure the dough is at room temperature before we start kneading.
A little bit of potassium carbonate will enhance the texture, just as we discovered last year.
The next step is to mold the mooncake using a special press, making sure the filling is completely enclosed in the dough.
Baking and Time
To ensure a lovely golden-brown sheen, we'll be baking these at 180°C (356°F). We've found this to be the sweet spot - any higher and the mooncakes might burn, any lower and they may not fully cook.
Now, let's talk timing. We'll set our timers for 15 minutes initially, then we'll whip out our mooncakes for a quick egg wash. You'll love the shiny finish this gives!
Then, back into the oven they go, for another 10 to 15 minutes. Be vigilant during this time, as ovens can vary.
Mooncake Cooling Process
Once we've removed our mooncakes from the oven, it's crucial to let them rest and cool completely on a wire rack.
This isn't just a pause in the process, it's a vital step in ensuring the mooncakes achieve their distinctive texture and flavor.
The cooling allows for the pastry to firm up and the filling to settle. This cooling period also intensifies the flavors within the mooncake, making every bite a delight.
To innovate, place the rack in a well-ventilated area to speed up the cooling. We could even use a fan to hasten the process. But remember, patience is key here.
Only after they're fully cooled can we package or serve our mooncakes, ensuring they're at their absolute best. Now, that's innovation in tradition.
Get the scoop on more like this:
Classic Pecan Butterball Cookies Recipe
Pistachio Macarons Recipe With White Buttercream
Easy to Make Coffee Brownies Recipe With Espresso
How To Use Nespresso Milk Frother: Step-By-Step Guide |
| Markdown | [Skip to content](https://sarahscoopeats.com/easy-mooncakes-how-to-make-traditional-moon-cake-recipe/#main)
[**HOLIDAY RECIPES**](https://sarahscoopeats.com/category/holiday-recipes/)
- [Contact](https://sarahscoopeats.com/contact/)
- [About](https://sarahscoopeats.com/about/)
- [Privacy Policy](https://sarahscoopeats.com/privacy-policy/)
[The Recipe Index](https://sarahscoopeats.com/recipe-index/)
[](https://sarahscoopeats.com/)
- [Recipes](https://sarahscoopeats.com/category/recipes/)
- [Breakfast](https://sarahscoopeats.com/category/recipes/breakfast/)
- [Lunch](https://sarahscoopeats.com/category/recipes/lunch/)
- [Dinner](https://sarahscoopeats.com/category/recipes/dinner/)
- [Snacks](https://sarahscoopeats.com/category/recipes/snacks/)
- [Desserts](https://sarahscoopeats.com/category/recipes/desserts/)
- [Holiday Recipes](https://sarahscoopeats.com/category/holiday-recipes/)
- [Halloween](https://sarahscoopeats.com/category/holiday-recipes/halloween/)
- [Thanksgiving](https://sarahscoopeats.com/category/holiday-recipes/thanksgiving/)
- [Christmas](https://sarahscoopeats.com/category/holiday-recipes/christmas/)
- [Drinks](https://sarahscoopeats.com/category/drinks/)
- [Coffee](https://sarahscoopeats.com/category/drinks/coffee/)
- [Cocktails](https://sarahscoopeats.com/category/drinks/cocktails/)
- [Wine](https://sarahscoopeats.com/category/drinks/wine/)
- [Cooking](https://sarahscoopeats.com/category/cooking/)
- [Airfryer](https://sarahscoopeats.com/category/cooking/airfryer/)
- [Crock Pot](https://sarahscoopeats.com/category/cooking/crock-pot/)
- [Instant Pot](https://sarahscoopeats.com/category/cooking/instant-pot/)
- [No Bake](https://sarahscoopeats.com/category/cooking/no-bake/)
- [Tips & More](https://sarahscoopeats.com/category/tips/)
- [How To](https://sarahscoopeats.com/category/tips/how-to/)
- [Substitutes](https://sarahscoopeats.com/category/tips/substitutes/)
- [What To Serve](https://sarahscoopeats.com/category/side-dishes/what-to-serve/)
- [Q & A](https://sarahscoopeats.com/category/tips/q-a/)
[](https://sarahscoopeats.com/)
[Home](https://sarahscoopeats.com/) / [Recipes](https://sarahscoopeats.com/category/recipes/) / Easy Mooncakes \| How to Make Traditional Moon Cake Recipe
[Desserts](https://sarahscoopeats.com/category/recipes/desserts/) \| [Recipes](https://sarahscoopeats.com/category/recipes/)
# Easy Mooncakes \| How to Make Traditional Moon Cake Recipe
By[Sarah Scoop](https://sarahscoopeats.com/author/sarahscoop/)
November 20, 2023
November 20, 2023
We’re thrilled to share our favorite traditional moon cake recipe with you! Mooncakes are more than just a treat; they’re a symbol of reunion and togetherness.

We’ve simplified the process without compromising the taste and significance.
Whether you’re a seasoned baker or a newbie, we’ll guide you through the journey of making your very own mooncakes.
Let’s dive into the rich culture of mooncakes, find the perfect ingredients, and start baking\!
This is where tradition meets innovation.
## Understanding Mooncake Origins
Before we dive into the recipe, let’s explore the rich cultural tapestry that’s the origin of mooncakes.
Mooncakes, or traditional Chinese mooncakes, are an integral part of the Mid-Autumn Festival, an event that celebrates the full moon’s beauty and family togetherness.
Mooncakes have been shared for centuries during this mooncake festival, their round shape symbolizing unity and completeness.
But, why buy when we can create our own mooncakes? Our homemade mooncakes recipe will enable you to craft these traditional treats with a modern twist.
As we delve deeper, we’ll introduce you to the art of making the perfect mooncake dough, filling and the intricate designs on moon cakes.
## Importance of Mooncakes
Stepping away from the historical background, let’s delve into why we place such importance on [mooncakes](https://www.amazon.com/dp/B0928DZC54?tag=sseats-20) in our festivities.
For Chinese people, particularly in Hong Kong, the traditional Cantonese mooncake holds a significant place in our hearts and our celebration.
This isn’t just about a mooncake recipe. It’s about preserving our heritage, our traditions.
It’s about the variety of fillings that bring us back to our childhood, the making of our own golden syrup that adds a touch of home, a flavor of nostalgia.
Store-bought versions just can’t replicate that. That’s why we encourage making easy mooncakes at home.
Sure, you can get them from a Chinese grocery store, but the importance of mooncakes goes beyond convenience. It’s about culture, it’s about family, it’s about love.
## Essential Mooncake Ingredients
After understanding the cultural significance of mooncakes, it’s time we delve into the essential ingredients we’ll need to start baking these traditional treats at home.
For the mooncake skin, we’ll need glutinous rice flour, a key ingredient in creating the unique texture of snow skin mooncakes.
The filling is a concoction of sweet paste, with popular options being lotus seed paste, [red bean paste](https://www.amazon.com/dp/B08L4SWLCJ?tag=sseats-20), and mung bean paste.
We’ll wrap a lotus paste ball around duck egg yolks, symbolizing the moon, to create the core of the mooncake. Some prefer a custard filling, adding a creamy contrast to the chewy skin.
It’s fascinating how these simple ingredients come together to create such a meaningful and delicious treat. Now, let’s get baking\!
## Sourcing Mooncake Ingredients
We’ll need to find reliable sources for our mooncake ingredients to ensure the quality and authenticity of our homemade treats.
Check out your local Asian market; they’re usually stocked with everything from adzuki beans to black sesame paste.
If you’re having trouble finding a [mooncake mold](https://www.amazon.com/dp/B07W5YX4FP?tag=sseats-20), don’t sweat it. Many online retailers offer a variety of shapes and sizes.
Salted duck egg yolk, lotus seeds, cake flour, coconut oil, and more can be found in these markets or ordered online.
Use a food processor to grind lotus seeds into a fine paste. Mix it with your syrup mixture to create a smooth filling. For the dough, combine cake flour and coconut oil.
Now, let’s get cooking\!
## Preparations Before Baking
Before we pop these mooncakes into the oven, there’s a few crucial steps we must take to ensure they turn out perfect.
First, sift the purpose flour into a [large bowl](https://www.amazon.com/Euro-Ware-3205-Mixing-Quart-Stainless/dp/B00OD7L4ZG?tag=sseats-20&ref_=as_li_ss_tl), ensuring no lumps remain.
Next, prepare the sweet filling. Roll it into small balls and store them in an airtight container to maintain freshness.
To get the perfect shape, place the filling balls on a piece of plastic wrap and gently flatten it with a rolling pin.

Then, wrap the flattened filling in the dough, sealing all edges.
Place the filled dough on a parchment-lined baking sheet.
Just before baking, we’ll use a pastry brush to apply a light egg wash, which gives our mooncakes a lovely sheen.
With these preparations before baking, you’re all set to create perfect mooncakes every time.
## Making Mooncake Dough
Let’s get started on mixing our mooncake dough, the base of this traditional treat. We’ll provide step-by-step photos to make the process more engaging and easier to follow.
Start by gathering your ingredients: you’ll need a clean work surface and a small bowl.
Using a [wooden spoon](https://www.amazon.com/dp/B08CKR1VWQ?tag=sseats-20), combine the ingredients in the small bowl until it forms a smooth dough ball.
It’s important to note that the dough should be handled gently to maintain its texture. Once mixed, transfer the dough onto your work surface.
Divide the dough into equal pieces. Then, shape each piece into a smooth, round ball. This mooncake ball is your canvas for creating a delightful, edible piece of art.
Remember, the dough ball is the heart of your mooncake, so treat it with care.
Enjoy the process\!
## Preparing the Filling
Having nurtured our mooncake dough with care, our attention now shifts to the soul of our mooncakes – the filling.
In preparing the filling, we’re seeking that perfect balance of flavors that defines the perfect mooncake.
For the full recipe, we’ll be using salted egg yolks, providing a rich contrast to the sweet mooncake. To start, we’ll heat a cup sugar in some [vegetable oil](https://www.amazon.com/Amazon-Brand-Happy-Vegetable-Ounces/dp/B07PC8CC3B?tag=sseats-20&ref_=as_li_ss_tl), letting it dissolve.
The next step involves the lye water, also known as alkaline water, which we’ll carefully incorporate.
This key ingredient helps to achieve a golden-brown crust and offsets the sweetness of the filling.
Stay tuned for the next steps as we continue our journey towards creating the perfect mooncake.
## Tips for Perfect Filling
While we’re crafting the perfect filling, it’s crucial we remember a few important tips to ensure our mooncakes turn out just right.
First, we’ll need to cook our filling on medium-low heat. This provides the best results, ensuring our filling is cooked evenly without burning.
Next, we’ll want to wrap the cooked filling in cling wrap and store it in an air-tight container. This keeps it fresh and maintains its daily values.
Before we start filling our mooncakes, we’ll need to preheat the oven to the right oven temperature.
We should also prepare a sheet of [parchment paper](https://www.amazon.com/dp/B09NQGXJ5C?tag=sseats-20) on the baking tray. This will help to create a beautiful pattern on top of the mooncake.
Lastly, remember to have plenty of water on hand to adjust the dough’s consistency.
## Filling Vs Dough Ratio
Often, we’re asked about the ideal filling to dough ratio for mooncakes, and it’s something we can’t ignore.
For first time mooncake makers, we suggest starting with a 1:1.5 dough to filling ratio.
This balance allows the golden brown hue of the baked mooncakes to shine, without overpowering the intricate patterns that make each cake unique.
To achieve this, prepare duck eggs, ensuring that they’re thoroughly mixed with peanut oil under medium heat.
Apply just enough egg wash to create a sheen, but avoid excess egg wash as it can alter the texture.
Store your mooncakes in tight containers to maintain freshness. Remember, family members might’ve different preferences, so feel free to adjust the ratio to suit their tastes.
## Shaping the Mooncakes
After perfecting the dough to filling ratio, we’re now ready to delve into the art of shaping our mooncakes.
The key is to ensure the dough is at room temperature before we start kneading.
A little bit of potassium carbonate will enhance the texture, just as we discovered last year.
The next step is to mold the mooncake using a special press, making sure the filling is completely enclosed in the dough.

This year, we’re introducing an innovative technique that involves chilling the shaped mooncakes for about 15 minutes before baking.
Preheat your oven to 180 degrees C, place the mooncakes on a [wire rack](https://www.amazon.com/dp/B017MWU59Y?tag=sseats-20), and bake until golden.
This will give you the perfect, traditional mooncakes with a creative twist.
## Using a Mooncake Mold
In spite of the complexity, we’ve found that using a mooncake mold isn’t as daunting as it seems.
You’ll find an array of molds online or in Asian markets, ranging from intricate traditional designs to modern, minimalist ones. We recommend starting with a 50g mold, perfect for beginners.
Here’s the magic part: lightly flour your mold to prevent sticking, press your filled mooncake ball into it, and then gently but firmly push down on the plunger to shape it.
In a swift motion, we release the mooncake, revealing the gorgeously embossed design. A tip: oil the mold after each use to keep it in top shape.
## Pre-Baking Procedures
Now that we’ve mastered using the mooncake mold, let’s move on to the important pre-baking procedures.
We’ll start by preheating our oven to the optimal temperature of 180 degrees Celsius. While it’s heating, we’ll brush a light layer of egg wash over our mooncakes.
This simple step gives them that gorgeous golden-brown finish. But remember, too much can cause the mooncakes to crack, so moderation is key\!
Next, we’ll arrange our mooncakes on a [baking tray](https://www.amazon.com/Cookie-Sheet-Baking-Nonstick-Champagne/dp/B09QPQVK37?tag=sseats-20&ref_=as_li_ss_tl) lined with parchment paper. Ensure they’re spaced apart to prevent them from sticking together.
Once our oven signals it’s ready, we’ll pop our tray in and bake. The anticipation builds as we watch our mooncakes transform into golden delights.
And there you have it! Our pre-baking procedures, innovatively simple and effective.
## Baking Temperature and Time
Let’s dive into the specifics of baking temperature and time for our mooncakes.
To ensure a lovely golden-brown sheen, we’ll be baking these at 180°C (356°F). We’ve found this to be the sweet spot – any higher and the mooncakes might burn, any lower and they may not fully cook.
Now, let’s talk timing. We’ll set our timers for 15 minutes initially, then we’ll whip out our mooncakes for a quick egg wash. You’ll love the shiny finish this gives\!
Then, back into the oven they go, for another 10 to 15 minutes. Be vigilant during this time, as ovens can vary.
The result? Perfectly baked mooncakes every time. It’s a bit of an art and a science, but oh-so worth it.
## Post-Baking Procedures
After we’ve baked our mooncakes to perfection, there are a few crucial steps we’ve got to follow to ensure they’re absolutely delectable.
Let’s start by allowing them to cool completely on a wire rack. We don’t want to rush this process, patience is key.
Next up, we’ll coat our mooncakes with a glossy egg wash, which will give them a beautiful shiny finish.
This is a simple yet transformative detail that will take our [mooncakes](https://www.amazon.com/dp/B005HGLKN8?tag=sseats-20) to the next level.
## Mooncake Cooling Process
Once we’ve removed our mooncakes from the oven, it’s crucial to let them rest and cool completely on a wire rack.
This isn’t just a pause in the process, it’s a vital step in ensuring the mooncakes achieve their distinctive texture and flavor.
The cooling allows for the pastry to firm up and the filling to settle. This cooling period also intensifies the flavors within the mooncake, making every bite a delight.
To innovate, place the rack in a well-ventilated area to speed up the cooling. We could even use a fan to hasten the process. But remember, patience is key here.
Only after they’re fully cooled can we package or serve our mooncakes, ensuring they’re at their absolute best. Now, that’s innovation in tradition.
## Storing Your Mooncakes
With our mooncakes completely cooled, the next phase in our mooncake journey is understanding the art of proper storage.
Let’s store these delicacies in an [airtight container](https://www.amazon.com/dp/B08RLL3PLC?tag=sseats-20) to ward off moisture.
Now, here’s a creative twist – we’re not going to dig in right away. Patience, my friends, is key. Leave them at room temperature for about two days.
This ‘resting’ period allows the oil from the filling to seep into the crust, making it softer and enhancing the overall flavor.
After this, if you’re not planning to feast on them immediately, they can be stored in the refrigerator for up to a week.

Remember, mooncakes are like a fine wine; they get better with time.
Enjoy the anticipation\!
## Serving Suggestions for Mooncakes
Now that we’ve patiently awaited our mooncakes’ peak flavor, let’s delve into the delightful world of serving these traditional treats.
Mooncakes are versatile and can be served in several innovative ways. For a chic and modern twist, consider presenting your mooncakes sliced and layered on a bed of fruit compote.
Alternatively, for a more traditional approach, serve them whole, allowing guests to admire their ornate designs before indulging.
A steaming pot of [herbal tea](https://www.amazon.com/dp/B004CIUU6K?tag=sseats-20) or a robust espresso could complement these delicacies perfectly, providing a balance to their rich sweetness.
If you’re aiming for a grand reveal, present them in a beautiful, ornate box as a centerpiece, creating anticipation and excitement.
## Understanding Mooncake Varieties
After enjoying the visual and gustatory delight of our mooncakes, let’s delve into understanding the various types that exist.
Traditionally, mooncakes are categorized by their fillings, which can range from sweet red bean to lotus seed paste, and even savory flavors like ham or egg yolk.
However, modern culinary innovation has ushered in new varieties, appealing to the adventurous taste buds.
We now have mooncakes with unique fillings like matcha, truffle, and even durian, pushing the boundaries of traditional flavors.
The crust, too, can vary, from the classic golden-brown pastry, to the snowy white, mochi-like skin of snow skin mooncakes.
The sheer diversity is testament to the mooncake’s adaptability and enduring appeal.
## Adapting the Recipe
Often, we’ll find ourselves tweaking traditional mooncake recipes to cater to our personal preferences or dietary needs.
It’s about understanding the balance of flavours and textures that make a mooncake enjoyable.
For instance, if you’re vegan, you can easily substitute lard with vegetable shortening in the dough.
You can also create fillings from a range of plant-based ingredients like [nuts](https://www.amazon.com/dp/B01N4KUBBG?tag=sseats-20), seeds, or red bean paste.
Perhaps you’re looking for something low-sugar? Reduce the amount of sweetener in your filling, or opt for natural sweeteners like dates or honey.
For a fun twist, try adding unconventional ingredients like chocolate or [matcha powder](https://www.amazon.com/dp/B08VZ17H3V?tag=sseats-20).
The key is to experiment and adapt, making your mooncake truly yours. Remember, there’s no limit to creativity in the kitchen.
## Mooncake Troubleshooting Tips
So, what do we do if our mooncake doesn’t turn out as expected? No need to panic, we’ve got some innovative solutions.
If your mooncake is too dry, it might be due to insufficient syrup. We recommend adding more in small increments.
On the flip side, if it’s too wet or sticky, lessen the liquid or increase baking time.
For crumbly mooncakes, it’s likely an issue with too much fat. Try reducing the amount next time.
If the shape isn’t holding, it might be a problem with the dough-to-filling ratio. Next time, use less filling or more dough.

And remember, practice makes perfect. Don’t be disheartened. Keep experimenting with ratios and baking times. Soon, you’ll be a mooncake master\!
## Nutritional Information
‘Where does the nutritional value lie in our homemade mooncakes, you might wonder? Well, let’s dive into the delicious details.
Mooncakes are a rich source of carbohydrates, providing you with the energy needed to fuel your day.
The filling, typically made from sweetened red bean or lotus seed paste, is high in fiber, aiding digestion. The egg yolk center, symbolic of the full moon, is packed with protein.
While they’re a sweet treat, mooncakes also contain a fair amount of sugar, so moderation is key.
Nuts and seeds often included in the filling add a crunch along with heart-healthy fats and antioxidants.
## Allergen Information
In making our mooncakes, it’s important for us to consider potential allergens that may be present in the ingredients.
We’re conscious that food allergies are a significant concern for many, which is why we’re detailing this information.
The key ingredients of our mooncakes are flour, golden syrup, lye water, lotus seed paste, melon seeds, and egg yolks.
They contain gluten, found in flour, and potential allergens like eggs and seeds.
For those with nut allergies, it’s crucial to note that while our traditional recipe doesn’t include [nuts](https://www.amazon.com/dp/B07W7ZZJQB?tag=sseats-20), some variations might.
We aim for transparency, ensuring you can enjoy our mooncakes while staying safe.
Always check the ingredient list for every recipe, and when in doubt, consult with a healthcare professional.
Your safety is our priority.
## Vegan Mooncake Alternatives
While we’ve highlighted traditional mooncake ingredients, we can’t forget about our vegan friends who may want to partake in this delicious tradition.
Innovating with plant-based alternatives is more than possible and can be just as tasty.
Instead of lard, try coconut oil for a rich, moist dough. Swap the much egg wash for a glossy [maple syrup](https://www.amazon.com/dp/B074H5CN2X?tag=sseats-20) glaze.
As for the filling, lotus seed paste is already vegan-friendly, but for a creative twist, consider a decadent mix of crushed nuts and dried fruits.
Don’t forget to choose vegan-friendly food colorings for your decorative imprints.
With these substitutions, you’ll craft a mooncake that’s not only vegan, but also a delightful surprise for all your guests. Tradition meets innovation in every bite\!
## Hosting a Mooncake Party
After whipping up some traditional and vegan-friendly mooncakes, we’re all set to throw an unforgettable mooncake party. Let’s create an atmosphere that’s both festive and intimate.
We’ll start with decorations. Think lanterns, table runners adorned with moon and star motifs, and centerpieces featuring fresh flowers.
Our playlist? A blend of traditional Chinese music and contemporary hits, creating a fusion that’s as unique as our mooncakes.
Now, for the food. We’ll serve our mooncakes as the star attraction, complemented by a mix of savory Asian-inspired finger foods.
Don’t forget the tea! A variety of flavors will cater to everyone’s palate.
Lastly, we’ll have interactive stations where guests can try their hand at mooncake making. It’s not just a party, it’s a mooncake experience\!
## Exploring More Mooncake Recipes
Now that we’ve mastered the basics, let’s venture into experimenting with more mooncake recipes to add a twist to our traditional creation.
Why not try a chocolate mooncake or perhaps a matcha-flavored one? Both offer a delightful blend of East meets West.
We could also incorporate fruits like coconut or pineapple, giving our mooncakes a tropical twist.
For those who prefer savory, let’s experiment with fillings like ham, cheese, or even [truffle](https://www.amazon.com/dp/B0C1KPL23J?tag=sseats-20).
The possibilities are endless, and we’re only limited by our creativity.

We can adapt our mooncake recipes to cater to dietary needs too – gluten-free, sugar-free, or vegan versions are certainly possible.
## Final Thoughts
We’ve journeyed through the rich history, importance, and delightful creation of mooncakes. From sourcing ingredients to baking and even hosting a mooncake party, we’ve covered it all.
Crafting mooncakes is a delightful culinary endeavor, and this moon cake recipe provides a satisfying and flavorful result.
The process involves creating a smooth ball of filling, infusing them with the sweetness derived from a carefully measured cup of sugar.
The g mooncake mold becomes the vessel for shaping these delectable treats, ensuring a uniform and visually appealing appearance.
A finishing touch involves brushing the mooncakes with an egg wash, removing excess for a perfect, golden sheen.
This moon cake recipe not only encapsulates the essence of a cherished tradition but also allows for a personalized touch in both flavor and presentation.
Whether shared during festive occasions or savored as a special treat, these mooncakes encapsulate the artistry of homemade delights.
Remember, there’s always room for creativity in the kitchen, even with traditional recipes. So, whether you’re making these for a festival or just a fun treat, enjoy the process.
Don’t forget to check out more mooncake recipes and vegan alternatives. Happy mooncake making\!
## How to Make Traditional Moon Cake Recipe

Mooncakes are more than just a treat; they're a symbol of reunion and togetherness.
**Prep Time** 20 minutes
**Cook Time** 30 minutes
**Total Time** 50 minutes
### Ingredients
- Glutinous rice flour
- Lotus seed paste, red bean paste, or mung bean paste
- Lotus paste ball
- Duck egg yolks
- Vegetable oil
- Sugar
### Instructions
#### **Preparations Before Baking**
Before we pop these mooncakes into the oven, there's a few crucial steps we must take to ensure they turn out perfect.
First, sift the purpose flour into a [large bowl](https://amzn.to/3R7f5R9), ensuring no lumps remain.
Next, prepare the sweet filling. Roll it into small balls and store them in an airtight container to maintain freshness.
To get the perfect shape, place a filling ball on a piece of plastic wrap and gently flatten it with a rolling pin.
Then, wrap the flattened filling in the dough, sealing all edges.
Place the filled dough on a parchment-lined baking sheet.
Just before baking, we'll use a pastry brush to apply a light egg wash, which gives our mooncakes a lovely sheen.
With these preparations before baking, you're all set to create perfect mooncakes every time.
#### Making Mooncake Dough
Let's get started on mixing our mooncake dough, the base of this traditional treat. We'll provide step-by-step photos to make the process more engaging and easier to follow.
Start by gathering your ingredients: you'll need a clean work surface and a small bowl.
Using a [wooden spoon](https://amzn.to/3MTXWb3), combine the ingredients in the small bowl until it forms a smooth dough ball.
It's important to note that the dough should be handled gently to maintain its texture. Once mixed, transfer the dough onto your work surface.
Divide the dough into equal pieces. Then, shape each piece into a smooth, round ball. This mooncake ball is your canvas for creating a delightful, edible piece of art.
Remember, the dough ball is the heart of your mooncake, so treat it with care.
#### Preparing the Filling
Having nurtured our mooncake dough with care, our attention now shifts to the soul of our mooncakes – the filling.
In preparing the filling, we're seeking that perfect balance of flavors that defines the perfect mooncake.
For the full recipe, we'll be using salted egg yolks, providing a rich contrast to the sweet mooncake. To start, we'll heat a cup of sugar in some [vegetable oil](https://amzn.to/3G9VDwS), letting it dissolve.
The next step involves the lye water, also known as alkaline water, which we'll carefully incorporate.
This key ingredient helps to achieve a golden-brown crust and offsets the sweetness of the filling.
Stay tuned for the next steps as we continue our journey towards creating the perfect mooncake.
#### **Shaping the Mooncakes**
After perfecting the dough to filling ratio, we're now ready to delve into the art of shaping our mooncakes.
The key is to ensure the dough is at room temperature before we start kneading.
A little bit of potassium carbonate will enhance the texture, just as we discovered last year.
The next step is to mold the mooncake using a special press, making sure the filling is completely enclosed in the dough.
#### Baking and Time
To ensure a lovely golden-brown sheen, we'll be baking these at 180°C (356°F). We've found this to be the sweet spot - any higher and the mooncakes might burn, any lower and they may not fully cook.
Now, let's talk timing. We'll set our timers for 15 minutes initially, then we'll whip out our mooncakes for a quick egg wash. You'll love the shiny finish this gives\!
Then, back into the oven they go, for another 10 to 15 minutes. Be vigilant during this time, as ovens can vary.
#### **Mooncake Cooling Process**
Once we've removed our mooncakes from the oven, it's crucial to let them rest and cool completely on a wire rack.
This isn't just a pause in the process, it's a vital step in ensuring the mooncakes achieve their distinctive texture and flavor.
The cooling allows for the pastry to firm up and the filling to settle. This cooling period also intensifies the flavors within the mooncake, making every bite a delight.
To innovate, place the rack in a well-ventilated area to speed up the cooling. We could even use a fan to hasten the process. But remember, patience is key here.
Only after they're fully cooled can we package or serve our mooncakes, ensuring they're at their absolute best. Now, that's innovation in tradition.
© Sarah Scoop
**Category:** Desserts

**Get the scoop on more like this:**
- [Classic Pecan Butterball Cookies Recipe](https://sarahscoopeats.com/classic-pecan-butterball-cookies-recipe/)
- [Pistachio Macarons Recipe With White Buttercream](https://sarahscoopeats.com/pistachio-macarons-recipe-with-white-buttercream/)
- [Easy to Make Coffee Brownies Recipe With Espresso](https://sarahscoopeats.com/easy-to-make-coffee-brownies-recipe-with-espresso/)
- [How To Use Nespresso Milk Frother: Step-By-Step Guide](https://sarahscoopeats.com/how-to-use-nespresso-milk-frother/)

**[Sarah Scoop](https://sarahscoopeats.com/author/sarahscoop/ "Posts by Sarah Scoop")**
## Post navigation
[PreviousClassic Pecan Butterball Cookies Recipe](https://sarahscoopeats.com/classic-pecan-butterball-cookies-recipe/)
[NextMake Iced Coffee Slushie Recipe \| Just 3 Ingredients](https://sarahscoopeats.com/coffee-slushie-recipe/)
## Similar Posts
[](https://sarahscoopeats.com/3-ingredient-pumpkin-fluff/)
[Desserts](https://sarahscoopeats.com/category/recipes/desserts/) \| [Holiday Recipes](https://sarahscoopeats.com/category/holiday-recipes/) \| [No Bake](https://sarahscoopeats.com/category/cooking/no-bake/) \| [Recipes](https://sarahscoopeats.com/category/recipes/)
### [Easy 3 Ingredient Pumpkin Fluff \| Pie Dip Recipe](https://sarahscoopeats.com/3-ingredient-pumpkin-fluff/)
[](https://sarahscoopeats.com/what-to-serve-with-tea/)
[Desserts](https://sarahscoopeats.com/category/recipes/desserts/) \| [Side Dishes](https://sarahscoopeats.com/category/side-dishes/) \| [What To Serve](https://sarahscoopeats.com/category/side-dishes/what-to-serve/)
### [What to Serve with Tea: 25+ Tea Party Food Ideas for Afternoon Tea](https://sarahscoopeats.com/what-to-serve-with-tea/)
[](https://sarahscoopeats.com/dunkin-refresher-recipe/)
[Drinks](https://sarahscoopeats.com/category/drinks/) \| [Recipes](https://sarahscoopeats.com/category/recipes/)
### [How To Make Copycat Dunkin Refresher Recipe](https://sarahscoopeats.com/dunkin-refresher-recipe/)
[](https://sarahscoopeats.com/15-energizing-snack-ideas-for-hiking-adventures/)
[Snacks](https://sarahscoopeats.com/category/recipes/snacks/)
### [15 Energizing Snack Ideas for Hiking Adventures](https://sarahscoopeats.com/15-energizing-snack-ideas-for-hiking-adventures/)
[](https://sarahscoopeats.com/pineapple-chicken-and-rice/)
[Cooking](https://sarahscoopeats.com/category/cooking/) \| [Dinner](https://sarahscoopeats.com/category/recipes/dinner/) \| [Recipes](https://sarahscoopeats.com/category/recipes/)
### [Pineapple Chicken and Rice Recipe](https://sarahscoopeats.com/pineapple-chicken-and-rice/)
[](https://sarahscoopeats.com/yerba-mate-latte-recipe/)
[Coffee](https://sarahscoopeats.com/category/drinks/coffee/) \| [Drinks](https://sarahscoopeats.com/category/drinks/) \| [Fun](https://sarahscoopeats.com/category/fun/) \| [Recipes](https://sarahscoopeats.com/category/recipes/)
### [Yerba Mate Latte Recipe](https://sarahscoopeats.com/yerba-mate-latte-recipe/)
### Leave a Reply [Cancel reply](https://sarahscoopeats.com/easy-mooncakes-how-to-make-traditional-moon-cake-recipe/#respond)

### Meet sarah
Welcome to SarahScoopEats - Get the scoop on all things food and fun recipes\!
***
#### Other Reader Favs
- [](https://sarahscoopeats.com/halloween-breadstick-bones-recipe/)
## [Halloween Breadstick Bones Recipe](https://sarahscoopeats.com/halloween-breadstick-bones-recipe/)
- [](https://sarahscoopeats.com/best-condiments-for-breakfast-sandwiches/)
## [25 Best Condiments for Breakfast Sandwiches](https://sarahscoopeats.com/best-condiments-for-breakfast-sandwiches/)
- [](https://sarahscoopeats.com/can-you-put-a-yeti-in-the-freezer/)
## [Can You Put A Yeti In The Freezer: Ice Tumbler](https://sarahscoopeats.com/can-you-put-a-yeti-in-the-freezer/)
- [](https://sarahscoopeats.com/can-you-put-wine-bottles-in-the-oven/)
## [Can You Put Wine Bottles In The Oven: How To Sterilize](https://sarahscoopeats.com/can-you-put-wine-bottles-in-the-oven/)
Check Out Our Other Sites

- [Contact](https://sarahscoopeats.com/contact/)
- [About](https://sarahscoopeats.com/about/)
- [Privacy Policy](https://sarahscoopeats.com/privacy-policy/)
© 2026 Sarah Scoop EATS • [Sarah Scoop, LLC](https://sarahscoop.com/)
[Skip to Recipe](https://sarahscoopeats.com/easy-mooncakes-how-to-make-traditional-moon-cake-recipe/#mv-creation-133)
- [Recipes](https://sarahscoopeats.com/category/recipes/)
Toggle child menu
- [Breakfast](https://sarahscoopeats.com/category/recipes/breakfast/)
- [Lunch](https://sarahscoopeats.com/category/recipes/lunch/)
- [Dinner](https://sarahscoopeats.com/category/recipes/dinner/)
- [Snacks](https://sarahscoopeats.com/category/recipes/snacks/)
- [Desserts](https://sarahscoopeats.com/category/recipes/desserts/)
- [Holiday Recipes](https://sarahscoopeats.com/category/holiday-recipes/)
Toggle child menu
- [Halloween](https://sarahscoopeats.com/category/holiday-recipes/halloween/)
- [Thanksgiving](https://sarahscoopeats.com/category/holiday-recipes/thanksgiving/)
- [Christmas](https://sarahscoopeats.com/category/holiday-recipes/christmas/)
- [Drinks](https://sarahscoopeats.com/category/drinks/)
Toggle child menu
- [Coffee](https://sarahscoopeats.com/category/drinks/coffee/)
- [Cocktails](https://sarahscoopeats.com/category/drinks/cocktails/)
- [Wine](https://sarahscoopeats.com/category/drinks/wine/)
- [Cooking](https://sarahscoopeats.com/category/cooking/)
Toggle child menu
- [Airfryer](https://sarahscoopeats.com/category/cooking/airfryer/)
- [Crock Pot](https://sarahscoopeats.com/category/cooking/crock-pot/)
- [Instant Pot](https://sarahscoopeats.com/category/cooking/instant-pot/)
- [No Bake](https://sarahscoopeats.com/category/cooking/no-bake/)
- [Tips & More](https://sarahscoopeats.com/category/tips/)
Toggle child menu
- [How To](https://sarahscoopeats.com/category/tips/how-to/)
- [Substitutes](https://sarahscoopeats.com/category/tips/substitutes/)
- [What To Serve](https://sarahscoopeats.com/category/side-dishes/what-to-serve/)
- [Q & A](https://sarahscoopeats.com/category/tips/q-a/) |
| Readable Markdown | We’re thrilled to share our favorite traditional moon cake recipe with you! Mooncakes are more than just a treat; they’re a symbol of reunion and togetherness.

We’ve simplified the process without compromising the taste and significance.
Whether you’re a seasoned baker or a newbie, we’ll guide you through the journey of making your very own mooncakes.
Let’s dive into the rich culture of mooncakes, find the perfect ingredients, and start baking\!
This is where tradition meets innovation.
## Understanding Mooncake Origins
Before we dive into the recipe, let’s explore the rich cultural tapestry that’s the origin of mooncakes.
Mooncakes, or traditional Chinese mooncakes, are an integral part of the Mid-Autumn Festival, an event that celebrates the full moon’s beauty and family togetherness.
Mooncakes have been shared for centuries during this mooncake festival, their round shape symbolizing unity and completeness.
But, why buy when we can create our own mooncakes? Our homemade mooncakes recipe will enable you to craft these traditional treats with a modern twist.
As we delve deeper, we’ll introduce you to the art of making the perfect mooncake dough, filling and the intricate designs on moon cakes.
## Importance of Mooncakes
Stepping away from the historical background, let’s delve into why we place such importance on [mooncakes](https://www.amazon.com/dp/B0928DZC54?tag=sseats-20) in our festivities.
For Chinese people, particularly in Hong Kong, the traditional Cantonese mooncake holds a significant place in our hearts and our celebration.
This isn’t just about a mooncake recipe. It’s about preserving our heritage, our traditions.
It’s about the variety of fillings that bring us back to our childhood, the making of our own golden syrup that adds a touch of home, a flavor of nostalgia.
Store-bought versions just can’t replicate that. That’s why we encourage making easy mooncakes at home.
Sure, you can get them from a Chinese grocery store, but the importance of mooncakes goes beyond convenience. It’s about culture, it’s about family, it’s about love.
## Essential Mooncake Ingredients
After understanding the cultural significance of mooncakes, it’s time we delve into the essential ingredients we’ll need to start baking these traditional treats at home.
For the mooncake skin, we’ll need glutinous rice flour, a key ingredient in creating the unique texture of snow skin mooncakes.
The filling is a concoction of sweet paste, with popular options being lotus seed paste, [red bean paste](https://www.amazon.com/dp/B08L4SWLCJ?tag=sseats-20), and mung bean paste.
We’ll wrap a lotus paste ball around duck egg yolks, symbolizing the moon, to create the core of the mooncake. Some prefer a custard filling, adding a creamy contrast to the chewy skin.
It’s fascinating how these simple ingredients come together to create such a meaningful and delicious treat. Now, let’s get baking\!
## Sourcing Mooncake Ingredients
We’ll need to find reliable sources for our mooncake ingredients to ensure the quality and authenticity of our homemade treats.
Check out your local Asian market; they’re usually stocked with everything from adzuki beans to black sesame paste.
If you’re having trouble finding a [mooncake mold](https://www.amazon.com/dp/B07W5YX4FP?tag=sseats-20), don’t sweat it. Many online retailers offer a variety of shapes and sizes.
Salted duck egg yolk, lotus seeds, cake flour, coconut oil, and more can be found in these markets or ordered online.
Use a food processor to grind lotus seeds into a fine paste. Mix it with your syrup mixture to create a smooth filling. For the dough, combine cake flour and coconut oil.
Now, let’s get cooking\!
## Preparations Before Baking
Before we pop these mooncakes into the oven, there’s a few crucial steps we must take to ensure they turn out perfect.
First, sift the purpose flour into a [large bowl](https://www.amazon.com/Euro-Ware-3205-Mixing-Quart-Stainless/dp/B00OD7L4ZG?tag=sseats-20&ref_=as_li_ss_tl), ensuring no lumps remain.
Next, prepare the sweet filling. Roll it into small balls and store them in an airtight container to maintain freshness.
To get the perfect shape, place the filling balls on a piece of plastic wrap and gently flatten it with a rolling pin.

Then, wrap the flattened filling in the dough, sealing all edges.
Place the filled dough on a parchment-lined baking sheet.
Just before baking, we’ll use a pastry brush to apply a light egg wash, which gives our mooncakes a lovely sheen.
With these preparations before baking, you’re all set to create perfect mooncakes every time.
## Making Mooncake Dough
Let’s get started on mixing our mooncake dough, the base of this traditional treat. We’ll provide step-by-step photos to make the process more engaging and easier to follow.
Start by gathering your ingredients: you’ll need a clean work surface and a small bowl.
Using a [wooden spoon](https://www.amazon.com/dp/B08CKR1VWQ?tag=sseats-20), combine the ingredients in the small bowl until it forms a smooth dough ball.
It’s important to note that the dough should be handled gently to maintain its texture. Once mixed, transfer the dough onto your work surface.
Divide the dough into equal pieces. Then, shape each piece into a smooth, round ball. This mooncake ball is your canvas for creating a delightful, edible piece of art.
Remember, the dough ball is the heart of your mooncake, so treat it with care.
Enjoy the process\!
## Preparing the Filling
Having nurtured our mooncake dough with care, our attention now shifts to the soul of our mooncakes – the filling.
In preparing the filling, we’re seeking that perfect balance of flavors that defines the perfect mooncake.
For the full recipe, we’ll be using salted egg yolks, providing a rich contrast to the sweet mooncake. To start, we’ll heat a cup sugar in some [vegetable oil](https://www.amazon.com/Amazon-Brand-Happy-Vegetable-Ounces/dp/B07PC8CC3B?tag=sseats-20&ref_=as_li_ss_tl), letting it dissolve.
The next step involves the lye water, also known as alkaline water, which we’ll carefully incorporate.
This key ingredient helps to achieve a golden-brown crust and offsets the sweetness of the filling.
Stay tuned for the next steps as we continue our journey towards creating the perfect mooncake.
## Tips for Perfect Filling
While we’re crafting the perfect filling, it’s crucial we remember a few important tips to ensure our mooncakes turn out just right.
First, we’ll need to cook our filling on medium-low heat. This provides the best results, ensuring our filling is cooked evenly without burning.
Next, we’ll want to wrap the cooked filling in cling wrap and store it in an air-tight container. This keeps it fresh and maintains its daily values.
Before we start filling our mooncakes, we’ll need to preheat the oven to the right oven temperature.
We should also prepare a sheet of [parchment paper](https://www.amazon.com/dp/B09NQGXJ5C?tag=sseats-20) on the baking tray. This will help to create a beautiful pattern on top of the mooncake.
Lastly, remember to have plenty of water on hand to adjust the dough’s consistency.
## Filling Vs Dough Ratio
Often, we’re asked about the ideal filling to dough ratio for mooncakes, and it’s something we can’t ignore.
For first time mooncake makers, we suggest starting with a 1:1.5 dough to filling ratio.
This balance allows the golden brown hue of the baked mooncakes to shine, without overpowering the intricate patterns that make each cake unique.
To achieve this, prepare duck eggs, ensuring that they’re thoroughly mixed with peanut oil under medium heat.
Apply just enough egg wash to create a sheen, but avoid excess egg wash as it can alter the texture.
Store your mooncakes in tight containers to maintain freshness. Remember, family members might’ve different preferences, so feel free to adjust the ratio to suit their tastes.
## Shaping the Mooncakes
After perfecting the dough to filling ratio, we’re now ready to delve into the art of shaping our mooncakes.
The key is to ensure the dough is at room temperature before we start kneading.
A little bit of potassium carbonate will enhance the texture, just as we discovered last year.
The next step is to mold the mooncake using a special press, making sure the filling is completely enclosed in the dough.

This year, we’re introducing an innovative technique that involves chilling the shaped mooncakes for about 15 minutes before baking.
Preheat your oven to 180 degrees C, place the mooncakes on a [wire rack](https://www.amazon.com/dp/B017MWU59Y?tag=sseats-20), and bake until golden.
This will give you the perfect, traditional mooncakes with a creative twist.
## Using a Mooncake Mold
In spite of the complexity, we’ve found that using a mooncake mold isn’t as daunting as it seems.
You’ll find an array of molds online or in Asian markets, ranging from intricate traditional designs to modern, minimalist ones. We recommend starting with a 50g mold, perfect for beginners.
Here’s the magic part: lightly flour your mold to prevent sticking, press your filled mooncake ball into it, and then gently but firmly push down on the plunger to shape it.
In a swift motion, we release the mooncake, revealing the gorgeously embossed design. A tip: oil the mold after each use to keep it in top shape.
## Pre-Baking Procedures
Now that we’ve mastered using the mooncake mold, let’s move on to the important pre-baking procedures.
We’ll start by preheating our oven to the optimal temperature of 180 degrees Celsius. While it’s heating, we’ll brush a light layer of egg wash over our mooncakes.
This simple step gives them that gorgeous golden-brown finish. But remember, too much can cause the mooncakes to crack, so moderation is key\!
Next, we’ll arrange our mooncakes on a [baking tray](https://www.amazon.com/Cookie-Sheet-Baking-Nonstick-Champagne/dp/B09QPQVK37?tag=sseats-20&ref_=as_li_ss_tl) lined with parchment paper. Ensure they’re spaced apart to prevent them from sticking together.
Once our oven signals it’s ready, we’ll pop our tray in and bake. The anticipation builds as we watch our mooncakes transform into golden delights.
And there you have it! Our pre-baking procedures, innovatively simple and effective.
## Baking Temperature and Time
Let’s dive into the specifics of baking temperature and time for our mooncakes.
To ensure a lovely golden-brown sheen, we’ll be baking these at 180°C (356°F). We’ve found this to be the sweet spot – any higher and the mooncakes might burn, any lower and they may not fully cook.
Now, let’s talk timing. We’ll set our timers for 15 minutes initially, then we’ll whip out our mooncakes for a quick egg wash. You’ll love the shiny finish this gives\!
Then, back into the oven they go, for another 10 to 15 minutes. Be vigilant during this time, as ovens can vary.
The result? Perfectly baked mooncakes every time. It’s a bit of an art and a science, but oh-so worth it.
## Post-Baking Procedures
After we’ve baked our mooncakes to perfection, there are a few crucial steps we’ve got to follow to ensure they’re absolutely delectable.
Let’s start by allowing them to cool completely on a wire rack. We don’t want to rush this process, patience is key.
Next up, we’ll coat our mooncakes with a glossy egg wash, which will give them a beautiful shiny finish.
This is a simple yet transformative detail that will take our [mooncakes](https://www.amazon.com/dp/B005HGLKN8?tag=sseats-20) to the next level.
## Mooncake Cooling Process
Once we’ve removed our mooncakes from the oven, it’s crucial to let them rest and cool completely on a wire rack.
This isn’t just a pause in the process, it’s a vital step in ensuring the mooncakes achieve their distinctive texture and flavor.
The cooling allows for the pastry to firm up and the filling to settle. This cooling period also intensifies the flavors within the mooncake, making every bite a delight.
To innovate, place the rack in a well-ventilated area to speed up the cooling. We could even use a fan to hasten the process. But remember, patience is key here.
Only after they’re fully cooled can we package or serve our mooncakes, ensuring they’re at their absolute best. Now, that’s innovation in tradition.
## Storing Your Mooncakes
With our mooncakes completely cooled, the next phase in our mooncake journey is understanding the art of proper storage.
Let’s store these delicacies in an [airtight container](https://www.amazon.com/dp/B08RLL3PLC?tag=sseats-20) to ward off moisture.
Now, here’s a creative twist – we’re not going to dig in right away. Patience, my friends, is key. Leave them at room temperature for about two days.
This ‘resting’ period allows the oil from the filling to seep into the crust, making it softer and enhancing the overall flavor.
After this, if you’re not planning to feast on them immediately, they can be stored in the refrigerator for up to a week.

Remember, mooncakes are like a fine wine; they get better with time.
Enjoy the anticipation\!
## Serving Suggestions for Mooncakes
Now that we’ve patiently awaited our mooncakes’ peak flavor, let’s delve into the delightful world of serving these traditional treats.
Mooncakes are versatile and can be served in several innovative ways. For a chic and modern twist, consider presenting your mooncakes sliced and layered on a bed of fruit compote.
Alternatively, for a more traditional approach, serve them whole, allowing guests to admire their ornate designs before indulging.
A steaming pot of [herbal tea](https://www.amazon.com/dp/B004CIUU6K?tag=sseats-20) or a robust espresso could complement these delicacies perfectly, providing a balance to their rich sweetness.
If you’re aiming for a grand reveal, present them in a beautiful, ornate box as a centerpiece, creating anticipation and excitement.
## Understanding Mooncake Varieties
After enjoying the visual and gustatory delight of our mooncakes, let’s delve into understanding the various types that exist.
Traditionally, mooncakes are categorized by their fillings, which can range from sweet red bean to lotus seed paste, and even savory flavors like ham or egg yolk.
However, modern culinary innovation has ushered in new varieties, appealing to the adventurous taste buds.
We now have mooncakes with unique fillings like matcha, truffle, and even durian, pushing the boundaries of traditional flavors.
The crust, too, can vary, from the classic golden-brown pastry, to the snowy white, mochi-like skin of snow skin mooncakes.
The sheer diversity is testament to the mooncake’s adaptability and enduring appeal.
## Adapting the Recipe
Often, we’ll find ourselves tweaking traditional mooncake recipes to cater to our personal preferences or dietary needs.
It’s about understanding the balance of flavours and textures that make a mooncake enjoyable.
For instance, if you’re vegan, you can easily substitute lard with vegetable shortening in the dough.
You can also create fillings from a range of plant-based ingredients like [nuts](https://www.amazon.com/dp/B01N4KUBBG?tag=sseats-20), seeds, or red bean paste.
Perhaps you’re looking for something low-sugar? Reduce the amount of sweetener in your filling, or opt for natural sweeteners like dates or honey.
For a fun twist, try adding unconventional ingredients like chocolate or [matcha powder](https://www.amazon.com/dp/B08VZ17H3V?tag=sseats-20).
The key is to experiment and adapt, making your mooncake truly yours. Remember, there’s no limit to creativity in the kitchen.
## Mooncake Troubleshooting Tips
So, what do we do if our mooncake doesn’t turn out as expected? No need to panic, we’ve got some innovative solutions.
If your mooncake is too dry, it might be due to insufficient syrup. We recommend adding more in small increments.
On the flip side, if it’s too wet or sticky, lessen the liquid or increase baking time.
For crumbly mooncakes, it’s likely an issue with too much fat. Try reducing the amount next time.
If the shape isn’t holding, it might be a problem with the dough-to-filling ratio. Next time, use less filling or more dough.

And remember, practice makes perfect. Don’t be disheartened. Keep experimenting with ratios and baking times. Soon, you’ll be a mooncake master\!
## Nutritional Information
‘Where does the nutritional value lie in our homemade mooncakes, you might wonder? Well, let’s dive into the delicious details.
Mooncakes are a rich source of carbohydrates, providing you with the energy needed to fuel your day.
The filling, typically made from sweetened red bean or lotus seed paste, is high in fiber, aiding digestion. The egg yolk center, symbolic of the full moon, is packed with protein.
While they’re a sweet treat, mooncakes also contain a fair amount of sugar, so moderation is key.
Nuts and seeds often included in the filling add a crunch along with heart-healthy fats and antioxidants.
## Allergen Information
In making our mooncakes, it’s important for us to consider potential allergens that may be present in the ingredients.
We’re conscious that food allergies are a significant concern for many, which is why we’re detailing this information.
The key ingredients of our mooncakes are flour, golden syrup, lye water, lotus seed paste, melon seeds, and egg yolks.
They contain gluten, found in flour, and potential allergens like eggs and seeds.
For those with nut allergies, it’s crucial to note that while our traditional recipe doesn’t include [nuts](https://www.amazon.com/dp/B07W7ZZJQB?tag=sseats-20), some variations might.
We aim for transparency, ensuring you can enjoy our mooncakes while staying safe.
Always check the ingredient list for every recipe, and when in doubt, consult with a healthcare professional.
Your safety is our priority.
## Vegan Mooncake Alternatives
While we’ve highlighted traditional mooncake ingredients, we can’t forget about our vegan friends who may want to partake in this delicious tradition.
Innovating with plant-based alternatives is more than possible and can be just as tasty.
Instead of lard, try coconut oil for a rich, moist dough. Swap the much egg wash for a glossy [maple syrup](https://www.amazon.com/dp/B074H5CN2X?tag=sseats-20) glaze.
As for the filling, lotus seed paste is already vegan-friendly, but for a creative twist, consider a decadent mix of crushed nuts and dried fruits.
Don’t forget to choose vegan-friendly food colorings for your decorative imprints.
With these substitutions, you’ll craft a mooncake that’s not only vegan, but also a delightful surprise for all your guests. Tradition meets innovation in every bite\!
## Hosting a Mooncake Party
After whipping up some traditional and vegan-friendly mooncakes, we’re all set to throw an unforgettable mooncake party. Let’s create an atmosphere that’s both festive and intimate.
We’ll start with decorations. Think lanterns, table runners adorned with moon and star motifs, and centerpieces featuring fresh flowers.
Our playlist? A blend of traditional Chinese music and contemporary hits, creating a fusion that’s as unique as our mooncakes.
Now, for the food. We’ll serve our mooncakes as the star attraction, complemented by a mix of savory Asian-inspired finger foods.
Don’t forget the tea! A variety of flavors will cater to everyone’s palate.
Lastly, we’ll have interactive stations where guests can try their hand at mooncake making. It’s not just a party, it’s a mooncake experience\!
## Exploring More Mooncake Recipes
Now that we’ve mastered the basics, let’s venture into experimenting with more mooncake recipes to add a twist to our traditional creation.
Why not try a chocolate mooncake or perhaps a matcha-flavored one? Both offer a delightful blend of East meets West.
We could also incorporate fruits like coconut or pineapple, giving our mooncakes a tropical twist.
For those who prefer savory, let’s experiment with fillings like ham, cheese, or even [truffle](https://www.amazon.com/dp/B0C1KPL23J?tag=sseats-20).
The possibilities are endless, and we’re only limited by our creativity.

We can adapt our mooncake recipes to cater to dietary needs too – gluten-free, sugar-free, or vegan versions are certainly possible.
## Final Thoughts
We’ve journeyed through the rich history, importance, and delightful creation of mooncakes. From sourcing ingredients to baking and even hosting a mooncake party, we’ve covered it all.
Crafting mooncakes is a delightful culinary endeavor, and this moon cake recipe provides a satisfying and flavorful result.
The process involves creating a smooth ball of filling, infusing them with the sweetness derived from a carefully measured cup of sugar.
The g mooncake mold becomes the vessel for shaping these delectable treats, ensuring a uniform and visually appealing appearance.
A finishing touch involves brushing the mooncakes with an egg wash, removing excess for a perfect, golden sheen.
This moon cake recipe not only encapsulates the essence of a cherished tradition but also allows for a personalized touch in both flavor and presentation.
Whether shared during festive occasions or savored as a special treat, these mooncakes encapsulate the artistry of homemade delights.
Remember, there’s always room for creativity in the kitchen, even with traditional recipes. So, whether you’re making these for a festival or just a fun treat, enjoy the process.
Don’t forget to check out more mooncake recipes and vegan alternatives. Happy mooncake making\!
**Prep Time** 20 minutes
**Cook Time** 30 minutes
**Total Time** 50 minutes
### Ingredients
- Glutinous rice flour
- Lotus seed paste, red bean paste, or mung bean paste
- Lotus paste ball
- Duck egg yolks
- Vegetable oil
- Sugar
### Instructions
#### **Preparations Before Baking**
Before we pop these mooncakes into the oven, there's a few crucial steps we must take to ensure they turn out perfect.
First, sift the purpose flour into a [large bowl](https://amzn.to/3R7f5R9), ensuring no lumps remain.
Next, prepare the sweet filling. Roll it into small balls and store them in an airtight container to maintain freshness.
To get the perfect shape, place a filling ball on a piece of plastic wrap and gently flatten it with a rolling pin.
Then, wrap the flattened filling in the dough, sealing all edges.
Place the filled dough on a parchment-lined baking sheet.
Just before baking, we'll use a pastry brush to apply a light egg wash, which gives our mooncakes a lovely sheen.
With these preparations before baking, you're all set to create perfect mooncakes every time.
#### Making Mooncake Dough
Let's get started on mixing our mooncake dough, the base of this traditional treat. We'll provide step-by-step photos to make the process more engaging and easier to follow.
Start by gathering your ingredients: you'll need a clean work surface and a small bowl.
Using a [wooden spoon](https://amzn.to/3MTXWb3), combine the ingredients in the small bowl until it forms a smooth dough ball.
It's important to note that the dough should be handled gently to maintain its texture. Once mixed, transfer the dough onto your work surface.
Divide the dough into equal pieces. Then, shape each piece into a smooth, round ball. This mooncake ball is your canvas for creating a delightful, edible piece of art.
Remember, the dough ball is the heart of your mooncake, so treat it with care.
#### Preparing the Filling
Having nurtured our mooncake dough with care, our attention now shifts to the soul of our mooncakes – the filling.
In preparing the filling, we're seeking that perfect balance of flavors that defines the perfect mooncake.
For the full recipe, we'll be using salted egg yolks, providing a rich contrast to the sweet mooncake. To start, we'll heat a cup of sugar in some [vegetable oil](https://amzn.to/3G9VDwS), letting it dissolve.
The next step involves the lye water, also known as alkaline water, which we'll carefully incorporate.
This key ingredient helps to achieve a golden-brown crust and offsets the sweetness of the filling.
Stay tuned for the next steps as we continue our journey towards creating the perfect mooncake.
#### **Shaping the Mooncakes**
After perfecting the dough to filling ratio, we're now ready to delve into the art of shaping our mooncakes.
The key is to ensure the dough is at room temperature before we start kneading.
A little bit of potassium carbonate will enhance the texture, just as we discovered last year.
The next step is to mold the mooncake using a special press, making sure the filling is completely enclosed in the dough.
#### Baking and Time
To ensure a lovely golden-brown sheen, we'll be baking these at 180°C (356°F). We've found this to be the sweet spot - any higher and the mooncakes might burn, any lower and they may not fully cook.
Now, let's talk timing. We'll set our timers for 15 minutes initially, then we'll whip out our mooncakes for a quick egg wash. You'll love the shiny finish this gives\!
Then, back into the oven they go, for another 10 to 15 minutes. Be vigilant during this time, as ovens can vary.
#### **Mooncake Cooling Process**
Once we've removed our mooncakes from the oven, it's crucial to let them rest and cool completely on a wire rack.
This isn't just a pause in the process, it's a vital step in ensuring the mooncakes achieve their distinctive texture and flavor.
The cooling allows for the pastry to firm up and the filling to settle. This cooling period also intensifies the flavors within the mooncake, making every bite a delight.
To innovate, place the rack in a well-ventilated area to speed up the cooling. We could even use a fan to hasten the process. But remember, patience is key here.
Only after they're fully cooled can we package or serve our mooncakes, ensuring they're at their absolute best. Now, that's innovation in tradition.
**Get the scoop on more like this:**
- [Classic Pecan Butterball Cookies Recipe](https://sarahscoopeats.com/classic-pecan-butterball-cookies-recipe/)
- [Pistachio Macarons Recipe With White Buttercream](https://sarahscoopeats.com/pistachio-macarons-recipe-with-white-buttercream/)
- [Easy to Make Coffee Brownies Recipe With Espresso](https://sarahscoopeats.com/easy-to-make-coffee-brownies-recipe-with-espresso/)
- [How To Use Nespresso Milk Frother: Step-By-Step Guide](https://sarahscoopeats.com/how-to-use-nespresso-milk-frother/) |
| ML Classification | |
| ML Categories | null |
| ML Page Types | null |
| ML Intent Types | null |
| Content Metadata | |
| Language | en-us |
| Author | Sarah Scoop |
| Publish Time | 2023-11-20 21:53:46 (2 years ago) |
| Original Publish Time | 2023-11-20 21:53:46 (2 years ago) |
| Republished | No |
| Word Count (Total) | 4,454 |
| Word Count (Content) | 4,054 |
| Links | |
| External Links | 24 |
| Internal Links | 55 |
| Technical SEO | |
| Meta Nofollow | No |
| Meta Noarchive | No |
| JS Rendered | No |
| Redirect Target | null |
| Performance | |
| Download Time (ms) | 1,048 |
| TTFB (ms) | 1,042 |
| Download Size (bytes) | 44,658 |
| Shard | 125 (laksa) |
| Root Hash | 5895588873071303525 |
| Unparsed URL | com,sarahscoopeats!/easy-mooncakes-how-to-make-traditional-moon-cake-recipe/ s443 |