ℹ️ Skipped - page is already crawled
| Filter | Status | Condition | Details |
|---|---|---|---|
| HTTP status | PASS | download_http_code = 200 | HTTP 200 |
| Age cutoff | PASS | download_stamp > now() - 6 MONTH | 0.5 months ago |
| History drop | PASS | isNull(history_drop_reason) | No drop reason |
| Spam/ban | PASS | fh_dont_index != 1 AND ml_spam_score = 0 | ml_spam_score=0 |
| Canonical | PASS | meta_canonical IS NULL OR = '' OR = src_unparsed | Not set |
| Property | Value |
|---|---|
| URL | https://applianceexpresstx.com/refrigerator-repair/how-to-clean-a-refrigerator-properly/ |
| Last Crawled | 2026-04-10 22:46:14 (13 days ago) |
| First Indexed | 2022-08-10 21:42:46 (3 years ago) |
| HTTP Status Code | 200 |
| Content | |
| Meta Title | How To Clean a Refrigerator Properly - Appliance Express |
| Meta Description | Giving your refrigerator a regular clean is important to ensure your appliance doesn’t get a build-up of bacteria and mold. When you don’t, your food and drinks… |
| Meta Canonical | null |
| Boilerpipe Text | Giving your refrigerator a regular clean is important to ensure your appliance doesn’t get a build-up of bacteria and mold. When you don’t, your food and drinks might go bad or cause health problems for you and your family. Thankfully, cleaning your fridge out is simple to do and doesn’t take much time. All you need is a spray cleaner and a damp cloth and you’re good to go.
In this guide, we will give you step-by-step instructions on how to properly clean your refrigerator. Simply start with step one and work your way through each step. Once completed, you’ll have a sparkling clean refrigerator!
Step 1 – Empty your refrigerator
Start by emptying all the food and drinks out of your refrigerator. To help keep them cool, place all your food and beverages into coolers with ice. This will stop your food and drinks from having to be thrown out–especially if it’s a particularly hot day.
Step 2 – Switch your refrigerator off
Once your refrigerator is empty, switch the power off. You can either switch the fridge off at the power socket or, if you’re unable to reach the socket, turn the circuit breaker off. As soon as you’ve emptied your refrigerator and switched the power off, leave open the fridge and freezer doors so the freezer can defrost. You may need to place a towel on the floor to collect any water that leaks out of the freezer.
Step 3 – Take the shelves out and clean them
You can now remove the shelves and drawers out of your fridge and give them a good clean. The easiest way to clean them is to fill up your sink with hot soapy water and give them a soak, followed by scrubbing them with a brush. Once clean, rinse them off and leave them to drip dry while you’re cleaning the inside of your fridge. Please note that if you have glass shelves, let them heat up to room temperature before placing them in hot water to stop them from cracking.
Step 4 – Clean the inside of your fridge
Now that you have emptied your refrigerator, turned it off, and removed the shelves, the next step is to give the inside of your appliance a thorough clean. All you need is a bottle of commercial disinfectant spray and a damp cloth. If you want to use a natural cleaning solution, simply mix 1 part baking soda with 7 parts warm water and pour it into a spray bottle.
You can clean the inside of your fridge by spraying and wiping all of the interior surfaces. Once clean, leave the fridge door open to let it dry out. Once the fridge compartment is clean, clean the freezer using the same method. Once you’ve finished cleaning the freezer, make sure you flush the drain out with hot soapy water.
Step 5 – Clean the refrigerator gasket
Once you’ve finished cleaning the inside of your refrigerator, the next step is to give the door gasket/seal a good clean. You can do this with hot soapy water (or a natural cleaning solution) and a damp cloth. If required, you can also use a toothbrush or other small brush to get deep into the gasket. Once clean, make sure you dry it off.
Step 6 – Clean the outside of your refrigerator
The next step in this guide for how to clean a refrigerator properly is to clean the outside of your appliance. This can be done by using your spray bottle and cloth to systematically clean each external surface. If you have a stainless-steel refrigerator unit, use some rubbing alcohol on a cloth to give it shine. If you don’t have rubbing alcohol, use a glass cleaner or another stainless-steel cleaner.
Step 7 – Clean the condenser coils
The next step is to clean the condenser coils. These can be found at the back of your fridge and the purpose of them is to help your refrigerator stay at the desired temperature. By giving them a clean, you’ll ensure they operate to their full capacity.
Here’s how to clean the refrigerator coils:
Switch the power off to your fridge if you haven’t already.
Pull your appliance out from the wall.
Locate the coils and remove the cover off them if there is one.
Use a damp cloth or a vacuum cleaner to remove all the dust from them.
Once clean, put the cover back on.
Step 8 – Empty the drain pan
Before pushing your refrigerator back against the wall, locate the drain pan and wipe it out to remove any water and other debris. If there is mold in the pan, use bleach to give it a more in-depth clean. Once the pan is empty and dry, you can push your fridge back into position and move on to the next step.
Step 9 – Put your fridge back together.
Now that you’ve finished cleaning your fridge, you can get all the shelves and drawers that you removed earlier and put them back into the fridge. Once the shelves are in place, you can put all of your food and drink back into your fridge and turn the power back on. Your refrigerator should now be nice and clean! |
| Markdown | [Now Hiring, We Train\!](https://applianceexpresstx.com/jobs/)
[](https://applianceexpresstx.com/)
ScheduleContact
Menu
[](https://applianceexpresstx.com/)
Menu
ScheduleContact
# How To Clean a Refrigerator Properly
Appliance Express
August 10, 2022
[Refrigerator Repair](https://applianceexpresstx.com/category/refrigerator-repair/)
Share this page:
Link copied\!
Giving your refrigerator a regular clean is important to ensure your appliance doesn’t get a build-up of bacteria and mold. When you don’t, your food and drinks might go bad or cause health problems for you and your family. Thankfully, cleaning your fridge out is simple to do and doesn’t take much time. All you need is a spray cleaner and a damp cloth and you’re good to go.
In this guide, we will give you step-by-step instructions on how to properly clean your refrigerator. Simply start with step one and work your way through each step. Once completed, you’ll have a sparkling clean refrigerator\!
## **Step 1 – Empty your refrigerator**
Start by emptying all the food and drinks out of your refrigerator. To help keep them cool, place all your food and beverages into coolers with ice. This will stop your food and drinks from having to be thrown out–especially if it’s a particularly hot day.
## **Step 2 – Switch your refrigerator off**
Once your refrigerator is empty, switch the power off. You can either switch the fridge off at the power socket or, if you’re unable to reach the socket, turn the circuit breaker off. As soon as you’ve emptied your refrigerator and switched the power off, leave open the fridge and freezer doors so the freezer can defrost. You may need to place a towel on the floor to collect any water that leaks out of the freezer.
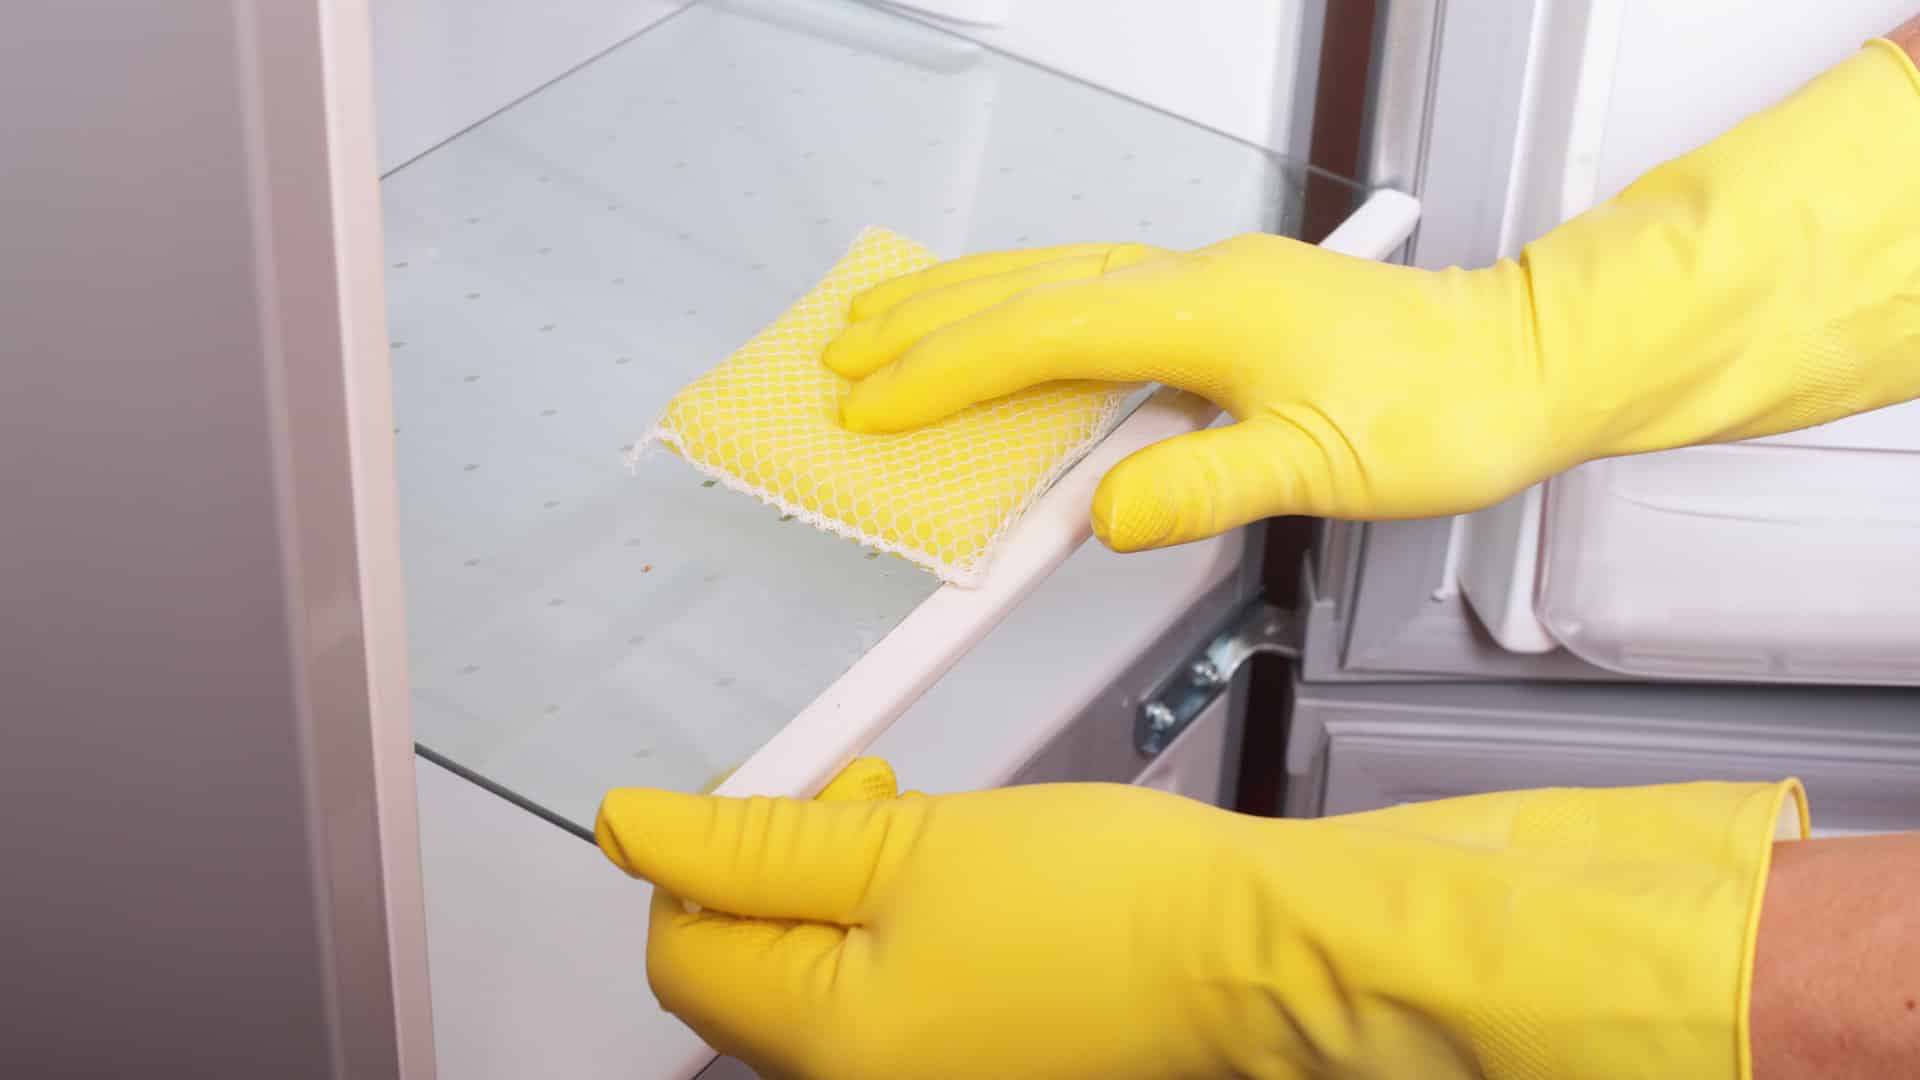
## **Step 3 – Take the shelves out and clean them**
You can now remove the shelves and drawers out of your fridge and give them a good clean. The easiest way to clean them is to fill up your sink with hot soapy water and give them a soak, followed by scrubbing them with a brush. Once clean, rinse them off and leave them to drip dry while you’re cleaning the inside of your fridge. Please note that if you have glass shelves, let them heat up to room temperature before placing them in hot water to stop them from cracking.
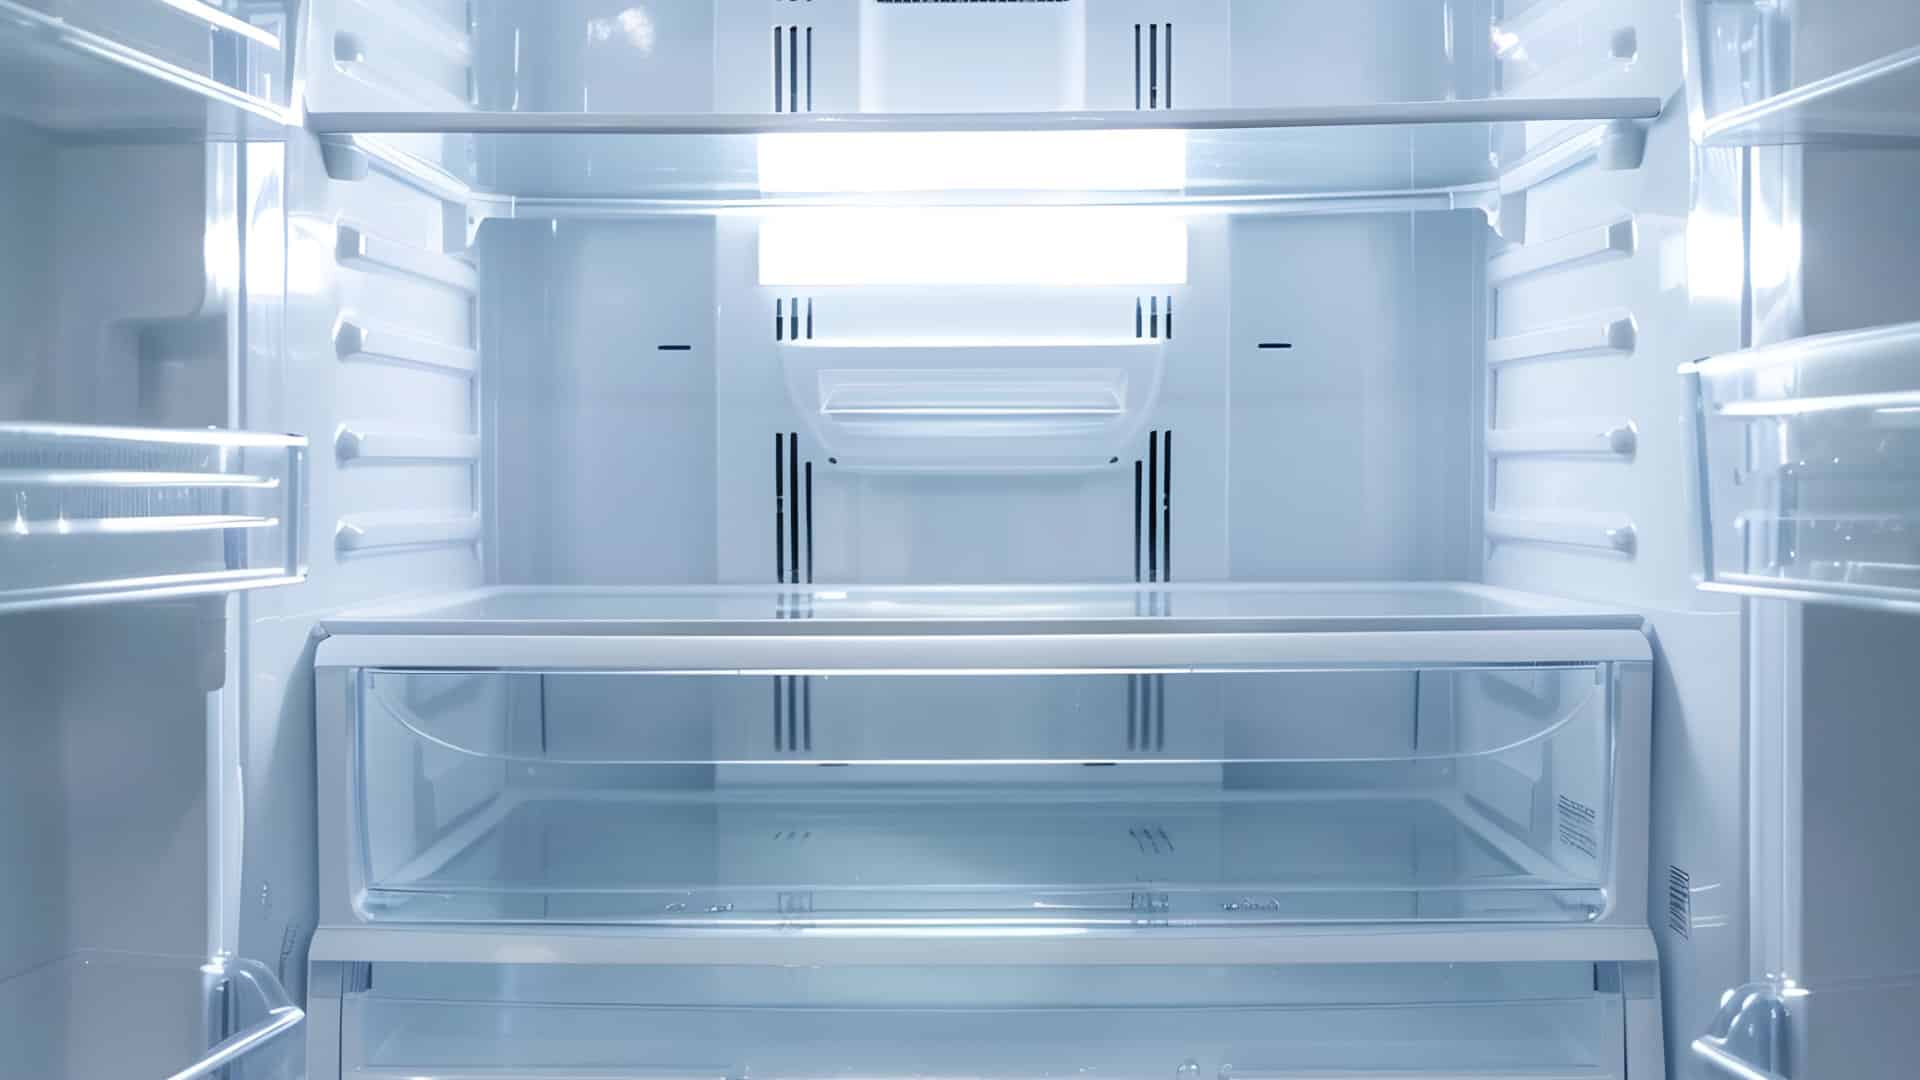
## **Step 4 – Clean the inside of your fridge**
Now that you have emptied your refrigerator, turned it off, and removed the shelves, the next step is to give the inside of your appliance a thorough clean. All you need is a bottle of commercial disinfectant spray and a damp cloth. If you want to use a natural cleaning solution, simply mix 1 part baking soda with 7 parts warm water and pour it into a spray bottle.
You can clean the inside of your fridge by spraying and wiping all of the interior surfaces. Once clean, leave the fridge door open to let it dry out. Once the fridge compartment is clean, clean the freezer using the same method. Once you’ve finished cleaning the freezer, make sure you flush the drain out with hot soapy water.
## **Step 5 – Clean the refrigerator gasket**
Once you’ve finished cleaning the inside of your refrigerator, the next step is to give the door gasket/seal a good clean. You can do this with hot soapy water (or a natural cleaning solution) and a damp cloth. If required, you can also use a toothbrush or other small brush to get deep into the gasket. Once clean, make sure you dry it off.
## **Step 6 – Clean the outside of your refrigerator**
The next step in this guide for how to clean a refrigerator properly is to clean the outside of your appliance. This can be done by using your spray bottle and cloth to systematically clean each external surface. If you have a stainless-steel refrigerator unit, use some rubbing alcohol on a cloth to give it shine. If you don’t have rubbing alcohol, use a glass cleaner or another stainless-steel cleaner.
## **Step 7 – Clean the condenser coils**
The next step is to clean the condenser coils. These can be found at the back of your fridge and the purpose of them is to help your refrigerator stay at the desired temperature. By giving them a clean, you’ll ensure they operate to their full capacity.
Here’s how to clean the refrigerator coils:
- Switch the power off to your fridge if you haven’t already.
- Pull your appliance out from the wall.
- Locate the coils and remove the cover off them if there is one.
- Use a damp cloth or a vacuum cleaner to remove all the dust from them.
- Once clean, put the cover back on.
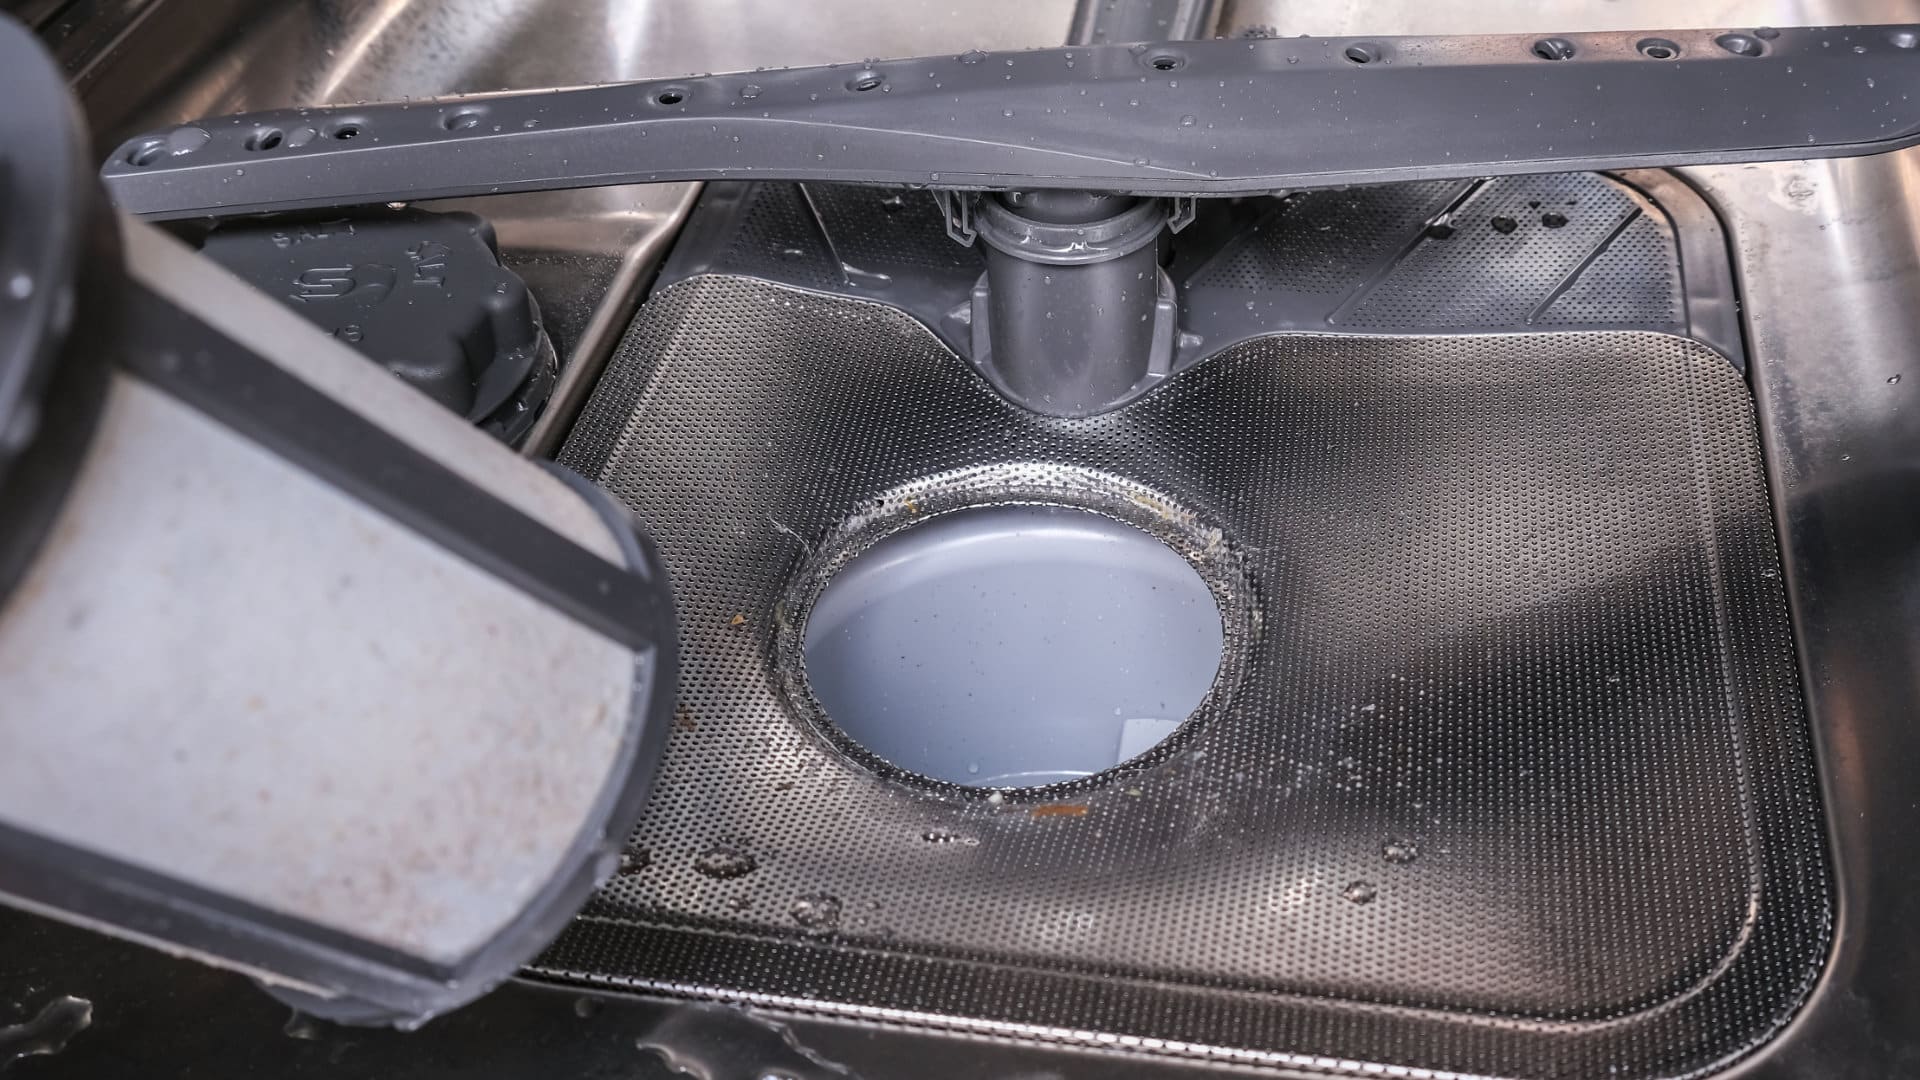
## **Step 8 – Empty the drain pan**
Before pushing your refrigerator back against the wall, locate the drain pan and wipe it out to remove any water and other debris. If there is mold in the pan, use bleach to give it a more in-depth clean. Once the pan is empty and dry, you can push your fridge back into position and move on to the next step.
## **Step 9 – Put your fridge back together.**
Now that you’ve finished cleaning your fridge, you can get all the shelves and drawers that you removed earlier and put them back into the fridge. Once the shelves are in place, you can put all of your food and drink back into your fridge and turn the power back on. Your refrigerator should now be nice and clean\!
[Feb. 19, 2025 Is the broiler the same as an oven?](https://applianceexpresstx.com/oven-repair/is-the-broiler-the-same-as-an-oven/)
[Jul. 08, 2024 Why Your Dryer Won’t Spin and How to Fix It](https://applianceexpresstx.com/dryer-repair/why-your-dryer-wont-spin-and-how-to-fix-it/)
[Jul. 08, 2024 How to Clean a Self-Cleaning Oven (in 5 Steps)](https://applianceexpresstx.com/oven-repair/how-to-clean-a-self-cleaning-oven-in-5-steps/)
[Jul. 08, 2024 How Many Amps Does a Microwave Use?](https://applianceexpresstx.com/microwave-repair/how-many-amps-does-a-microwave-use/)
[Jun. 03, 2024 How to Clean Refrigerator Coils (in 5 Steps)](https://applianceexpresstx.com/refrigerator-repair/how-to-clean-refrigerator-coils-in-5-steps/)
[Jun. 03, 2024 Bosch Oven Not Heating? Here’s Why](https://applianceexpresstx.com/oven-repair/bosch-oven-not-heating-heres-why/)
[Jun. 03, 2024 The 10 Best Washer and Dryer Brands in 2024](https://applianceexpresstx.com/washer-repair/the-10-best-washer-and-dryer-brands-in-2024/)
[May. 06, 2024 How Many Gallons of Water Does a Dishwasher Use?](https://applianceexpresstx.com/dishwasher-repair/how-many-gallons-of-water-does-a-dishwasher-use/)
[May. 06, 2024 Dryer Making Grinding Noise? Here’s Why](https://applianceexpresstx.com/dryer-repair/dryer-making-grinding-noise-heres-why/)
[May. 06, 2024 Maytag Washer Error Codes Explained](https://applianceexpresstx.com/washer-repair/maytag-washer-error-codes-explained/)
[Apr. 09, 2024 GE Washer Not Spinning? Here’s The Fix\!](https://applianceexpresstx.com/washer-repair/ge-washer-not-spinning-heres-the-fix/)
[Apr. 09, 2024 How to Restore Power to Your GE Dishwasher](https://applianceexpresstx.com/dishwasher-repair/how-to-restore-power-to-your-ge-dishwasher/)
[Apr. 09, 2024 How To Reset Your GE Washer Top Loader](https://applianceexpresstx.com/washer-repair/how-to-reset-your-ge-washer-top-loader/)
[Mar. 06, 2024 Understanding Whirlpool Washer Error Codes](https://applianceexpresstx.com/washer-repair/understanding-whirlpool-washer-error-codes/)
[Mar. 06, 2024 JennAir Ice Maker Not Working? Here’s What to Do](https://applianceexpresstx.com/refrigerator-repair/jennair-ice-maker-not-working-heres-what-to-do/)
[Mar. 06, 2024 What to Do If Your LG Fridge Isn’t Cooling](https://applianceexpresstx.com/refrigerator-repair/what-to-do-if-your-lg-fridge-isnt-cooling/)
[Feb. 05, 2024 Propane vs. Natural Gas Stove: What’s Best?](https://applianceexpresstx.com/oven-repair/propane-vs-natural-gas-stove-whats-best/)
[Feb. 05, 2024 How Hot Does a Dryer Get?](https://applianceexpresstx.com/dryer-repair/how-hot-does-a-dryer-get/)
[Feb. 05, 2024 LG Dryer Flow Sense: Everything You Need to Know](https://applianceexpresstx.com/dryer-repair/lg-dryer-flow-sense-everything-you-need-to-know/)
[Jan. 03, 2024 What to Do When Your Freezer Is Not Freezing but the Fridge Is Cold](https://applianceexpresstx.com/refrigerator-repair/what-to-do-when-your-freezer-is-not-freezing-but-the-fridge-is-cold/)
[](https://applianceexpresstx.com/)
[Schedule Service Request Service 24/7](https://applianceexpresstx.com/schedule-service/)
***
[(512) 819-0670Call Us](tel:15128190670)
***
[Customer ReviewsCheck out our feedback](https://applianceexpresstx.com/customer-reviews/)
- [Call (512) 819-0670](tel:15128190670)
- [Schedule Service](https://applianceexpresstx.com/schedule-service/)
- [Appliance Parts](https://applianceexpresstx.com/appliance-parts/)
- [Pay My Bill](https://applianceexpresstx.com/paymybill/)
- [Leave a Review](https://applianceexpresstx.com/leave-a-review/)
- [Customer Reviews](https://applianceexpresstx.com/customer-reviews/)
- [Meet Our Team](https://applianceexpresstx.com/meet-our-team/)
- [Service Area](https://applianceexpresstx.com/service-area/)
- [What We Service](https://applianceexpresstx.com/what-we-service/)
- [Blog](https://applianceexpresstx.com/news-and-tips/)
- [Jobs](https://applianceexpresstx.com/jobs/)
[](https://applianceexpresstx.com/)
[Schedule Service](https://applianceexpresstx.com/schedule-service/)
***
[(512) 819-0670](tel:15128190670)
***
[Customer Reviews](https://applianceexpresstx.com/customer-reviews/)
- [Call (512) 819-0670](tel:15128190670)
- [Schedule Service](https://applianceexpresstx.com/schedule-service/)
- [Appliance Parts](https://applianceexpresstx.com/appliance-parts/)
- [Pay My Bill](https://applianceexpresstx.com/paymybill/)
- [Leave a Review](https://applianceexpresstx.com/leave-a-review/)
- [Customer Reviews](https://applianceexpresstx.com/customer-reviews/)
- [Meet Our Team](https://applianceexpresstx.com/meet-our-team/)
- [Service Area](https://applianceexpresstx.com/service-area/)
- [What We Service](https://applianceexpresstx.com/what-we-service/)
- [Blog](https://applianceexpresstx.com/news-and-tips/)
- [Jobs](https://applianceexpresstx.com/jobs/)
**LOCATION \| Appliance Parts [Click Here for Directions](https://goo.gl/maps/vwq7MU2nHPAaBf1r5)**
104 Parkview Drive
Georgetown, TX 78626
**Mailing Address**
PO Box 5443
Acton, TX 76049
[Conditions of Use - Privacy Policy](https://applianceexpresstx.com/conditions-of-use-privacy-policy/)
Site Designed by [Fluid Services](https://fluid.services/)
- [Schedule Service](https://applianceexpresstx.com/schedule-service/)
- [Call (512) 819-0670](tel:15128190670)
- [Call (512) 819-0670](tel:15128190670)
- [Schedule Service](https://applianceexpresstx.com/schedule-service/)
- [Appliance Parts](https://applianceexpresstx.com/appliance-parts/)
- [Pay My Bill](https://applianceexpresstx.com/paymybill/)
- [Customer Reviews](https://applianceexpresstx.com/customer-reviews/)
- [Meet Our Team](https://applianceexpresstx.com/meet-our-team/)
- [Service Area](https://applianceexpresstx.com/service-area/)
- [What We Service](https://applianceexpresstx.com/what-we-service/)
- [Jobs](https://applianceexpresstx.com/jobs/)
- [Schedule Service](https://applianceexpresstx.com/schedule-service/)
- [Call (512) 819-0670](tel:15128190670) |
| Readable Markdown | Giving your refrigerator a regular clean is important to ensure your appliance doesn’t get a build-up of bacteria and mold. When you don’t, your food and drinks might go bad or cause health problems for you and your family. Thankfully, cleaning your fridge out is simple to do and doesn’t take much time. All you need is a spray cleaner and a damp cloth and you’re good to go.
In this guide, we will give you step-by-step instructions on how to properly clean your refrigerator. Simply start with step one and work your way through each step. Once completed, you’ll have a sparkling clean refrigerator\!
## **Step 1 – Empty your refrigerator**
Start by emptying all the food and drinks out of your refrigerator. To help keep them cool, place all your food and beverages into coolers with ice. This will stop your food and drinks from having to be thrown out–especially if it’s a particularly hot day.
## **Step 2 – Switch your refrigerator off**
Once your refrigerator is empty, switch the power off. You can either switch the fridge off at the power socket or, if you’re unable to reach the socket, turn the circuit breaker off. As soon as you’ve emptied your refrigerator and switched the power off, leave open the fridge and freezer doors so the freezer can defrost. You may need to place a towel on the floor to collect any water that leaks out of the freezer.
## **Step 3 – Take the shelves out and clean them**
You can now remove the shelves and drawers out of your fridge and give them a good clean. The easiest way to clean them is to fill up your sink with hot soapy water and give them a soak, followed by scrubbing them with a brush. Once clean, rinse them off and leave them to drip dry while you’re cleaning the inside of your fridge. Please note that if you have glass shelves, let them heat up to room temperature before placing them in hot water to stop them from cracking.
## **Step 4 – Clean the inside of your fridge**
Now that you have emptied your refrigerator, turned it off, and removed the shelves, the next step is to give the inside of your appliance a thorough clean. All you need is a bottle of commercial disinfectant spray and a damp cloth. If you want to use a natural cleaning solution, simply mix 1 part baking soda with 7 parts warm water and pour it into a spray bottle.
You can clean the inside of your fridge by spraying and wiping all of the interior surfaces. Once clean, leave the fridge door open to let it dry out. Once the fridge compartment is clean, clean the freezer using the same method. Once you’ve finished cleaning the freezer, make sure you flush the drain out with hot soapy water.
## **Step 5 – Clean the refrigerator gasket**
Once you’ve finished cleaning the inside of your refrigerator, the next step is to give the door gasket/seal a good clean. You can do this with hot soapy water (or a natural cleaning solution) and a damp cloth. If required, you can also use a toothbrush or other small brush to get deep into the gasket. Once clean, make sure you dry it off.
## **Step 6 – Clean the outside of your refrigerator**
The next step in this guide for how to clean a refrigerator properly is to clean the outside of your appliance. This can be done by using your spray bottle and cloth to systematically clean each external surface. If you have a stainless-steel refrigerator unit, use some rubbing alcohol on a cloth to give it shine. If you don’t have rubbing alcohol, use a glass cleaner or another stainless-steel cleaner.
## **Step 7 – Clean the condenser coils**
The next step is to clean the condenser coils. These can be found at the back of your fridge and the purpose of them is to help your refrigerator stay at the desired temperature. By giving them a clean, you’ll ensure they operate to their full capacity.
Here’s how to clean the refrigerator coils:
- Switch the power off to your fridge if you haven’t already.
- Pull your appliance out from the wall.
- Locate the coils and remove the cover off them if there is one.
- Use a damp cloth or a vacuum cleaner to remove all the dust from them.
- Once clean, put the cover back on.
## **Step 8 – Empty the drain pan**
Before pushing your refrigerator back against the wall, locate the drain pan and wipe it out to remove any water and other debris. If there is mold in the pan, use bleach to give it a more in-depth clean. Once the pan is empty and dry, you can push your fridge back into position and move on to the next step.
## **Step 9 – Put your fridge back together.**
Now that you’ve finished cleaning your fridge, you can get all the shelves and drawers that you removed earlier and put them back into the fridge. Once the shelves are in place, you can put all of your food and drink back into your fridge and turn the power back on. Your refrigerator should now be nice and clean\! |
| ML Classification | |
| ML Categories | null |
| ML Page Types | null |
| ML Intent Types | null |
| Content Metadata | |
| Language | en-us |
| Author | Appliance Express |
| Publish Time | 2022-08-10 19:05:41 (3 years ago) |
| Original Publish Time | 2022-08-10 19:05:41 (3 years ago) |
| Republished | No |
| Word Count (Total) | 1,290 |
| Word Count (Content) | 878 |
| Links | |
| External Links | 5 |
| Internal Links | 36 |
| Technical SEO | |
| Meta Nofollow | No |
| Meta Noarchive | No |
| JS Rendered | No |
| Redirect Target | null |
| Performance | |
| Download Time (ms) | 963 |
| TTFB (ms) | 898 |
| Download Size (bytes) | 30,491 |
| Shard | 79 (laksa) |
| Root Hash | 1750240928931411079 |
| Unparsed URL | com,applianceexpresstx!/refrigerator-repair/how-to-clean-a-refrigerator-properly/ s443 |