ℹ️ Skipped - page is already crawled
| Filter | Status | Condition | Details |
|---|---|---|---|
| HTTP status | PASS | download_http_code = 200 | HTTP 200 |
| Age cutoff | PASS | download_stamp > now() - 6 MONTH | 3.1 months ago |
| History drop | PASS | isNull(history_drop_reason) | No drop reason |
| Spam/ban | PASS | fh_dont_index != 1 AND ml_spam_score = 0 | ml_spam_score=0 |
| Canonical | PASS | meta_canonical IS NULL OR = '' OR = src_unparsed | Not set |
| Property | Value |
|---|---|
| URL | https://apidog.com/blog/jquery-post-json/ |
| Last Crawled | 2026-01-19 03:18:07 (3 months ago) |
| First Indexed | 2024-01-24 11:46:14 (2 years ago) |
| HTTP Status Code | 200 |
| Meta Title | How to Use jQuery to Post JSON Data? |
| Meta Description | Learn how to use jQuery to post JSON data to an API with this comprehensive guide. Includes step-by-step instructions, best practices, and more. |
| Meta Canonical | null |
| Boilerpipe Text | Welcome to this comprehensive guide on how to use jQuery to post JSON data to an API. In today’s world, APIs are everywhere, and they are an essential part of modern web development. They allow developers to interact with other applications and services, making it possible to build complex and powerful web applications.
In this guide, we will cover everything you need to know about using jQuery to post JSON data to an API. We will then introduce Apidog, an all-in-one collaborative API development platform. We will explain how Apidog can be used to generate your jQuery code and test your API.
button
Introduction to API
An API, or
Application Programming Interface
, is a set of defined rules that enable different applications to communicate with each other. It acts as an intermediary layer that processes data transfers between systems, letting companies open their application data and functionality to external third-party developers, business partners, and internal departments within their companies. The definitions and protocols within an API help businesses connect the many different applications they use in day-to-day operations, which saves employees time and breaks down silos that hinder collaboration and innovation.
APIs simplify software development and innovation by enabling applications to exchange data and functionality easily and securely. They offer significant benefits to developers and organizations at large. The average enterprise uses almost 1,200 cloud applications, many of which are disconnected. APIs enable integration so that these platforms and apps can seamlessly communicate with one another. Through this integration, companies can automate workflows and improve workplace collaboration.
What is jQuery?
jQuery
is a fast, small, and feature-rich JavaScript library that simplifies HTML document traversal and manipulation, event handling, animation, and Ajax across browsers. It is designed to make it easier to use JavaScript on your website by taking common tasks that require many lines of JavaScript code to accomplish and wrapping them into methods that you can call with a single line of code. jQuery also simplifies a lot of the complicated things from JavaScript, like AJAX calls and DOM manipulation.
The library contains a wide range of features, including HTML/DOM manipulation, CSS manipulation, HTML event methods, effects and animations, and utilities. In addition, jQuery has plugins for almost any task out there.
jQuery is a popular choice for working with APIs because it simplifies the process of sending and receiving data from an API. In the next section, we will explain what an API is and why it is important to know how to use jQuery to interact with them.
JSON Data: The Future of Data Exchange
JSON (JavaScript Object Notation)
is a lightweight data-interchange format that is easy for humans to read and write, and easy for machines to parse and generate. It is a text format that is language-independent and uses a simple key-value pair structure to represent data. JSON is widely used for sending data to APIs because it is easy to parse and generate, and it is supported by most programming languages and web frameworks.
Here are some examples of how JSON data can be used in conjunction with the
POST
method:
Sending form data
: When a user submits a form on a website, the data is typically sent to the server using the POST method. The data can be sent in JSON format, which makes it easy to parse on the server side. For example, a user might submit a form with their name, email address, and phone number. This data can be sent to the server in JSON format, like this:
{
"name": "John Smith",
"email": "john.smith@example.com",
"phone": "555-1234"
}
2. Sending data to an API
: APIs often require data to be sent in a specific format, such as JSON. The data can be sent to the API using the POST method. For example, a weather API might require latitude and longitude coordinates to return the current weather conditions. The data can be sent in JSON format, like this:
{
"latitude": 47.6062,
"longitude": -122.3321
}
3. Updating data on a server
: When updating data on a server, the data can be sent in JSON format using the POST method. For example, a user might want to update their profile information on a website. The updated data can be sent to the server in JSON format, like this:
{
"name": "John Smith",
"email": "john.smith@example.com",
"phone": "555-1234",
"address": "123 Main St."
}
In all of these examples, the data is sent to the server using the POST method and is formatted in JSON. This makes it easy for the server to parse the data and use it as needed.
POST Method: The Key to Sending Data to APIs
The
POST method
is an HTTP request method used to send data to a web server. It is commonly used to create or update resources on the server. Unlike other HTTP methods, POST requests carry a payload, which is the data sent to the server. This data is included in the request body and can be in various formats, such as JSON, XML, or URL-encoded form data.
Here are some examples of when you might want to use the POST method:
Submitting a form
: When a user submits a form on a website, the data is typically sent to the server using the POST method. For example, a user might submit a form with their name, email address, and phone number. This data can be sent to the server in JSON format, like this:
{
"name": "John Smith",
"email": "john.smith@example.com",
"phone": "555-1234"
}
Sending data to an API
: APIs often require data to be sent in a specific format, such as JSON. The data can be sent to the API using the POST method. For example, a weather API might require latitude and longitude coordinates to return the current weather conditions. The data can be sent in JSON format, like this:
{
"latitude": 47.6062,
"longitude": -122.3321
}
Updating data on a server
: When updating data on a server, the data can be sent in JSON format using the POST method. For example, a user might want to update their profile information on a website. The updated data can be sent to the server in JSON format, like this:
{
"name": "John Smith",
"email": "john.smith@example.com",
"phone": "555-1234",
"address": "123 Main St."
}
In all of these examples, the data is sent to the server using the POST method and is formatted in JSON. This makes it easy for the server to parse the data and use it as needed.
Why Use jQuery to Post JSON Data?
There are several benefits to using jQuery to post JSON data. First, jQuery is a powerful and flexible JavaScript library that makes it easy to manipulate HTML documents, handle events, create animations, and interact with server-side APIs. Second, jQuery is designed to simplify the client-side scripting of HTML, which means that it can help you write cleaner, more maintainable code. Finally, jQuery is widely used and well-documented, which means that there are plenty of resources available to help you learn how to use it effectively.
How to Use jQuery to Post JSON Data
Now that you understand what jQuery and JSON are and why you should use jQuery to post JSON data, let’s take a look at how to do it step-by-step:
First, include the jQuery library in your HTML file by adding the following line within the
<head>
tags of your HTML document:
<script src="https://code.jquery.com/jquery-3.6.0.min.js"></script>
Create a JSON object that contains the data you want to send.
var data = {
"name": "John",
"age": 30,
"city": "New York"
};
Convert the JSON object to a string using the
JSON.stringify()
method.
var jsonString = JSON.stringify(data);
Define the URL and method for your AJAX request.
var url = "https://your-api-endpoint.com";
var method = "POST";
Send the AJAX request using the
$.ajax()
method.
$.ajax({
url: url,
type: method,
data: jsonString,
contentType: "application/json; charset=utf-8",
dataType: "json",
success: function(response) {
console.log(response);
},
error: function(xhr, status, error) {
console.log(xhr.responseText);
}
});
This code sends a POST request to the specified API endpoint with the JSON data in the request body. The
contentType
option specifies that the data being sent is JSON, and the
dataType
option specifies that the expected response is also JSON.
Generate jQuery to Post JSON Data with Apidog
Apidog
is an
all-in-one collaborative API development platform
that provides a comprehensive toolkit for designing, debugging, testing, publishing, and mocking APIs. It can also help to generate jQuery code.
button
Let see how to do it.
Step 1
: Open
Step 2
: Open
Step 3
: Open
Step 4
: Open
Simplify Your API Testing with Apidog
To test jQuery to Post JSON Data,
Apidog
provides a
user-friendly interface
for crafting
POST requests with JSON payloads
. The process of sending POST requests with JSON data is a fundamental skill in API testing and development. Apidog can streamline API testing by enabling sending POST requests with JSON payloads.
button
To send a POST request with JSON data in Apidog, you can follow these steps:
Step 1:
Open Apidog and create a new request.
Step 2:
Click on the
Request
tab and select
POST
from the dropdown menu.
Step 3:
Enter the URL of the API endpoint you want to test
, i
n the
Headers
section, add any required headers. In the
Body
section, select
JSON
from the dropdown menu and enter the JSON data you want to send in the request body.
Step 4:
Click on the Send button to send the request and check the response.
Apidog also provides a detailed guide for crafting POST requests with JSON payloads within the user-friendly interfaces of both Postman and Apidog. This guide delves into the basics of POST requests and explains why JSON is the preferred choice for transmitting data in API requests. API developers will find these tools invaluable for simplifying the testing of endpoints that necessitate JSON data within the request body.
Best Practices for Posting JSON Data
Here are some best practices to keep in mind when posting JSON data with jQuery:
Minimize the size of your JSON data
: One key way to improve performance when posting JSON data is to minimize the size of the data being sent. This can be achieved by only including the necessary data in the JSON object and using compression techniques, such as GZIP, to further reduce the size of the data.
Set the content type to application/json
: When sending JSON data, it’s important to set the content type to
application/json
to ensure that the server knows how to handle the data.
Use HTTPS
: To ensure that your data is secure during transmission, it’s recommended to use HTTPS instead of HTTP.
Handle errors gracefully
: When sending JSON data, it’s important to handle errors gracefully. This can be achieved by using the
error
callback function in the
$.ajax()
method to handle any errors that occur during the request.
Test your code thoroughly
: Before deploying your code to production, it’s important to test it thoroughly to ensure that it works as expected. This can be achieved by using tools such as Postman to test your API endpoints.
Conclusion
In conclusion, using jQuery to post JSON data is a powerful technique that can help you build more efficient and responsive web applications. By following the step-by-step guide outlined in this post, you can easily send JSON data to an API and handle the response using jQuery’s built-in functions. Remember to keep best practices in mind when posting JSON data, such as minimizing the size of your data, setting the content type to
application/json
, and handling errors gracefully. By doing so, you can ensure that your web applications are secure, efficient, and user-friendly.
button
Apidog provides a more straightforward and efficient process, making it the superior choice for thoroughly testing APIs that require JSON data within POST requests and other request types. By following the tips and techniques outlined in this post, you’ll be able to post JSON data with jQuery like a pro! |
| Markdown | - [Products]()
- [Learn]()
- [Download](https://apidog.com/download)
- [Pricing](https://apidog.com/pricing)
- [API Hub](https://apidog.com/apihub)
- [Apidog Europe](https://apidog.com/help/eu)
- [Launch App](https://app.apidog.com/user/login)
[Viewpoint](https://apidog.com/blog/viewpoint/)[Tutorials](https://apidog.com/blog/tutorials/)[Effective Strategies](https://apidog.com/blog/effective-strategies/)[Product Updates](https://apidog.com/blog/product-updates/)[Software Reviews](https://apidog.com/blog/software-reviews/)[All](https://apidog.com/blog/all/)
[Blog](https://apidog.com/blog/)
[Tutorials](https://apidog.com/blog/tutorials/)
# How to Use jQuery to Post JSON Data?
Learn how to use jQuery to post JSON data to an API with this comprehensive guide. Includes step-by-step instructions, best practices, and more.

Ashley Innocent
21 July 2025

Welcome to this comprehensive guide on how to use jQuery to post JSON data to an API. In today’s world, APIs are everywhere, and they are an essential part of modern web development. They allow developers to interact with other applications and services, making it possible to build complex and powerful web applications.
In this guide, we will cover everything you need to know about using jQuery to post JSON data to an API. We will then introduce Apidog, an all-in-one collaborative API development platform. We will explain how Apidog can be used to generate your jQuery code and test your API.
button
## Introduction to API
An API, or **Application Programming Interface**, is a set of defined rules that enable different applications to communicate with each other. It acts as an intermediary layer that processes data transfers between systems, letting companies open their application data and functionality to external third-party developers, business partners, and internal departments within their companies. The definitions and protocols within an API help businesses connect the many different applications they use in day-to-day operations, which saves employees time and breaks down silos that hinder collaboration and innovation.

APIs simplify software development and innovation by enabling applications to exchange data and functionality easily and securely. They offer significant benefits to developers and organizations at large. The average enterprise uses almost 1,200 cloud applications, many of which are disconnected. APIs enable integration so that these platforms and apps can seamlessly communicate with one another. Through this integration, companies can automate workflows and improve workplace collaboration.
## What is jQuery?
**jQuery** is a fast, small, and feature-rich JavaScript library that simplifies HTML document traversal and manipulation, event handling, animation, and Ajax across browsers. It is designed to make it easier to use JavaScript on your website by taking common tasks that require many lines of JavaScript code to accomplish and wrapping them into methods that you can call with a single line of code. jQuery also simplifies a lot of the complicated things from JavaScript, like AJAX calls and DOM manipulation.

The library contains a wide range of features, including HTML/DOM manipulation, CSS manipulation, HTML event methods, effects and animations, and utilities. In addition, jQuery has plugins for almost any task out there.
jQuery is a popular choice for working with APIs because it simplifies the process of sending and receiving data from an API. In the next section, we will explain what an API is and why it is important to know how to use jQuery to interact with them.
## JSON Data: The Future of Data Exchange
**JSON (JavaScript Object Notation)** is a lightweight data-interchange format that is easy for humans to read and write, and easy for machines to parse and generate. It is a text format that is language-independent and uses a simple key-value pair structure to represent data. JSON is widely used for sending data to APIs because it is easy to parse and generate, and it is supported by most programming languages and web frameworks.
Here are some examples of how JSON data can be used in conjunction with the **POST** method:
1. **Sending form data**: When a user submits a form on a website, the data is typically sent to the server using the POST method. The data can be sent in JSON format, which makes it easy to parse on the server side. For example, a user might submit a form with their name, email address, and phone number. This data can be sent to the server in JSON format, like this:
```
{
"name": "John Smith",
"email": "john.smith@example.com",
"phone": "555-1234"
}
```
**2\. Sending data to an API**: APIs often require data to be sent in a specific format, such as JSON. The data can be sent to the API using the POST method. For example, a weather API might require latitude and longitude coordinates to return the current weather conditions. The data can be sent in JSON format, like this:
```
{
"latitude": 47.6062,
"longitude": -122.3321
}
```
**3\. Updating data on a server**: When updating data on a server, the data can be sent in JSON format using the POST method. For example, a user might want to update their profile information on a website. The updated data can be sent to the server in JSON format, like this:
```
{
"name": "John Smith",
"email": "john.smith@example.com",
"phone": "555-1234",
"address": "123 Main St."
}
```
In all of these examples, the data is sent to the server using the POST method and is formatted in JSON. This makes it easy for the server to parse the data and use it as needed.
## POST Method: The Key to Sending Data to APIs
The **POST method** is an HTTP request method used to send data to a web server. It is commonly used to create or update resources on the server. Unlike other HTTP methods, POST requests carry a payload, which is the data sent to the server. This data is included in the request body and can be in various formats, such as JSON, XML, or URL-encoded form data.
Here are some examples of when you might want to use the POST method:
1. **Submitting a form**: When a user submits a form on a website, the data is typically sent to the server using the POST method. For example, a user might submit a form with their name, email address, and phone number. This data can be sent to the server in JSON format, like this:
```
{
"name": "John Smith",
"email": "john.smith@example.com",
"phone": "555-1234"
}
```
1. **Sending data to an API**: APIs often require data to be sent in a specific format, such as JSON. The data can be sent to the API using the POST method. For example, a weather API might require latitude and longitude coordinates to return the current weather conditions. The data can be sent in JSON format, like this:
```
{
"latitude": 47.6062,
"longitude": -122.3321
}
```
1. **Updating data on a server**: When updating data on a server, the data can be sent in JSON format using the POST method. For example, a user might want to update their profile information on a website. The updated data can be sent to the server in JSON format, like this:
```
{
"name": "John Smith",
"email": "john.smith@example.com",
"phone": "555-1234",
"address": "123 Main St."
}
```
In all of these examples, the data is sent to the server using the POST method and is formatted in JSON. This makes it easy for the server to parse the data and use it as needed.
## Why Use jQuery to Post JSON Data?
There are several benefits to using jQuery to post JSON data. First, jQuery is a powerful and flexible JavaScript library that makes it easy to manipulate HTML documents, handle events, create animations, and interact with server-side APIs. Second, jQuery is designed to simplify the client-side scripting of HTML, which means that it can help you write cleaner, more maintainable code. Finally, jQuery is widely used and well-documented, which means that there are plenty of resources available to help you learn how to use it effectively.
## How to Use jQuery to Post JSON Data
Now that you understand what jQuery and JSON are and why you should use jQuery to post JSON data, let’s take a look at how to do it step-by-step:
1. First, include the jQuery library in your HTML file by adding the following line within the `<head>` tags of your HTML document:
```
<script src="https://code.jquery.com/jquery-3.6.0.min.js"></script>
```
1. Create a JSON object that contains the data you want to send.
```
var data = {
"name": "John",
"age": 30,
"city": "New York"
};
```
1. Convert the JSON object to a string using the `JSON.stringify()` method.
```
var jsonString = JSON.stringify(data);
```
1. Define the URL and method for your AJAX request.
```
var url = "https://your-api-endpoint.com";
var method = "POST";
```
1. Send the AJAX request using the `$.ajax()` method.
```
$.ajax({
url: url,
type: method,
data: jsonString,
contentType: "application/json; charset=utf-8",
dataType: "json",
success: function(response) {
console.log(response);
},
error: function(xhr, status, error) {
console.log(xhr.responseText);
}
});
```
This code sends a POST request to the specified API endpoint with the JSON data in the request body. The `contentType` option specifies that the data being sent is JSON, and the `dataType` option specifies that the expected response is also JSON.
## Generate jQuery to Post JSON Data with Apidog
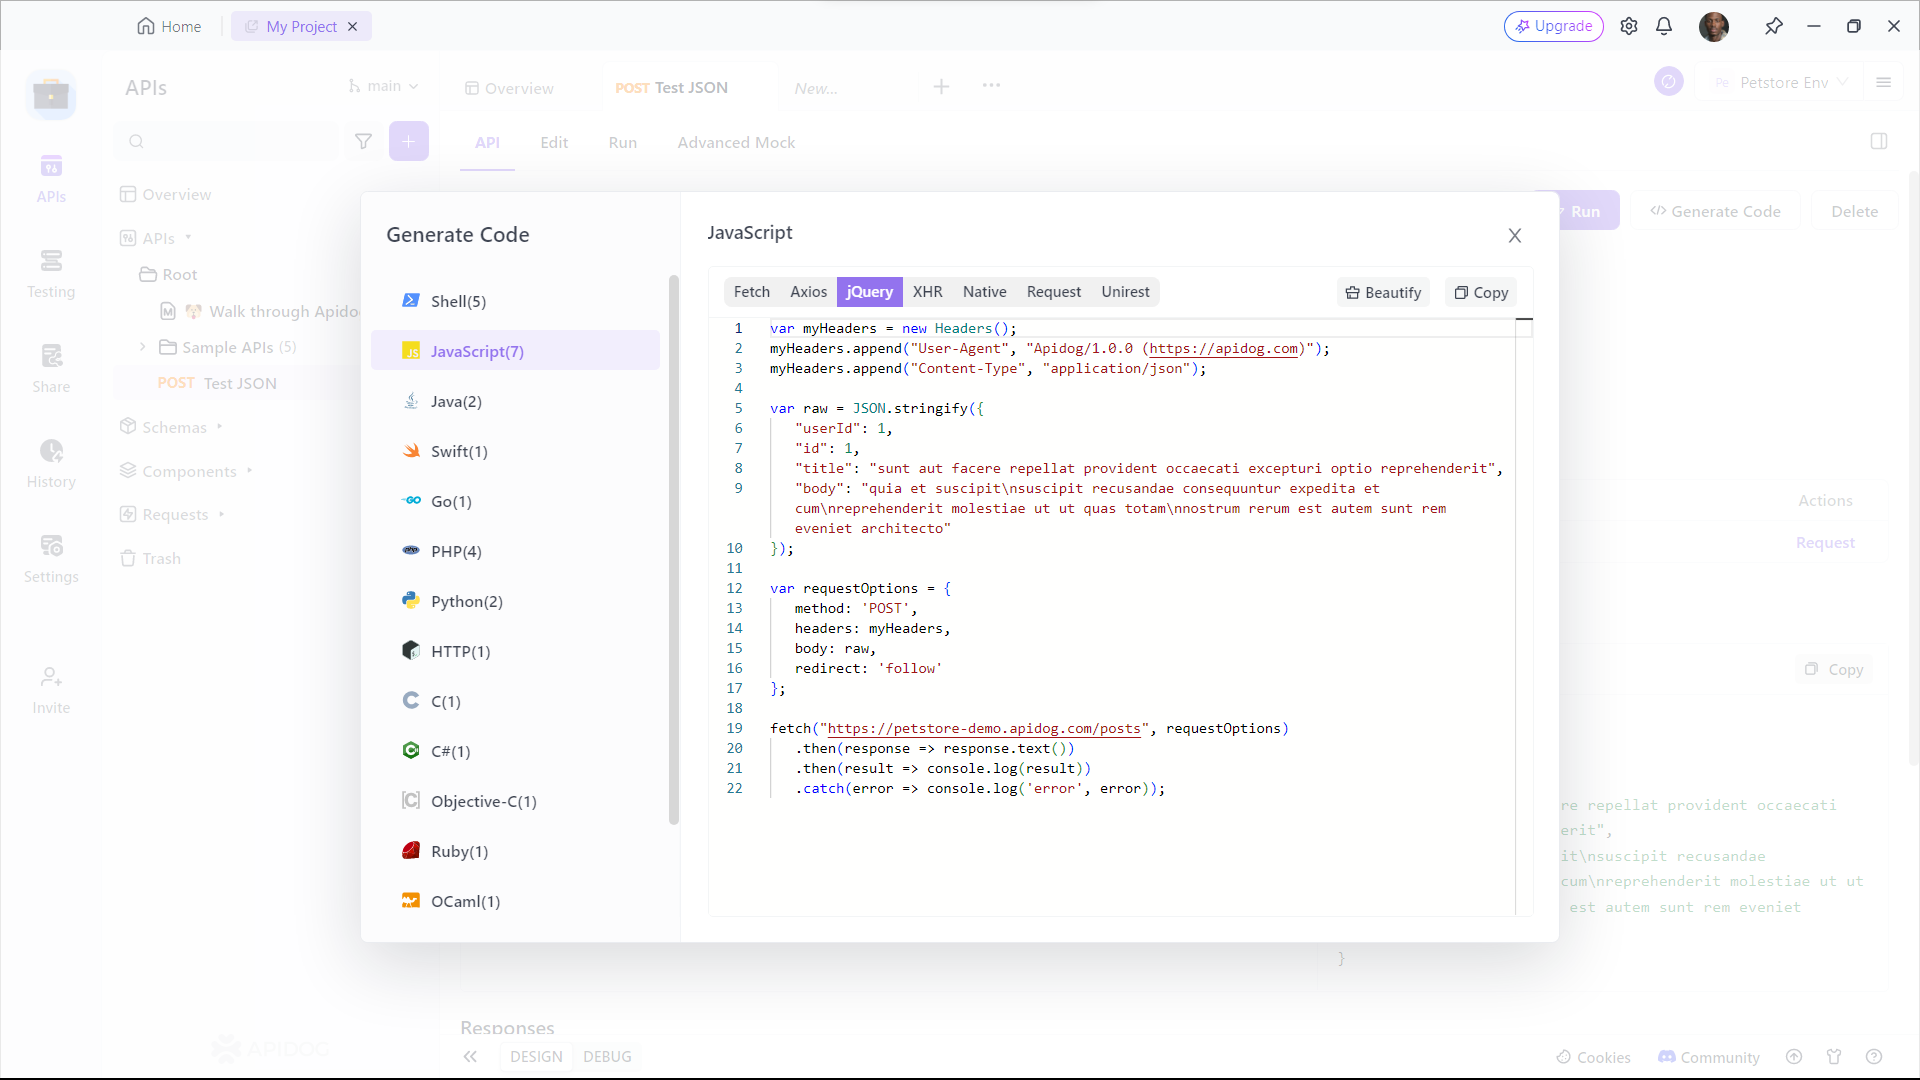
[Apidog](https://apidog.com/) is an **all-in-one collaborative API development platform** that provides a comprehensive toolkit for designing, debugging, testing, publishing, and mocking APIs. It can also help to generate jQuery code.
button
Let see how to do it.
**Step 1**: Open
**Step 2**: Open
**Step 3**: Open
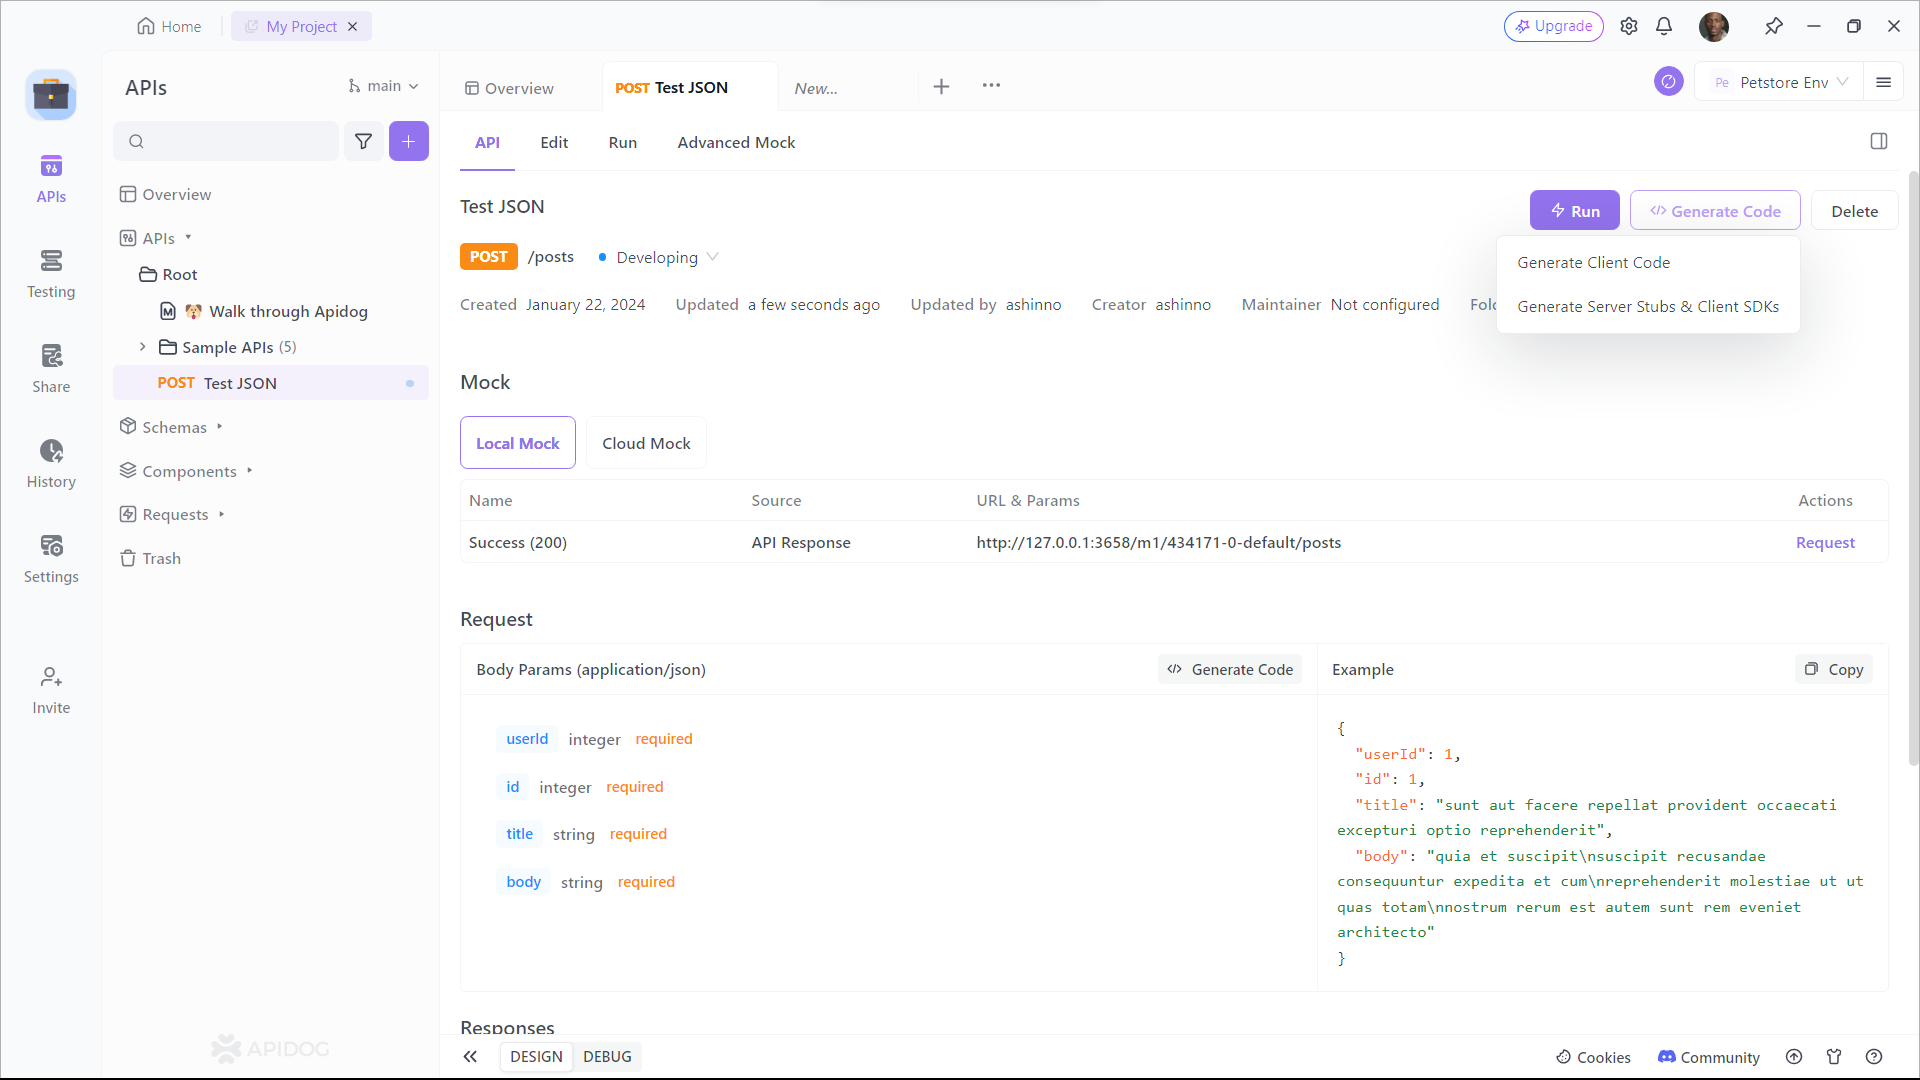
**Step 4**: Open
## Simplify Your API Testing with Apidog
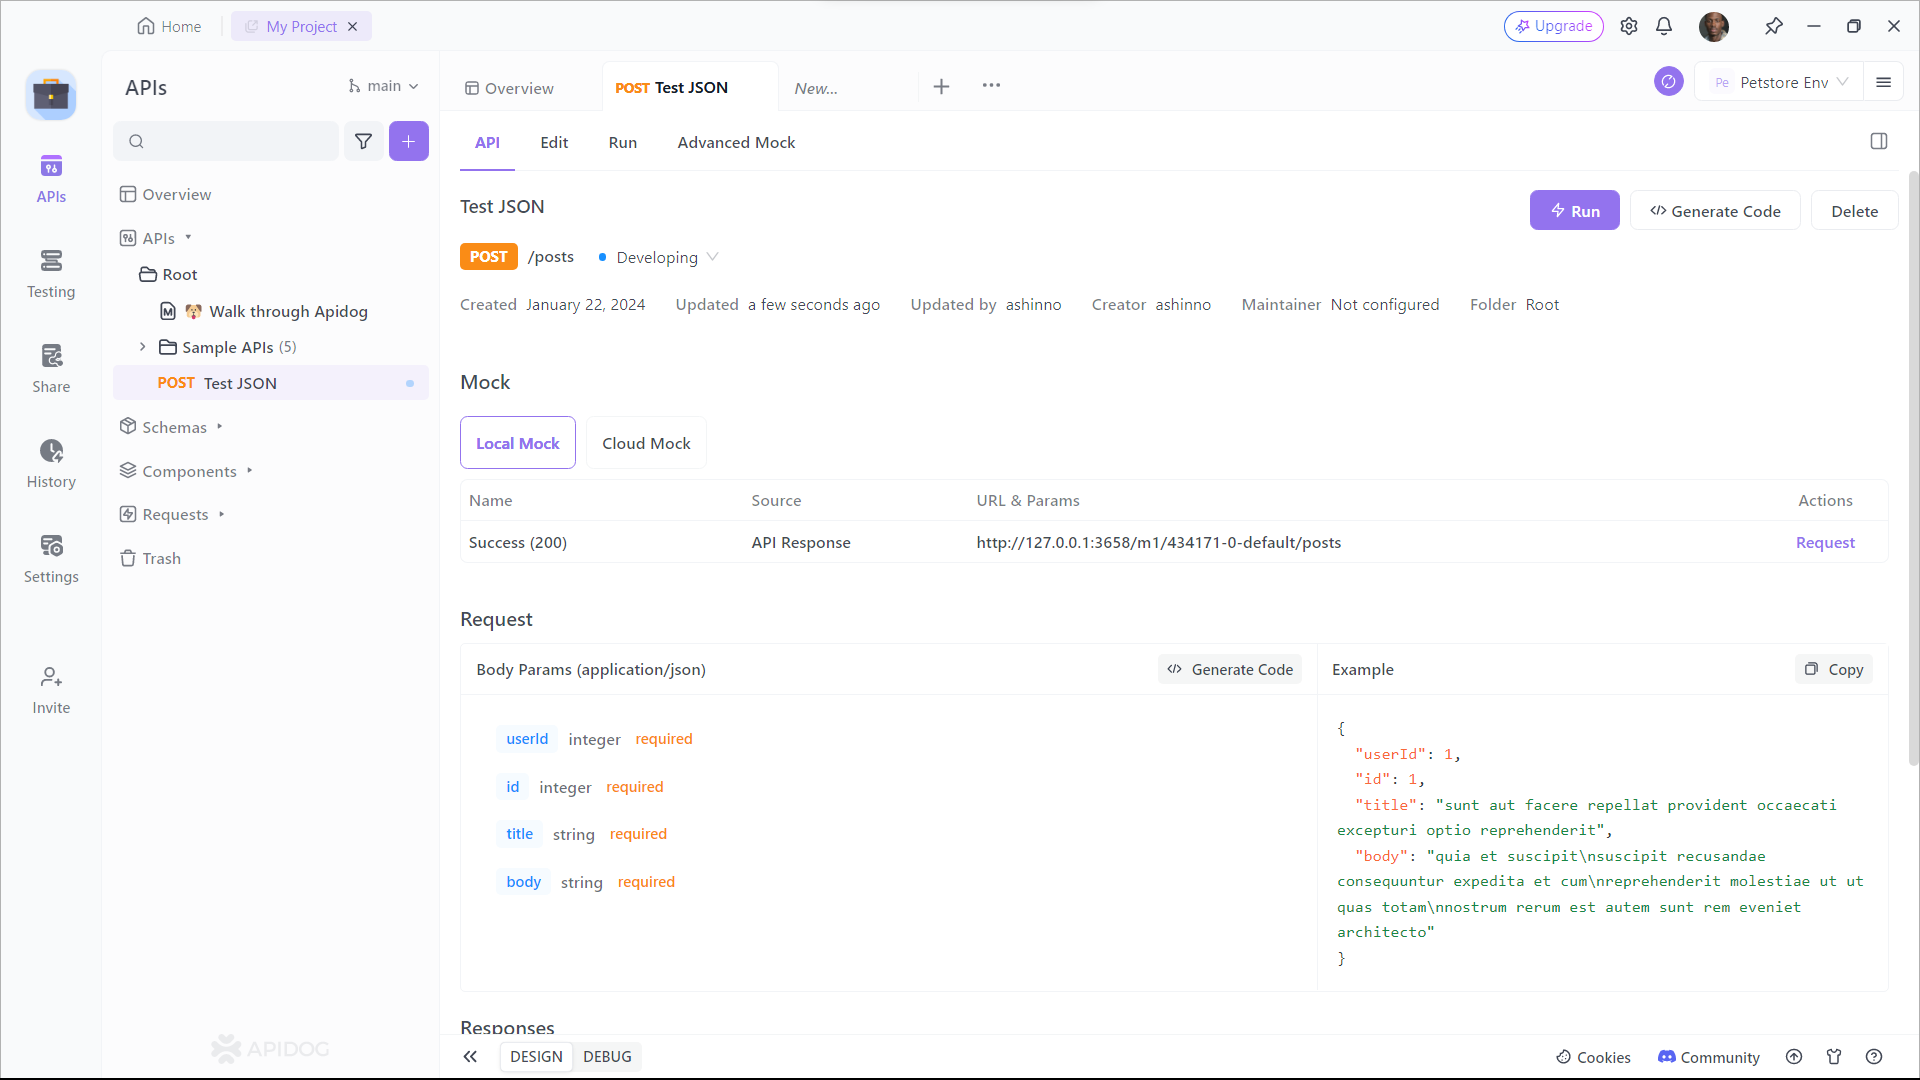
To test jQuery to Post JSON Data, [Apidog](https://apidog.com/) provides a **user-friendly interface** for crafting [POST requests with JSON payloads](https://apidog.com/articles/send-json-object-with-post-request/). The process of sending POST requests with JSON data is a fundamental skill in API testing and development. Apidog can streamline API testing by enabling sending POST requests with JSON payloads.
button
To send a POST request with JSON data in Apidog, you can follow these steps:
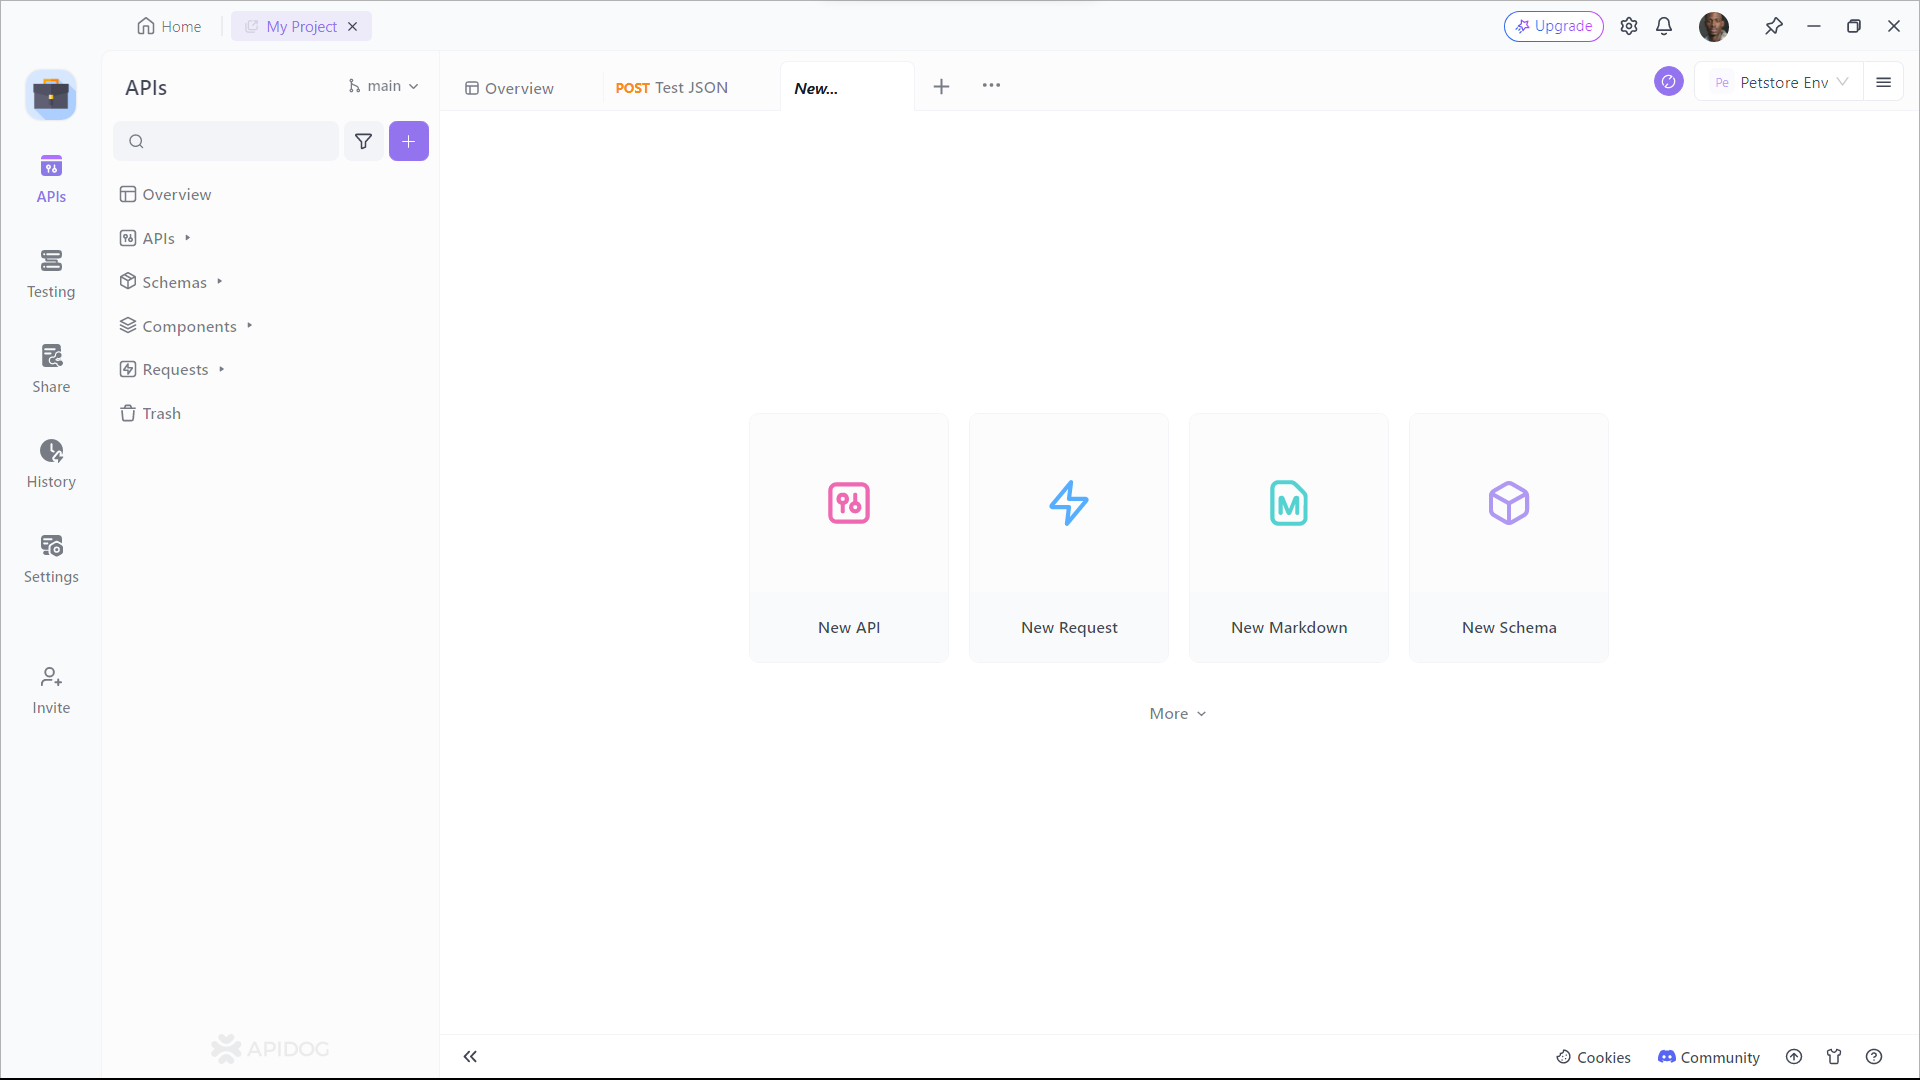
**Step 1:** Open Apidog and create a new request.
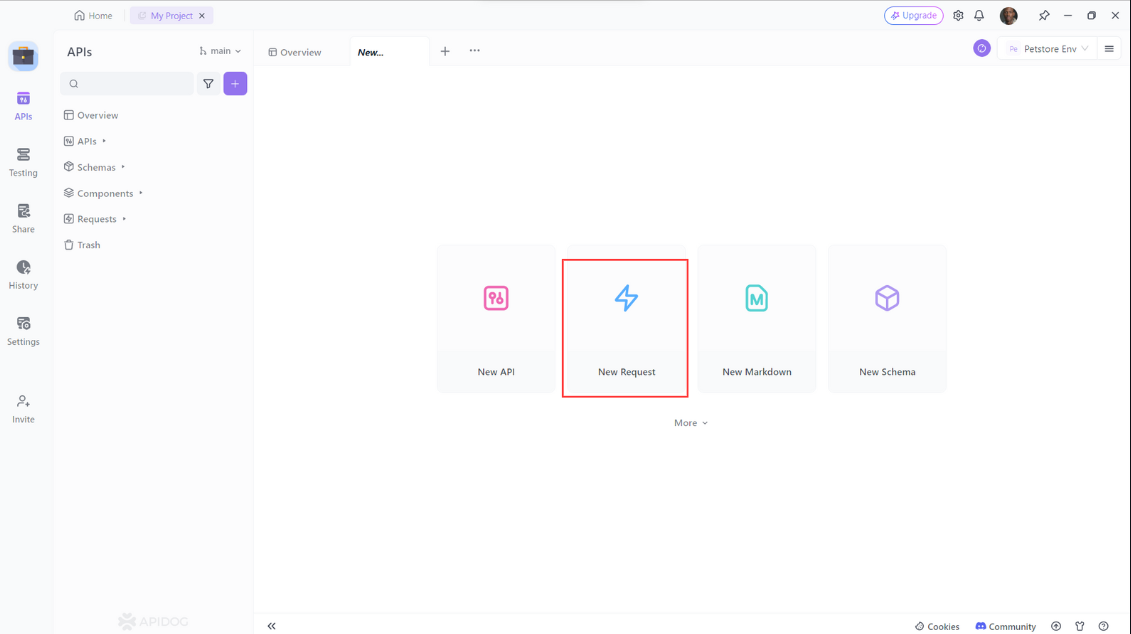
**Step 2:** Click on the **Request** tab and select **POST** from the dropdown menu.
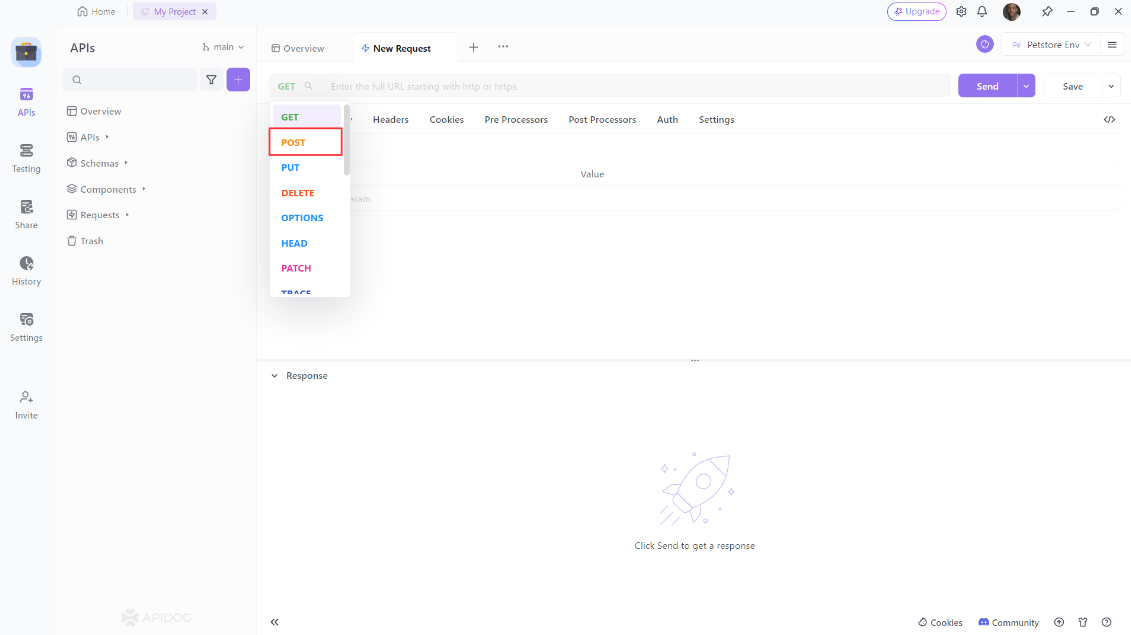
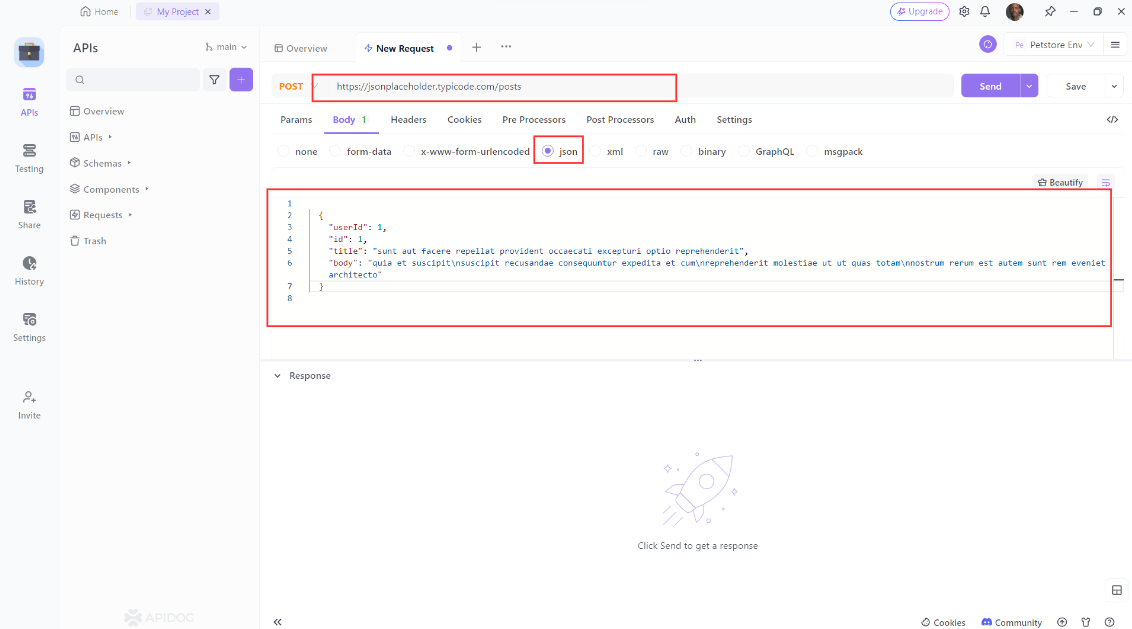
**Step 3:** Enter the URL of the API endpoint you want to test**, i**n the **Headers** section, add any required headers. In the **Body** section, select **JSON** from the dropdown menu and enter the JSON data you want to send in the request body.
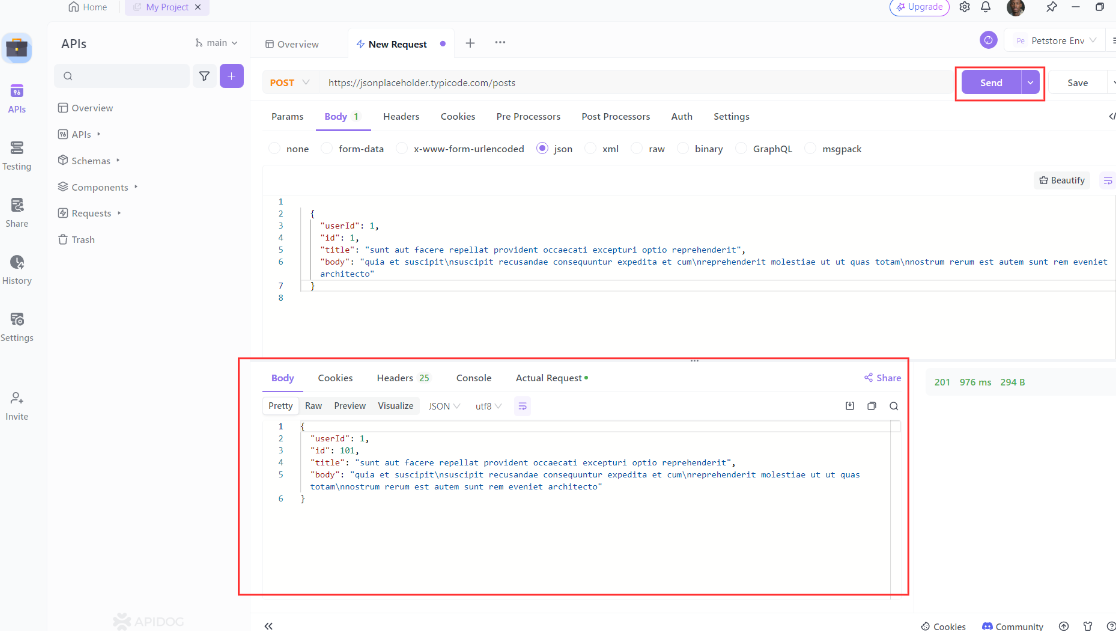
**Step 4:** Click on the Send button to send the request and check the response.
Apidog also provides a detailed guide for crafting POST requests with JSON payloads within the user-friendly interfaces of both Postman and Apidog. This guide delves into the basics of POST requests and explains why JSON is the preferred choice for transmitting data in API requests. API developers will find these tools invaluable for simplifying the testing of endpoints that necessitate JSON data within the request body.
## Best Practices for Posting JSON Data
Here are some best practices to keep in mind when posting JSON data with jQuery:
1. **Minimize the size of your JSON data**: One key way to improve performance when posting JSON data is to minimize the size of the data being sent. This can be achieved by only including the necessary data in the JSON object and using compression techniques, such as GZIP, to further reduce the size of the data.
2. **Set the content type to application/json**: When sending JSON data, it’s important to set the content type to `application/json` to ensure that the server knows how to handle the data.
3. **Use HTTPS**: To ensure that your data is secure during transmission, it’s recommended to use HTTPS instead of HTTP.
4. **Handle errors gracefully**: When sending JSON data, it’s important to handle errors gracefully. This can be achieved by using the `error` callback function in the `$.ajax()` method to handle any errors that occur during the request.
5. **Test your code thoroughly**: Before deploying your code to production, it’s important to test it thoroughly to ensure that it works as expected. This can be achieved by using tools such as Postman to test your API endpoints.
## Conclusion
In conclusion, using jQuery to post JSON data is a powerful technique that can help you build more efficient and responsive web applications. By following the step-by-step guide outlined in this post, you can easily send JSON data to an API and handle the response using jQuery’s built-in functions. Remember to keep best practices in mind when posting JSON data, such as minimizing the size of your data, setting the content type to `application/json`, and handling errors gracefully. By doing so, you can ensure that your web applications are secure, efficient, and user-friendly.
button
Apidog provides a more straightforward and efficient process, making it the superior choice for thoroughly testing APIs that require JSON data within POST requests and other request types. By following the tips and techniques outlined in this post, you’ll be able to post JSON data with jQuery like a pro\!
In this article
[Introduction to API](https://apidog.com/blog/jquery-post-json/#introduction-to-api)[What is jQuery?](https://apidog.com/blog/jquery-post-json/#what-is-jquery) [JSON Data: The Future of Data Exchange](https://apidog.com/blog/jquery-post-json/#json-data-the-future-of-data-exchange)[POST Method: The Key to Sending Data to APIs](https://apidog.com/blog/jquery-post-json/#post-method-the-key-to-sending-data-to-apis)[Why Use jQuery to Post JSON Data?](https://apidog.com/blog/jquery-post-json/#why-use-jquery-to-post-json-data) [How to Use jQuery to Post JSON Data](https://apidog.com/blog/jquery-post-json/#how-to-use-jquery-to-post-json-data) [Generate jQuery to Post JSON Data with Apidog](https://apidog.com/blog/jquery-post-json/#generate-jquery-to-post-json-data-with-apidog)[Simplify Your API Testing with Apidog](https://apidog.com/blog/jquery-post-json/#simplify-your-api-testing-with-apidog)[Best Practices for Posting JSON Data](https://apidog.com/blog/jquery-post-json/#best-practices-for-posting-json-data) [Conclusion](https://apidog.com/blog/jquery-post-json/#conclusion)
Apidog: A Real Design-first API Development Platform
API Design
API Documentation
API Debugging
Automated Testing
API Mocking
More
[Get started for free](https://app.apidog.com/)[Request demo](https://zcal.co/apidog/demo/)
Explore more
[](https://apidog.com/blog/ltx-2-api/)
[How to Use the LTX-2 API?](https://apidog.com/blog/ltx-2-api/)
Learn how to use the LTX-2 API to generate high-quality videos from text prompts and images. This technical guide covers setup, authentication, endpoints, prompting best practices, and integration with Apidog. Developers gain tools for creating dynamic content efficiently.
16 January 2026
[](https://apidog.com/blog/vercel-agent-skills/)
[How to Use Vercel Agent-Skills?](https://apidog.com/blog/vercel-agent-skills/)
How to use Vercel agent-skills? This in-depth tutorial explains installation, key features, and practical examples for extending AI agents with React best practices, web design guidelines, and instant deployments. Integrate seamlessly with tools like Apidog for API testing.
16 January 2026
[](https://apidog.com/blog/apidog-cli-claude-skills-api-test-automation-guide/)
[Apidog CLI + Claude Skills: Integrating API Automation Testing into the Development Workflow](https://apidog.com/blog/apidog-cli-claude-skills-api-test-automation-guide/)
This article demonstrated how to build an automated API testing workflow using Claude Code, Apidog CLI, and Claude Skills.
14 January 2026
Practice API Design-first in Apidog
Discover an easier way to build and use APIs
[Sign up for free](https://app.apidog.com/user/login)
[Download]()
All-in-One API Platform: Design, Debug, Mock, Test, and Document
PRODUCTS
[Download Apidog](https://apidog.com/download/)[Pricing](https://apidog.com/pricing/)[Apidog Europe](https://apidog.com/help/eu)[API](https://openapi.apidog.io/)[Changelog](https://apidog.canny.io/changelog/)[Wall of love](https://testimonial.to/apidog/all)
RESOURCES
[Help Docs](https://docs.apidog.com/)[Getting Started](https://docs.apidog.com/overview-644404m0)[Video Tutorials](https://www.youtube.com/@Apidoghq)[Blog](https://apidog.com/blog/)[Newsletter](https://apidog.com/blog/product-updates/)[Articles](https://apidog.com/articles/)[Roadmap](https://github.com/orgs/apidog/projects/4)
SUPPORT
[About us](https://apidog.com/about/)[Request a Demo](https://zcal.co/apidog/demo)[Migration](https://docs.apidog.com/overview-633036m0)[Contact us](mailto:support@apidog.com)[Term of use](https://legal.apidog.io/)[Security and compliance](https://trust.apidog.com/)[Service status](https://status.apidog.com/)
COMPARE
[vs Postman](https://apidog.com/compare/apidog-vs-postman/)[vs Insomnia](https://apidog.com/compare/apidog-vs-insomnia/)[vs Hoppscotch](https://apidog.com/compare/apidog-vs-hoppscotch/)[vs RapidAPI](https://apidog.com/compare/apidog-vs-rapidapi/)[vs Stoplight](https://apidog.com/compare/apidog-vs-stoplight/)[vs Readme](https://apidog.com/compare/apidog-vs-readme/)

©2026 Apidog, Inc. |
| Readable Markdown | null |
| Shard | 193 (laksa) |
| Root Hash | 9624368471745094793 |
| Unparsed URL | com,apidog!/blog/jquery-post-json/ s443 |